Registry Assistant Handbook
What's New
1/31/2024
Added new class Rubric.
12/05/2023
Added new class Credentialing Action.
11/13/2023
The Credential Engine team reduced some of the class properties required for publishing:
- Condition Profile: Description is no longer required but is still recommended where useful to clarify requirements.
- Cost Profile: Description and CostDetails are no longer but are still recommended where useful to clarify requirements.
- Online or Physical Location. Previously Assessment Profile, Learning Opportunity Profile, Learning Program, and Course all had a requirement that at least one of: ceterms:availableAt, ceterms:availableOnlineAt, or ceterms:availabilityListing had to be provided. This no longer a requirement.
8/01/2023
Added section to getting started that emphasizes the basic steps to publish an organization and publishing a basic organization.
7/25/2023
Added new classes Job and Occupation.
5/30/2023
Added new class Support Service.
5/01/2023
Added two helper properties for use where a whole framework is aligned to either a learning opportunity or assessment profile. Rather than having to include a large number of entries in, say Teaches, just provide the framework CTID in TeachesCompetencyFramework. The API will validate the framework, then fetch and populate the Teaches property.
- LearningOpportunity.TeachesCompetencyFramework
- Assessment.AssessesCompetencyFrameworks
3/31/2023
The class Verification Service Profile is now a top-level class:
- It is published separately, and no longer published with an Organization
- Now includes the CTID property as required
3/30/2023
Added a new section Class and Property Requirements:
2/03/2023
Updated the Condition Profile section:
- Add a section on Common Used Properties
- Add section Helper Property: TargetCompetencyFramework. The property TargetCompetencyFramework can be used where all competencies in a framework are to be aligned as required in a condition profile.
10/24/2022
Added a new section on Transfer Intermediaries, a surrogate resource to which other resources are mapped in order to indicate their common transferability. It is used when multiple resources such as courses are grouped together to indicate they have mutually agreed upon transfer value.
Added an example of publishing an organization with multiple locations.
10/5/2022
Added references to the Concept Scheme section.
Added a new section on Progression Models, a class that is a sub-class of Concept Scheme.
8/16/2022
Added a Quick Start section with the key steps for getting started with publishing.
Added a section on Prototyping With Postman, a popular tool for building and testing APIs.
8/2/2022
Corrected corrected examples where Organization.AgentSectorType was defined as a list where it is a single string.
5/26/2022
Added section on Registry Resources Life Cycle. If a resource is no longer active, it should not be deleted. A credential is still valid even if no longer offered.
4/25/2022
Added sample code for deleting a resource from the registry.
NOTE: data in the registry is meant to be permanent. Where say a credential is no longer offered, it should be republished with a CredentialStatus of Deprecated.
4/1/2022
Updated related sections to emphasize that a third-party publisher should use their OWN API key when publishing on behalf of other organizations.
10/31/2021
- Learning Opportunity: added Learning Program and Course subclasses.
- Course: Currently the only difference between Course and the other learning opportunity classes is the addition of School Courses for the Exchange of Data code (SCED).
- LifeCycleStatus: added to Organization, Assessment, and Learning Opportunity classes. The related concept scheme is lifeCycleStatusType. While this property is required, the API will use a default of Active, if it is not provided.
- TransferValue: added Transfer Intermediary.
7/9/2021
- Updated underlying handbook code
- Bugfixes and cleanup for all code samples
1/26/2021
- Updated Pathway
- Added Pathway Set
- Added "Reference" topics to most sections (common/need-to-know links)
8/28/2020
Updated Financial Assistance Profile:
- Added information on Financial Assistance Type
- Added new property: Financial Assistance Value
02/01/2020
New URL for Production Assistant:
- The main Credential Engine site is moving to a server different from where the Assistant API is resident. As a result, the URL for the Assistant API has changed to:
- The current URL ( https://credentialengine.org/assistant ) will be removed in April of 2020.
11/25/2019
New URL for Sandbox Assistant:
- We have added a new server for the Sandbox Assistant API: https://sandbox.credentialengine.org/assistant
- The current URL will be left active until Nov. 30, 2019, and then removed.
10/15/2019
Credential - Added new properties:
- ceterms:supersededBy: Credential that replaces this credential.
- ceterms:supersedes: Credential that this credential replaces.
- ceterms:nextVersion: Version of the credential that immediately follows this version.
Credential Status:
- Deprecate credentialStat:Superseded
-
Create credentialStat:Suspended
- Definition: Awards of the credential are not available, but may resume.
-
Updated the definition of credentialStat:Deprecated
- From: Credential is no longer awarded.
- To: Awards of the credential have ceased.
Financial Assistance Profile - Added:
- FinancialAssistanceType. Type of financial assistance; select from an existing enumeration of such types. See: ceterms:FinancialAssistance
8/30/2019
ConditionProfile:
- ceterms:submissionOf was changed from a list of language strings to a list of URIs.
- Added new property: ceterms:submissionOfDescription, as an rdf:langstring. Definition: Name, label, or description of an artifact to be submitted such as a transcript, portfolio, or an affidavit.
7/30/2019
Organization - Added:
- ISIC Revision 4 Code. The International Standard of Industrial Classification of All Economic Activities (ISIC), Revision 4 code for a particular organization, business person, or place.
- NCES ID. Identifier comprised of a 12 digit code issued by the National Center for Education Statistics (NCES) for educational institutions where the first 7 digits are the NCES District ID.
7/10/2019
5/4/2019
Added section on publishing: Competency Frameworks, and Concept Schemes.
5/3/2019
- The properties: AlternativeOccupationType, AlternativeIndustryType, and AlternativeInstructionalProgramType are now implemented.
- The property: AudienceLevelType has been added to the AssessmentProfile and LearningOpportunityProfile classes.
- The new class schema:QuantitativeValue for the new property: ceterms:creditValue has been added to replace the individual proproperties of: CreditUnitType, CreditUnitValue CreditUnitTypeDescription, CreditHourType, CreditHourValue. The use of QuantitativeValue will allow for specifying a range of credit units. For example where depending on achieved pre-requisites, 9 to 15 credit units may be necessary to complete a credential.
3/19/2019
The Registry Assistant API guide has been updated with better examples and clarifiction in its content.
2/21/2019
Added a section on deleting documents from the credential registry.
2/11/2019
- Added clarification that for CTDL properties of type URI, that will refer to a document in the Credential Registry, only the CTID need be provided, rather than the full URI.
- Added a separate section for illustrating how to publish properties from a framework such as for occupations from O*Net and industries from NAICS.
Overview
The Credential Engine offers the Registry Assistant API as a way to streamline publishing to the Credential Registry. The Registry Assistant uses a simplified version of the CTDL schema designed to be easy to map your data to. This guide is a step-by-step walkthrough for using the Registry Assistant API.
To use the Registry Assistant API, you will need:
- A Credential Engine Account, including an Organization account that has been approved to publish via the Registry Assistant API
- Your API key (obtainable via your Credential Engine Account)
- A working knowledge of CTDL and related concepts
- Programmatic read/write access to your data to generate and store CTIDs and retrieve the data for publishing
- The ability to update your website or system to publish data to the Registry

Working Knowledge
This guide assumes a working knowledge of:
- Computer programming, including the use of APIs
- JSON
- Metadata
- The Mapping, Object Types, and CTID sections of the Registry Guide
Additionally, it is recommended to be familiar with:
Getting your API Key
In order to publish/consume data using the Registry Assistant API, you will need an API Key. This key is connected to your organization in the Credential Engine Accounts site. If you do not already have an account and/or an approved organization:
- Navigate to the Credential Engine Accounts site.
- Create an account. After registering, you will receive an email to confirm your account.
- After confirming your account, you can add your organization.
- Complete the required information for the organization, along with publishing roles and methods, and submit the organization for approval.
A member of the CE team will review the organization request. Upon approval, an API key will be generated for your organization's account. This API key will be used for publishing and consuming (Note: You will not need the API key for requests to the Format endpoint).
Your organization's CTID and API key will be available on the organization dashboard on the accounts site, as shown below:

Managing your CTIDs
The CTID serves as the primary, unique identifier for all major objects in the Credential Registry. As such, it is critical that your system is able to associate each credential with its CTID, as this is the only way to update or delete the credential's data once it is published to the Registry.
CTIDs can be easily generated by concatenating ce- and a UUID or GUID. For example:
ce-fabac3e1-ba70-43b6-b0ce-5ff6108c8e7d
Most programming languages have methods to create a GUID.
-
Microsoft C#
var myCTID = "ce-" + Guid.NewGuid().ToString().ToLower(); -
Java
import java.util.UUID; var myCTID = "ce-" + UUID.randomUUID().ToString().ToLower(); -
SQL Server
						declare @CTID varchar(50)
						set @CTID = 'ce-' + Lower(convert(varchar(50),newID()))
API and Registry Features
This section describes features of the API and the environments to which you can publish.
Publishing Environments
The Credential Engine maintains two environments for publishing:
- The sandbox environment, for testing your system and your data
- The production environment, for real data
Sandbox
The Credential Engine offers a sandbox environment for both initial testing of publishing an organization's data and to allow feedback from CE on the range and type of data published. The sandbox should be used for all initial testing. An API key is normally not required for publishing to the sandbox. A partner who anticipates acting as a third party publisher may wish to use the sandbox environment to better understand the workflow. In this case, the CE team will work with the partner to simulate an environment in the sandbox similar to the anticipated workflow in production, including the use of API keys and identifying the CTIDs for 'client' organizations. The pattern for the sandbox URLs are as follows:
Format Data (no publishing)
https://sandbox.credentialengine.org/assistant/{CTDL object type}/format
Publish Data (automatically formats first)
https://sandbox.credentialengine.org/assistant/{CTDL object type}/publish
Delete Data
https://sandbox.credentialengine.org/assistant/{CTDL object type}/delete
The majority of the code samples in this section will use the sandbox URLs.
Production
The production environment, naturally, is used to publish data to the production registry. Typically an organization will be required to use the sandbox environment first to validate how their data is retrieved, and formatted for publishing. The pattern for the sandbox URLs are as follows:
Format Data (no publishing)
https://apps.credentialengine.org/assistant/{CTDL object type}/format
Publish Data (automatically formats first)
https://apps.credentialengine.org/assistant/{CTDL object type}/publish
Delete Data
https://apps.credentialengine.org/assistant/{CTDL object type}/delete
Services
The Registry Assistant API provides three main services related to the credential registry:
- Formatting your data in CTDL JSON-LD
- Publishing your data in the Credential Registry
- Deleting your data from the Credential Registry
Request/Response
Request
The Publish and Format endpoints use an HTTP POST request. Each endpoint type will have a custom input class. The input object will be provided in the body of the Post request.
Response
Response class returned from publish endpoints.
NOTE: If the document being published has the same contents as the currently published one, the envelope last updated_at date on the envelope will NOT be updated. As well a warning message will be returned.
	/// <summary>
	/// Registry Assistant Response
	/// </summary>
	public class RegistryAssistantResponse
	{
		public RegistryAssistantResponse()
		{
			Messages = new List<string>();
			Payload = "";
		}

		/// True if action was successfull, otherwise false
		public bool Successful { get; set; }
		/// <summary>
		/// List of error or warning messages
		/// </summary>
		public List<string> Messages { get; set; }

		public string CTID { get; set; }
		/// <summary>
		/// URL for the registry envelope that contains the document just add/updated
		/// </summary>
		public string EnvelopeUrl { get; set; }
		/// <summary>
		/// URL for the graph endpoint for the document just add/updated
		/// </summary>
		public string GraphUrl { get; set; }
		/// <summary>
		/// Credential Finder Detail Page URL for the document just published (within 30 minutes of publishing)
		/// </summary>
		public string CredentialFinderUrl { get; set; }
		/// <summary>
		/// Identifier for the registry envelope that contains the document just add/updated
		/// </summary>
		public string RegistryEnvelopeIdentifier { get; set; }

		/// <summary>
		/// Payload of request to registry, containing properties formatted as CTDL - JSON-LD
		/// </summary>
		public string Payload { get; set; }
	}
Response class returned from format endpoints.
	public class RegistryAssistantFormatResponse
	{
		public RegistryAssistantFormatResponse()
		{
			Messages = new List<string>();
			Payload = "";
		}

		/// True if action was successfull, otherwise false
		public bool Successful { get; set; }
		/// <summary>
		/// List of error or warning messages
		/// </summary>
		public List<string> Messages { get; set; }

		/// <summary>
		/// Payload of request to registry, containing properties formatted as CTDL - JSON-LD
		/// </summary>
		public string Payload { get; set; }
	}
Response class returned from delete endpoints.
	public class RegistryAssistantDeleteResponse
	{
		public RegistryAssistantDeleteResponse()
		{
			Messages = new List<string>();
		}
		/// <summary>
		/// True if delete was successfull, otherwise false
		/// </summary>
		public bool Successful { get; set; }

		/// <summary>
		/// List of error or warning messages
		/// </summary>
		public List<string> Messages { get; set; }

	}
Format Endpoints
The primary purpose of the formatting endpoints are to be able to 'test' making publishing calls. These endpoints are called with the same data that would be provided when publishing. The format endpoints do the same data validation as happens when calling the publish endpoints, and then formats the data as JSON-LD - as would be found in the registry. However, instead of publishing the data, it is returned to the caller.
Note that the Publish endpoint will format the data first, so you do not need to call both.
You can access these services by making HTTP POST requests to:
Format Data (only)
https://sandbox.credentialengine.org/assistant/{CTDL object type}/format
Example: Format Credential
https://sandbox.credentialengine.org/assistant/credential/format
Publish Endpoints
The publishing endpoints are used when you are ready to actually publish data to the registry.
You can access these services by making HTTP POST requests to:
Publish Data (automatically formats first)
https://sandbox.credentialengine.org/assistant/{CTDL object type}/publish
Example: Publish Organization
https://sandbox.credentialengine.org/assistant/organization/publish
Delete Endpoints
The delete endpoints are used when you want to remove a document from the registry.
NOTE: Generally data in the registry is meant to be permanent. For example if a credential is no longer offered it should not be deleted. Rather it should be republished with a status of Deprecated. If bad data like duplicates has been published, then these should be deleted.
You can access these services by making HTTP DELETE requests to:
Delete a Document
https://sandbox.credentialengine.org/assistant/{CTDL object type}/delete
Example: Delete Credential
https://sandbox.credentialengine.org/assistant/credential/delete
The requirements for a delete request are as follows. Note: The API key is passed in the header of the request (see the Getting Your API Key section for details)
- Your API Key
- The CTID of the document to be deleted
- The CTID of the organization making the request
Below is some example code to delete a credential, see github for the complete example.
Sample credential delete code (C#)
            using System;
            using System.Collections.Generic;
            using System.Text;
            using System.Net.Http;
            using System.Net.Http.Headers;
            using Newtonsoft.Json;
            using RA.Models.Input;

            namespace RA.SamplesForDocumentation
            {
            public void CredentialDeleteExample()
            {
                var defaultRegistry = "";
                var apiKey = SampleServices.GetMyApiKey();
                if ( string.IsNullOrWhiteSpace( apiKey ) )
                {
                    //ensure you have added your apiKey to the app.config
                }

                // This is the CTID of the organization that owns the data being deleted
                var owningOrgCTID = "ce-a4041983-b1ae-4ad4-a43d-284a5b4b2d73";
                //provide the CTID for the resource to be deleted.
                var ctidToDelete = "ce-7051cdf9-43b6-4e5b-8444-37cfeb64fdfe";
                //format the request
                DeleteRequest deleteRequest = new DeleteRequest()
                {
                    CTID = ctidToDelete.ToLower(),
                    PublishForOrganizationIdentifier = owningOrgCTID.ToLower(),
                    Registry = defaultRegistry
                };
                string message = "";
                //call method to call the assistant delete endpoint for this resource type (credential in this example)
                new SampleServices().DeleteRequest( deleteRequest, apiKey, "credential", ref message );
            }
            //
            // Call Assistant to delete a resource
            public bool DeleteRequest( DeleteRequest request, string apiKey, string requestType, ref string message )
            {
                RAResponse raResponse = new RAResponse();
                //get the Assistant API URL for the target environment
                string serviceUri = SampleServices.GetAppKeyValue( "registryAssistantApi" );
                //format the endpoing for the requested resource type.
                string endpointUrl = serviceUri + string.Format( "{0}/delete", requestType );

                //format the payload
                string postBody = JsonConvert.SerializeObject( request, SampleServices.GetJsonSettings() );
                try
                {
                    using ( var client = new HttpClient() )
                    {
                        client.DefaultRequestHeaders.
                            Accept.Add( new MediaTypeWithQualityHeaderValue( "application/json" ) );
                        client.DefaultRequestHeaders.Add( "Authorization", "ApiToken " + apiKey );

                        HttpRequestMessage hrm = new HttpRequestMessage
                        {
                            Content = new StringContent( postBody, Encoding.UTF8, "application/json" ),
                            Method = HttpMethod.Delete,
                            RequestUri = new Uri( endpointUrl )
                        };
                        var task = client.SendAsync( hrm );
                        task.Wait();
                        var result = task.Result;
                        string response = JsonConvert.SerializeObject( result );
                        var contents = task.Result.Content.ReadAsStringAsync().Result;
                        //
                        if ( result.IsSuccessStatusCode == false )
                        {
                            //logging
                            LoggingHelper.LogError( "RegistryServices.DeleteRequest Failed\n\r" + response + "\n\rError: " + JsonConvert.SerializeObject( contents ) );

                            RegistryResponseContent contentsJson = JsonConvert.DeserializeObject<RegistryResponseContent>( contents );
                            message = string.Join( "<br/>", contentsJson.Errors.ToArray() );
                        }
                        else
                        {
                            raResponse = JsonConvert.DeserializeObject<RAResponse>( contents );
                            //
                            if ( raResponse.Successful )
                            {
                                LoggingHelper.DoTrace( 5, string.Format( "DeleteRequest sucessful for requestType:{0}.  CTID: {1}, dataOwnerCtid: {2} ", requestType, request.CTID, request.PublishForOrganizationIdentifier ) );
                            }
                            else
                            {
                                LoggingHelper.DoTrace( 5, thisClassName + " DeleteRequest FAILED. result: " + response );
                                //message = string.Join("", raResponse.Messages );
                                message = string.Join( ",", raResponse.Messages.ToArray() );
                                return false;
                            }
                        }
                        return result.IsSuccessStatusCode;
                    }
                }
                catch ( Exception exc )
                {
                    LoggingHelper.LogError( exc, string.Format( "DeleteRequest. RequestType:{0}, CTID: {1}", requestType, request.CTID ) );
                    message = LoggingHelper.FormatExceptions( exc );
                    return false;
                }

            }
        }
Publishing Process
This section describes the process for publishing to the Registry via the Registry Assistant API.
Quick Start
The remainder of this document provides the details for publishing data to the registry. This section provides a quick start of the steps.
All publishing starts with the organization. An organization must always be published first before any credentials, etc. that it may own are published.
- First register your organization in the Credential Engine Accounts site.
-
If your organization is planning on publishing as a third party on behalf of other organizations, a permissions relationship must be set up and approved with thoses organizations before able to publish (see the following section on workflows).
-
The Accounts API can be used to register an organization and set up the publishing relationship.
- If your organization has been approved as trusted third party publisher, the relationship is immediately approved
- Otherwise the target organization and Credential Engine must approve the relationship.
- Otherwise an organization can manually set up/request publishing permissions in the accounts site.
- While an API key is created for every organization registered in the account system, a third party publisher will ALWAYS use their own API key even when publishing data on behalf of other organizations.
-
The Accounts API can be used to register an organization and set up the publishing relationship.
- Once registered in the accounts site and approved, then the organization can be published.
-
Each section on publishing will start with a list of references including the class definition on https://credreg.net, the latest version of the request class on Github, and sample publishing code on Github. For example, the Organization section has the following:
-
- Organization class on credreg.net
- See github for the Organization Request class used by the Assistant API.
- See more detailed ready to run examples in github.
-
- After successfully publishing the organization, then credentials, learning opportunities, etc. can be published.
Workflows
There are different types of workflows related to publishing:
- First Party
- Third Party
- Trusted Third Party with Authority
First Party Workflow
First Party workflow is defined as: The owner of the data to be published also performs the publishing.
- The organization registers with the CE accounts site.
- A CTID is created for the organization. This CTID will used when publishing the organization, the PublishForOrganizationIdentifier property for all publishing requests, and the OwnedBy property when publishing credentials, etc.
- Upon approval, the organization will be given access to an API key (see Getting your API Key), that is used along with the CTID for their organization when calling the API to publish their data.
- The API process will validate whether a particular API key can be used to publish data for a particular organization CTID.
Third Party Workflow
Third Party workflow is defined as: The data organization has decided to have a third party publish data on their behalf.
- The organization, such as a state body, registers with the CE accounts site. Under their organization information, they would indicate that they plan to act as a third party publisher.
- The latter organization identifies 'client' organizations, and these bodies also register on the CE accounts site.
- As above, a CTID is created for the organization. This CTID will used when the third party publishes data for the organization
- After approval, a 'client' organization can submit a request to designate the third party organization to publish on their behalf.
- The third party organization must approve the request. Then CE staff will approve the completion of a third party publishing permission.
- Upon approval, the third party organization will be given access to an API key (see Getting your API Key).
- When publishing the third party organization would use their API key and the CTID for one of the client organizations.
- The Assistant API process will validate whether a particular API key can be used to publish data for a particular organization CTID.
-
NEW - batch registration
-
A third party organizaion can register multiple organizations at one time, using either a bulk upload from the accounts site, or using an Accounts API (separate from the Assistant API).
- Bulk Upload: A third party or trusted partner will see a Third Party Publishing tab on their account dashboard. Click the Upload/Register Organization link for Bulk Upload instructions (see image below).
- Alternately, a Web API can be used to register organizations. See the Trusted Partner Publishing page for details.
-
A third party organizaion can register multiple organizations at one time, using either a bulk upload from the accounts site, or using an Accounts API (separate from the Assistant API).

Trusted Third Party with Authority Workflow
Trusted Third Party with Authority workflow is defined as: The trusted third party has authorization to publish for the data organization, without the data organizations having to first create an account and give explicit authorization to the third party.
- The trusted organization, such as a state body, registers with the CE accounts site. Under their organization information, they would indicate that they plan to act as a third party publisher.
- This organization will likely have already had meetings with the CE team to discuss their plans. A CE team member has to designate an organization as a trusted partner.
- The trusted partner is responsible for validation of the organizations for whom they will be publishing.
- Typically the trusted partner will use either the accounts API endpoint or a bulk upload in the accounts site to register the organizations for whom they will be publishing.
-
Both the API endpoint or bulk upload process will:
- Validate the data
- At least one contact is required. This person will be added as an administrator for the new organization.
- The administrator will receive an email requesting confirmation of their account. This administrator can add additional contacts as needed.
- The organization will be created, approved, and assigned an API key for publishing.
- A third party relationship will be created and approved for publishing.
- The provided contact will receive an email as notification that their organization has been added by the trusted partner.
- When publishing the third party organization would use their API key and the CTID for one of the client organizations as the PublishForOrganizationIdentifier parameter when publishing to the registry.
- The Assistant API process will validate whether a particular API key can be used to publish data for a particular organization CTID.
Sequence of Publishing
The Organization is always the first class to be published. It must exist in the registry before any credential, or learning opportunity, etc. can be published. The API has validation checks:
- Checks if the organization has been registered and approved in the CE accounts site. If not the request will be rejected.
- If a CTID is provided for the properties like owned by, offered by, accredited by, etc. the Assistant API will check if the record exists in the credential registry
- If not found, an error will be returned
The Credential is typically the next document to publish. A credential can refer to a required learning opportunity or assessment using a condition profile. Example of a credential that references a required learning opportunity using a 'requires' condition profile:
            //Credential that requires a learning opportunity
            var myData = new MyCredential()
            {
                Name = "My Credential Name",
                Description = "This is some text that describes my credential.",
                CTID = myCredCTID,
                SubjectWebpage = "https:/example.org/credential/1234",
                CredentialType = "ceterms: Certificate",
                InLanguage = new List<string>() { "en-US" },
                Requires = new List<ConditionProfile>()
                {
                    new ConditionProfile()
                    {
                        Description = "To earn this credential, a student must have completed the following learning opportunity.",
                        TargetLearningOpportunity = new List<EntityReference>()
                        {
                            new EntityReference() {
                                Type="LearningOpportunity",
                                CTID="ctidForLearningOpportunity"
                            }
                        }
                    }
                }
The API will check if the learning opportunity for the provided CTID (ctidForLearningOpportunity in the example above) is in the registry. If not, the publish request will still continue and a Warning will be returned as a reminder that the related learning opportunity should be published.
Required and Recommended Properties
Credential Engine has a minimum data policy for data being published to the credential registry.
This Credential Minimum Data Policy defines the requirements for publishing to the Credential Registry. Use the Benchmark Models to improve transparency of information beyond this policy. The Credential Transparency Description Language (CTDL) is the common language by which credentials and credentialing organizations are described. We don’t expect organizations to include information about each term in the language; however, some terms will be required, while others are recommended.
Each publishing section in this handbook will include a link to the related section for the minimum data for that class.
The minimum data policy also includes sections on Recommended Benchmarks:
These terms are not required, but is a best practice to include them in order to improve transparency and connections.
Data Requirements
There are very few data restrictions.
- URLs, such as for a subject webpage must be publically available and resolvable
- URIs (CTIDs) for registry related resources USUALLY must aleady exist and be resolvable. There are exceptions such as where an organization owns or offers credentials. The organization must be published before the credential, so references to owns a credential, etc. are not expected to exist in the registry yet.
- Descriptions, where required, have a minimum length of 15 characters. This restriction means values like N/A or Not Applicable are not valid.
Registry Resources Life Cycle
Data in the registry is meant to be permanent. For example, even though a credential is no longer offered, a holder of that credential should be able reference the credential information, like competencies.
Rather than deleting a resource, it should be published with an update to its related status:
- For Credentials no longer offered use: CredentialStatusType: Deprecated
- For Competency Frameworks no longer offered use: PublicationStatusType: Deprecated
- For Organizations, Learning Opportunities, Assessments, Transfer Value Profiles, and Collections use LifeCycleStatusType: Ceased
Pattern for Calling the Publishing API
All publish requests follow the same pattern. A publish request consists of three main parts:
- The API key for your organization, passed in the header (see below)
- The CTID of the organization that owns the data (If you are publishing on behalf of another organization, use that organization's CTID. Otherwise, use your organization's CTID)
- The data itself
Passing Your API Key
The API key will be provided in the header of the request using the Authorization header and a label of ApiToken.
Adding an API key to an HTTP Request using HttpClient (C#)
            // Initialize the HTTPClient
            var client = new HttpClient();

            // Your API Key, from your Organization's dashboard on https://apps.credentialengine.org/accounts
            var myAPIKey = "xxxxxxxx - xxxx - xxxx - xxxx - xxxxxxxxxxxx";

            // Add the Authorization header to the client's default request headers
            client.DefaultRequestHeaders.Add( "Authorization", "ApiToken " + myAPIKey );
The CTID for the data owner is provided in the body of the request along with the main data class.
Creating a request body for an organization (C#)
            // Instantiate the request
            var request = new OrganizationRequest();

            // Assign the CTID
            request.PublishForOrganizationIdentifier = organizationCTIDFromAccountsSite;
            request.DefaultLanguage = "en-US";
            // Assign the organization data
            request.Organization = myOrganizationData;

            // Assign the default language to use when creating the language strings. This will default to 'en-US" if not provided
            request.DefaultLanguage = "en-CA";
Serializing to JSON
While creating a JSON document is fairly straightforward, there should not be a need to manually code the JSON format. Libraries are available in most high level languages to serialize a class into JSON. For example The Newtonsoft library can be added to a C# project, and with one line a C# class can be serialized to JSON:
Sample showing one-line serialization of a C# class to JSON using the Newtonsoft library
string postBody = Newtonsoft.Json.JsonConvert.SerializeObject( myCSharpDataClass );
API Input Classes
When calling endpoints in the API, you only have to include the properties that are needed, or that you have available. Some of the samples in this section may reference related profiles such as condition profiles. If your process will not provide condition profiles, you don't need to include these properties in the classes that you use to fill out data to send to the API. Following are references where you may view or download sample input classes (in C# at this time).
The API input classes clarify the multiplicity of the input properties, which is not immediately clear by just reviewing the CTDL terms. As well special classes are used to organize some of the CTDL properties. For example:
- Use of single multiplicity for Jurisdiction.MainJurisdiction
- FrameworkItem for known Occupations, Industries, and Instructional Programs frameworks
Language Maps
October 31, 2018. Several major updates were made to how data is stored in the registry. These changes, for the most part, were transparent to API users. One of the additions was to store simple strings as language maps. For example, previously the ceterms:name property was formated as:
Previous name format
"ceterms:name": "Certificate in Electrical Specialist"
Language Strings
Properties defined as a language map (rdf:langString) are now an object with a value for each language provided. The property name is the BCP 47 language code (optionally can include the region, e.g. "en" versus "en-US"). This allows describing data for the same property in multiple languages, which in turn allows a system consuming the data to select the language(s) it wants to display.
Sample language map with one language
"ceterms:name": { "en-US": "Certificate in Electrical Specialist" }
Sample language map with multiple languages
"ceterms:name": { "en-US": "Certificate in Electrical Specialist", "es": "Certificado en Especialista Eléctrico", "uk-UK": "Сертифікат спеціаліста-електрика" }
Array Language Strings
A list of values can also be provided in multiple languages.
Sample keyword language map list with multiple languages
				"ceterms:keyword":
				{
				"en-us": [ "Business and Management", "Computer Science", "Data Analysis and Statistics"],
				"uk": [ "Бізнес і менеджмент", "Інформатика", "Аналіз даних і статистика" ],
				"es": [ "Empresa y Gestión", "Ciencias de la Computación", "Análisis de Datos y Estadística" ]
				},
Language Usage Options
As noted, one of the main tenets of the API is to simplify publishing to the Credential Registry. To this end, users of the API can choose to provide data as a simple string or as a language map. Each applicable property will include two options: the actual CTDL name and the latter with a suffix of map. Example Name and Name_map:
				// Name of this credential
				public string Name { get; set; }

				// Alternately can provide a language map
				public LanguageMap Name_Map { get; set; } = new LanguageMap();

				//Keyword list
				public List
					Keyword { get; set; }

					// Alternately Language map list for Keyword
					public LanguageMapList Keyword_Map { get; set; } = new LanguageMapList();
If all of your data is in one language, the language provided in the request DefaultLanguage property will be used when formatting a language map for publishing to the registry.
If DefaultLanguage is not provided, en-US (United States english) will be used.
In the API input classes, the language Map is defined as Dictionary with string keys and values (expressed in C# as Dictionary<string, string>).
See github for full LanguageMap class
Sample language map usage (C#)
            // Sample Credential
            public class Credential
            {
                // Simple string
                public string Name { get; set; }

                // Language Map
                public LanguageMap Name_Map { get; set; } = new LanguageMap();

                //Keyword list
                public List<string> Keyword { get; set; }

                // Alternately Language map list for Keyword
                public LanguageMapList Keyword_Map { get; set; } = new LanguageMapList();
            }

            // Language map extends Dictionary<string, string>
            public class LanguageMap : Dictionary<string, string>
            {
                // Default constructor
                public LanguageMap() { }
                // Construct a language map using a default language
                public LanguageMap( string text )
                {
                    this.Add( "en-US", text );
                }
                // Add a language map using a passed language code and string
                public LanguageMap( string languageCode, string text )
                {
                    this.Add( languageCode, text );
                }
            }

            //sample usage
            public class SampleUsage
            {
                var myData = new Credential()
                {
                    CTID = "ce-ccea0794-0c9a-4140-80b2-52569391651a",
                    SubjectWebpage = "https://mycredential.com/",
                    CredentialType = "ceterms:BachelorDegree",
                    CredentialStatusType = "Active"
                };
                myData.Name_Map = new LanguageMap()
                {
                    { "en-US", "Bachelor of Science in Accounting" }, //English (US)
                    { "uk", "Бакалавр наук з бухгалтерського обліку" } //Ukrainian
                };
                myData.Description_Map = new LanguageMap();
                myData.Description_Map.Add( "en-US", "The Bachelor of Science in Accounting is considered one of the most versatile degrees in business. " );
                myData.Description_Map.Add( "uk", "Бакалавр наук з бухгалтерського обліку вважається одним із найбільш універсальних ступенів у бізнесі. )";

                //add keywords. In this case if a language is not provided, a default language is used.
                myData.Keyword_Map = new LanguageMapList( new List<string>() { "Accounting", "Taxation", "financial management" } );
                //now add a list in a new language
                myData.Keyword_Map.Add( "uk", new List<string>() { "Бухгалтерський облік", "Оподаткування", "Фінансовий менеджмент" } );
            }
Organization and Entity References
The Reference classes, EntityReference and OrganizationReference, were created to enable three scenarios:
- Just the CTID of the resource in the registry. (RECOMMENDED)
The API will insert the correct domain name and path, based on the target server, to enable independence from the publishing environment. - The URI to an Organization (or credential, etc.) in the registry (rarely necessary/used)
- A reference to an organization that has not been published to the registry
Entity Reference
When referencing a property that refers to a credential, assessment or learning opportunity, the assistant API uses an EntityReference. See the Entity Reference class in Github for all available properties.
This class, and the organization reference class enable a flexible approach to providing references to other entities, depending on what is available in the publishing system. There are three approaches:
-
Provide just CTID (recommended):
- If the related entity is in the registry, or soon will be, then just the CTID can be provided.
- The preference between providing a CTID or Id would be the CTID. Then the API can format the URL correctly based on the target credential registry and community/private registry where applicable.
- There may be a case where a reference is needed for an entity that is in a different community/private registry than the current target (rare, and not yet completely handled). In this case, then the full URL should be provided in the Id property.
-
Example
								myData.AccreditedBy.Add( new OrganizationReference()
								{
								CTID = "ce-541da30c-15dd-4ead-881b-729796024b8f"
								} );
-
Provide just Id:
- If the entity being referenced is already published in the registry, the full URI can be provided, like:
https://sandbox.credentialengineregistry.org/resources/ce-a4041983-b1ae-4ad4-a43d-284a5b4b2d73. - Note: The convention is to provide the /resources URI, not the /graph URI.
- If the entity being referenced is already published in the registry, the full URI can be provided, like:
-
Provide Reference Properties:
-
A reference can be made to an entity that doesn’t exist in the registry but does have a URL. In this case, the following can be provided:
- Type (required). This would be one of ceterms:AssessmentProfile, ceterms:LearningOpportunityProfile, or one of the Credential subclasses such as ceterms:Badge, ceterms:Certification, etc.
- Name (required)
- SubjectWebpage (required)
- Description (optional)
- May 18, 2020. Several additional properties were added to the Entity Reference class
- See the Entity Reference class in Github for all available properties.
-
A reference can be made to an entity that doesn’t exist in the registry but does have a URL. In this case, the following can be provided:
Note: only one of the three options should be provided. Just the CTID (checked first), or just the Id (checked second), or the external reference.
Sample usage (C#). See the Entity Reference class in Github for all available properties.
            //HasPart - for example a list of included credentials
            List<EntityReference> HasPart = new List<EntityReference>();
            var myOrg = new Organization();

            //if you know the CTID, then only specify CTID for a credential that this QA org accredits
            myOrg.Accredits.Add( new EntityReference() { CTID = "ce-541da30c-15dd-4ead-881b-729796024b8f" } );

            //if the CTID is not known, or if not sure a credential is in the registry, use a reference to an entity
            myOrg.Approves.Add( new EntityReference()
            {
                Type = "ceterms:Certification",
                Name = "A certification that is approved by our ORG",
                Description = "A helpful but optional description of this certification",
                SubjectWebpage = "https://example.com/certification"
            } );

            //Transfer Value
            var myTVP = new TransferValueProfile();
            myTVP.TransferValueFor = new List<EntityReference>()
            {
                new EntityReference()
                {
                    Type = "LearningOpportuntiy",
                    Name = "Name of Learning Opportunity",
                    SubjectWebpage = "https://example.org/loppurl",
                    Teaches = new List<CredentialAlignmentObject>()
                    {
                        new CredentialAlignmentObject()
                        {
                            TargetNodeName = "Some competency one"
                        },
                        new CredentialAlignmentObject()
                        {
                            TargetNodeName = "Some competency two"
                        }
                    }
                }
            };
Partial EntityReference class. See the Entity Reference class in Github for all available properties.
            public class EntityReference
            {
                // Id is a resovable URI
                // If the entity exists in the registry, provide the URI.
                // If not sure of the exact URI, especially if just publishing the entity, then provide the CTID and the API will format the URI.
                public string Id { get; set; }
                // RECOMMENDED: a CTID can be entered instead of an Id.
                // Only enter Id or CTID, but not both
                public string CTID { get; set; }

                //if there is no available Id/CTID, enter the following, where Type, Name, and SubjectWebpage would be required

                // the type of the entity must be provided if the Id was not provided.
                // ceterms:AssessmentProfile
                // ceterms:LearningOpportunityProfile
                // ceterms:ConditionManifest
                // ceterms:CostManifest
                // or the many credential subclasses!!
                public virtual string Type { get; set; }

                // Name of the entity (required)
                public string Name { get; set; }
                // Subject webpage of the entity (required)
                public string SubjectWebpage { get; set; }
                // Description of the entity (optional)
                public string Description { get; set; }

                //=== Optional additional properties===

                //For Assessments only, list of competencies being assessed
                public List<CredentialAlignmentObject> Assesses { get; set; } = new List<CredentialAlignmentObject>();

                // Description of the assessment methods for a resource.(optional)
                public string AssessmentMethodDescription { get; set; }

                // List of places where the resource is available.
                public List<string> AvailableAt { get; set; }

                //
                // Coded Notation
                public string CodedNotation { get; set; }
                //
                //List  of QuantitativeValue profiles
                public ValueProfile CreditValue { get; set; } = new ValueProfile();
                //
                // List of estimated duration
                public List<DurationProfile> EstimatedDuration { get; set; } = new List<DurationProfile>();

                //Description of the learning methods for a resource.
                public string LearningMethodDescription { get; set; }

                //
                // Organization(s) that offer this resource
                public List<OrganizationReference> OfferedBy { get; set; }

                // Organization(s) that own this resource
                public List<OrganizationReference> OwnedBy { get; set; }
                //
                //For Learning Opps only, list of competencies being taught
                public List<CredentialAlignmentObject> Teaches { get; set; } = new List<CredentialAlignmentObject>();
            }
Organization Reference
An OrganizationReference has a small number of required properties, plus the additional optional property of SocialMedia. The Organization reference is used in properties like ownedBy, offeredBy, accreditedBy, etc.
Like the EntityReference class, and the organization reference class enable a flexible approach to providing references to other entities, depending on what is available in the publishing system. This class will be commonly used for referencing QA organizations where the partner may not (and should not) know if the organization exists in the registry.
There are three approaches:
-
Id:
- If the entity being referenced is already published in the registry, the full URI can be provided, like:
https://sandbox.credentialengineregistry.org/resources/ce-a4041983-b1ae-4ad4-a43d-284a5b4b2d73. - Note: The convention is to provide the /resources URI, not the /graph URI.
- If the entity being referenced is already published in the registry, the full URI can be provided, like:
-
CTID:
- Again, if the related entity is in the registry, or soon will be, then just the CTID can be provided.
- The preference between providing a CTID or Id would be the CTID. Then the API can format the URL correctly based on the target credential registry and community/private registry where applicable.
- There may be a case where a reference is needed for an entity that is in a different community/private registry that the current target (rare, and not yet completely handled). In this case, then the full URL should be provided in the Id property.
-
External Reference:
- A reference can be made to an entity that doesn’t exist in the registry but does have a URL.
- This class inherits from the EntityReference and adds one property: SocialMedia (a list of URLs to sites like LinkedId, Facebook, Twitter, etc.).
-
In this case, the following can be provided:
- Name (required)
- Organization type (class): (required): CredentialOrganization or QACredentialOrganization
- SubjectWebpage (required)
- Description (optional)
- SocialMedia (optional)
Note: only one of the three options should be provided. The CTID is checked first, then the Id, then the external reference.
Sample Properties (C#). See full class in github.
            // Credential Property: List<OrganizationReference> OwnedBy

            public class OrganizationReference
            {
                // Id is a resovable URI
                // If the entity exists in the registry, provide the URI.
                // If not sure of the exact URI, especially if just publishing the entity, then provide the CTID and the API will format the URI.
                public string Id { get; set; }

                // Optionally, a CTID can be entered instead of an Id.
                // Only enter Id or CTID, but not both
                // If there is no available Id/CTID, enter the following, where Type, Name, and SubjectWebpage would be required
                public string CTID { get; set; }

                // The type of the entity must be provided if the Id was not provided.
                // Type (required): CredentialOrganization or QACredentialOrganization
                public virtual string Type { get; set; }

                // Name of the entity (required)
                public string Name { get; set; }

                // Subject webpage of the entity (required)
                public string SubjectWebpage { get; set; }

                // Description of the entity (optional)
                public string Description { get; set; }

                // Social Media URL links (optional)
                // For example, Facebook, LinkedIn
                public List<string> SocialMedia { get; set; }
            }
Sample Usage (C#)
            // If the CTID is known, then only specify CTID
            myOrg.AccreditedBy.Add( new OrganizationReference() { CTID = "ce-541da30c-15dd-4ead-881b-729796024b8f" } );

            // If the CTID is not known, or if not sure a QA organization is in the registry, use a reference
            myOrg.Department.Add( new OrganizationReference()
            {
                Name = "A Quality Assurance Organization",
                SubjectWebpage = "https://example.com/qualityAssuranceIsUs",
                Type = OrganizationReference.QACredentialOrganization
            } );
Occupations, Industries and Instructional Programs
Occupations, Industries and Instructional Programs that are related to credentials, learning opportunities, and others may be published to the credential registry. There are three ways to provide the latter data to the API, as shown below.
- Using a structured class
- Using a list of codes from a known framework
- Using a list of text where the topic is not part of a framework
Items From a Formal Framework
The full details of a framework item can be published as credential alignment objects (see: CredentialAlignmentObject). The commonly used properties are:
- framework - URL for the framework
- frameworkName - the name of the framework
- codedNotation - for example a SOC code of 49-9081.00 (Wind Turbine Service Technicians)
- targetNode - public URL to this code
- targetNodeName - name of this code
- targetNodeDescription - a description of this code
The equivalent class in the API is FrameworkItem:
	/// <summary>
	/// Coded Framework
	/// Examples
	/// SOC/O*Net	- occupations
	/// NAICS		- industries
	/// CIP			- Classification of Instructional Programs
	/// </summary>
	public class FrameworkItem
	{
		/// <summary>
		/// Could be a registry URL or external, typically expect a framework URL.
		/// URL
		/// </summary>
		public string Framework { get; set; }

		/// <summary>
		/// Formal name of the framework.
		/// </summary>
		public string FrameworkName { get; set; }
		/// <summary>
		/// Name of the framework - using LanguageMap
		/// </summary>
		public LanguageMap FrameworkName_Map { get; set; } = new LanguageMap();

		/// <summary>
		/// Set of alpha-numeric symbols as defined by the body responsible for this resource that uniquely identifies this resource and supports its discovery and use.
		/// </summary>
		public string CodedNotation { get; set; }

		/// <summary>
		/// Name of the framework item, such as occupation or industry.
		/// targetNodeName
		/// </summary>
		public string Name { get; set; }
		/// <summary>
		/// Alternately provide name using LanguageMap
		/// </summary>
		public LanguageMap Name_Map { get; set; } = new LanguageMap();
		/// <summary>
		/// Description of the framework item
		/// targetNodeDescription
		/// </summary>
		public string Description { get; set; }
		/// <summary>
		/// Alternately provide description using LanguageMap
		/// </summary>
		public LanguageMap Description_Map { get; set; } = new LanguageMap();

		/// <summary>
		/// URI for the FrameworkItem
		/// </summary>
		public string TargetNode { get; set; }

		/// <summary>
		/// Measurement of the weight, degree, percent, or strength of a recommendation, requirement, or comparison.
		/// </summary>
		public decimal? Weight { get; set; }
	}
Helper for O*Net/NAICS and CIP Codes
The API has short cut properties for handling occupations from the O*Net framework, industries from NAICS, and instructional programs from Classification of Instructional Programs (CIP). These properties only require the entry of a list of items using the coded notation only. The API will validate the codes, format the framework and target node data, and publish the data as a CredentialAlignmentObject. The helper properites are:
- ONET_Codes
- Naics
- CIP_Codes
Alternative Framework Items
Feb. 22, 2019.
The API has helper properties for handling occupations, industries and instructional programs that are not part of a formal framework. The new properites are:
- AlternativeIndustryType
- AlternativeOccupationType
- AlternativeInstructionalProgramType
Framework Examples
Following are examples of the different properties that can be used to publish framework data.
Example for adding Occupations using a FrameworkItem, a SOC list or alternate occupations to a credential request
	public class OccupationsHelper
	{

        /// <summary>
        /// Example for populating Occupations for a Credential Request.
        /// The same approach would be used for other classes that support Occupations such as Assessments and LearningOpportunities.
        /// Possible Input Types
        /// - List of frameworks
        /// - list of occupation names
        /// - List of SOC codes
        /// </summary>
        /// <param name="AlternativeTypes">If applicable, will return a list of occupations (name only) for use with request.AlternativeInstructionalProgramType</param>
        /// <param name="ONET_Codes">If applicable, will return a list of SOC codes for use with request.ONET_Codes</param>
        /// <returns></returns>
        public static List<FrameworkItem> PopulateOccupations( ref List<string> AlternativeTypes, ref List<string> ONET_Codes )
		{
			var OccupationType = new List<FrameworkItem>();

			//Using existing frameworks such as O*Net
			//occupations from a framework like ONet - where the information is stored locally and can be included in publishing
			OccupationType.Add( new FrameworkItem()
			{
				Framework = "https://www.onetcenter.org/taxonomy.html",
				FrameworkName = "Standard Occupational Classification",
				Name = "Information Security Analysts",
				TargetNode = "https://www.onetonline.org/link/summary/15-1122.00",
				CodedNotation = "15-1122.00",
				Description = "Plan, implement, upgrade, or monitor security measures for the protection of computer networks and information. May ensure appropriate security controls are in place that will safeguard digital files and vital electronic infrastructure. May respond to computer security breaches and viruses."
			} );
			OccupationType.Add( new FrameworkItem()
			{
				Framework = "https://www.onetcenter.org/taxonomy.html",
				FrameworkName = "Standard Occupational Classification",
				Name = "Computer Network Support Specialists",
				TargetNode = "https://www.onetonline.org/link/summary/15-1152.00",
				CodedNotation = "15-1152.00",
				Description = "Plan, implement, upgrade, or monitor security measures for the protection of computer networks and information. May ensure appropriate security controls are in place that will safeguard digital files and vital electronic infrastructure. May respond to computer security breaches and viruses."
			} );
			//or if want to just reference the Job family
			OccupationType.Add( new FrameworkItem()
			{
				Framework = "https://www.onetcenter.org/taxonomy.html",
				FrameworkName = "Standard Occupational Classification",
				Name = "Construction and Extraction",
				TargetNode = "https://www.onetonline.org/find/family?f=47",
				CodedNotation = "47"
			} );

			////Occupations not in a known framework
			////Occupations that are not in a framework can still be published using a list of strings.
			AlternativeTypes = new List<string>() { "Cybersecurity", "Forensic Scientist", "Forensic Anthropologist" };

            //O*Net helper - ALternately provided a list of O*Net codes.
            //The Assistant API will validate the codes and format the output including the framework name and URL, the occupation, description, and code
            //request.ONET_Codes
            ONET_Codes = new List<string>() { "13-2099.01", "13-2052.00", "13-2061.00", "13-2051.00" };
			return OccupationType;
		}

	}
Example for adding Industries using a FrameworkItem, NAICS list or alternate industries to a credential request
	public class Industries
	{
		/// <summary>
		/// Example for populating Industries for a Credential Request.
		/// The same approach would be used for other classes that support Industries such as Assessments and LearningOpportunities.
		/// Possible Input Types
		/// - List of frameworks
		/// - list of industry names
		/// - List of NAICS codes
		/// </summary>
		/// <param name="request"></param>
		public static void PopulateIndustries( Credential request )
		{
			request.IndustryType = new List<FrameworkItem>
			{
				//Using existing frameworks such as NAICS
				//occupations from a framework like NAICS - where the information is stored locally and can be included in publishing
				new FrameworkItem()
				{
					Framework = "https://www.naics.com/",
					FrameworkName = "NAICS - North American Industry Classification System",
					Name = "National Security",
					TargetNode = "https://www.naics.com/naics-code-description/?code=928110",
					CodedNotation = "928110",
					Description = "This industry comprises government establishments of the Armed Forces, including the National Guard, primarily engaged in national security and related activities."
				},
				new FrameworkItem()
				{
					Framework = "https://www.naics.com/",
					FrameworkName = "NAICS - North American Industry Classification System",
					Name = "Regulation and Administration of Transportation Programs",
					TargetNode = "https://www.naics.com/naics-code-description/?code=926120",
					CodedNotation = "926120",
					Description = "This industry comprises government establishments primarily engaged in the administration, regulation, licensing, planning, inspection, and investigation of transportation services and facilities. Included in this industry are government establishments responsible for motor vehicle and operator licensing, the Coast Guard (except the Coast Guard Academy), and parking authorities."
				}
			};


			//Industries not in a known framework
			//Industries that are not in a framework can still be published using a list of strings.
			request.AlternativeIndustryType = new List<string>() { "Cybersecurity", "Forensic Science", "Forensic Anthropology" };

			//NAICS helper - ALternately provided a list of NAICS codes.
			//The Assistant API will validate the codes and format the output including the framework name and URL, the name, description, and code
			request.Naics = new List<string>() { "9271", "927110", "9281", "928110" };
		}

        /// <summary>
        /// Example of populating a request for industry type
        /// </summary>
        /// <param name="AlternativeTypes"></param>
        /// <param name="NaicsList">If applicable, will return a list of NaicsList codes for use with request.NaicsList</param>
        /// <returns></returns>
        public static List<FrameworkItem> PopulateIndustries( ref List<string> AlternativeTypes, ref List<string> NaicsList )
		{
			var IndustryType = new List<FrameworkItem>
			{
				//Using existing frameworks such as NAICS
				//occupations from a framework like NAICS - where the information is stored locally and can be included in publishing
				new FrameworkItem()
				{
					Framework = "https://www.naics.com/",
					FrameworkName = "NAICS - North American Industry Classification System",
					Name = "National Security",
					TargetNode = "https://www.naics.com/naics-code-description/?code=928110",
					CodedNotation = "928110",
					Description = "This industry comprises government establishments of the Armed Forces, including the National Guard, primarily engaged in national security and related activities."
				},
				new FrameworkItem()
				{
					Framework = "https://www.naics.com/",
					FrameworkName = "NAICS - North American Industry Classification System",
					Name = "Regulation and Administration of Transportation Programs",
					TargetNode = "https://www.naics.com/naics-code-description/?code=926120",
					CodedNotation = "926120",
					Description = "This industry comprises government establishments primarily engaged in the administration, regulation, licensing, planning, inspection, and investigation of transportation services and facilities. Included in this industry are government establishments responsible for motor vehicle and operator licensing, the Coast Guard (except the Coast Guard Academy), and parking authorities."
				}
			};


            //Industries not in a known framework
            //Industries that are not in a framework can still be published using a list of strings.
            AlternativeTypes = new List<string>() { "Cybersecurity", "Forensic Science", "Forensic Anthropology" };

            //NAICS helper - ALternately provided a list of NAICS codes.
            //The Assistant API will validate the codes and format the output including the framework name and URL, the name, description, and code
            NaicsList = new List<string>() { "9271", "927110", "9281", "928110" };
			return IndustryType;
		}

	}
Example for adding Instructional Programs using a FrameworkItem, a SOC list or alternate instructional programs to a credential request
	public class InstructionalPrograms
	{
        /// <summary>
        /// Example for populating Instructional Programs (example CIP)
        /// The same approach would be used for all classes that support Instructional Programs such as Assessments and LearningOpportunities.
        /// Possible Input Types
        /// - List of frameworks
        /// - list of program names
        /// - List of CIP codes
        /// </summary>
        /// <param name="AlternativeTypes">If applicable, will return a list of programs (name only) for use with request.AlternativeInstructionalProgramType</param>
        /// <param name="CIP_Codes">If applicable, will return a list of CIP codes for use with request.CIP_Codes</param>
        public static List<FrameworkItem> PopulatePrograms(ref List<string> AlternativeTypes, ref List<string> CIP_Codes )
		{
			var InstructionalProgramType = new List<FrameworkItem>
			{
				//Using existing frameworks such as CIP
				//programs from a framework like Classification of Instructional Program - where the information is stored locally and can be included in publishing
				new FrameworkItem()
				{
					Framework = "https://nces.ed.gov/ipeds/cipcode/search.aspx?y=56",
					FrameworkName = "Classification of Instructional Program",
					Name = "Medieval and Renaissance Studies",
					TargetNode = "https://nces.ed.gov/ipeds/cipcode/cipdetail.aspx?y=56&cip=30.1301",
					CodedNotation = "30.1301",
					Description = "A program that focuses on the  study of the Medieval and/or Renaissance periods in European and circum-Mediterranean history from the perspective of various disciplines in the humanities and social sciences, including history and archeology, as well as studies of period art and music."
				},
				new FrameworkItem()
				{
					Framework = "https://nces.ed.gov/ipeds/cipcode/search.aspx?y=56",
					FrameworkName = "Classification of Instructional Program",
					Name = "Classical, Ancient Mediterranean and Near Eastern Studies and Archaeology",
					TargetNode = "https://nces.ed.gov/ipeds/cipcode/cipdetail.aspx?y=56&cip=30.2202",
					CodedNotation = "30.2202",
					Description = "A program that focuses on the cultures, environment, and history of the ancient Near East, Europe, and the Mediterranean basin from the perspective of the humanities and social sciences, including archaeology."
				}
			};


            //Instructional Programs not in a known framework
            //Instructional Programs that are not in a framework can still be published using a list of strings.
            AlternativeTypes = new List<string>() { "Cybersecurity 101", "Forensic Science 120", "Forensic Anthropology 400" };

            //CIP code helper - ALternately provided a list of CIP codes.
            //The Assistant API will validate the codes and format the output including the framework name and URL, the name, description, and code
            CIP_Codes = new List<string>() { "31.0504", "31.0505", "31.0599", "31.9999" };

            return InstructionalProgramType;
		}
	}
Duration Items
DurationItem - used with DurationProfile class for the property EstimatedDuration. Rather than providing data in the ISO 8601 duration format (ex. for 10 hours, the format would be PT10H
The DurationItem has properties for Years, Months, Weeks, Days, Hours, and Minutes.
Duration Profile:
	/// <summary>
	/// Duration Profile
	/// Either enter an ExactDuration or a range using Minimum duration, and maximum duration
	/// </summary>
	public class DurationProfile
	{
		public DurationProfile()
		{
			MinimumDuration = new DurationItem();
			MaximumDuration = new DurationItem();
			ExactDuration = new DurationItem();
		}

		/// <summary>
		/// Description of this duration profile - optional
		/// </summary>
		public string Description { get; set; }
        public LanguageMap Description_Map { get; set; } = new LanguageMap();
        public DurationItem MinimumDuration { get; set; }
		public DurationItem MaximumDuration { get; set; }
		public DurationItem ExactDuration { get; set; }

	}
Duration Item:
	/// <summary>
	/// Enter either the Duration_ISO8601 value, OR the necessary combination of years, months, weeks, etc
	/// </summary>
	public class DurationItem
	{
		/// <summary>
		/// A duration in the registry is stored using the ISO8601 durations format.
		/// P is the duration designator (for period) placed at the start of the duration representation. P is always required, even if only time related designators are included.
		///		Y is the year designator that follows the value for the number of years.
		///		M is the month designator that follows the value for the number of months.
		///		W is the week designator that follows the value for the number of weeks.
		///		D is the day designator that follows the value for the number of days
		/// T is the time designator that precedes the time components of the representation.
		/// Time durations cannot be included if there is non-time durations present!
		///		H is the hour designator that follows the value for the number of hours.
		///		M is the minute designator that follows the value for the number of minutes.
		///		S is the second designator that follows the value for the number of seconds.
		///	Examples:
		///	P2Y		- two years
		///	P10M	- 10 months
		///	PT10H	- 10 hours
		/// <seealso href="https://en.wikipedia.org/wiki/ISO_8601#Durations">ISO_8601 Durations</seealso>
		/// </summary>
		public string Duration_ISO8601 { get; set; }
		//TODO - technically a decimal can be used. So P2.5Y instead of P2Y6M. Or more precise: P4.38Y.
		public decimal? Years { get; set; }
		public decimal? Months { get; set; }
		public decimal? Weeks { get; set; }
		public decimal? Days { get; set; }
		public decimal? Hours { get; set; }
		public decimal? Minutes { get; set; }

        public string Print()
        {
            var parts = new List<string>();
            if ( Years > 0 ) { parts.Add( Years + " year" + ( Years == 1 ? "" : "s" ) ); }
            if ( Months > 0 ) { parts.Add( Months + " month" + ( Months == 1 ? "" : "s" ) ); }
            if ( Weeks > 0 ) { parts.Add( Weeks + " week" + ( Weeks == 1 ? "" : "s" ) ); }
            if ( Days > 0 ) { parts.Add( Days + " day" + ( Days == 1 ? "" : "s" ) ); }
            if ( Hours > 0 ) { parts.Add( Hours + " hour" + ( Hours == 1 ? "" : "s" ) ); }
            if ( Minutes > 0 ) { parts.Add( Minutes + " minute" + ( Minutes == 1 ? "" : "s" ) ); }

            if ( parts.Count > 0 )
                return string.Join( ", ", parts );
            else
                return string.Empty;
        }
    }
Sample Usage:
            // Sample usage
            var profile = new DurationProfile();
            profile.Description = "A full time student will typically complete this certificate in 15 hours.";
            profile.ExactDuration = new DurationItem() { Hours = 15 };
Getting Started
To call the publish API, you will need to make an HTTP POST request to the API endpoint specific to the data type being published. For example, to publish a credential you would use:
https://apps.credentialengine.org/assistant/credential/publish
NOTE: The remaining examples on this page will use URLs for the sandbox version of the credential registry.
With your request, include two things: First, you will need to pass your organization's API key (see Getting your API Key) as a request header using the format:
Authorization: ApiToken [YOUR API KEY]
Sample:
				using ( var client = new HttpClient() )
				{
				client.DefaultRequestHeaders.
				Accept.Add( new MediaTypeWithQualityHeaderValue( "application/json" ) );
				//Add Authorization header
				client.DefaultRequestHeaders.Add( "Authorization", "ApiToken " + "YOUR API KEY" );
				//........
				}
Second, a JSON object with properties to publish. The provided JSON object will be specific to the type of data being published. The following sections will have examples of the properties for each data that may be published.
Top level classes in the Registry often need to reference one another. For example, a Credential might need to reference both the Organization that owns it, and an Assessment that it requires. The easiest way to provide valid references to these things is to ensure that things which need to be referenced are published before things that are doing the referencing. Usually this means that you should publish the Organization first, any required entities like assessments or learning opportunities second, and the credential(s) that reference these entities last. These references are all handled via the URIs explained in the CTID section of the Registry guide page.
The Registry Assistant API uses simiplified and flexible input classes. While all properties of CTDL are available, the input properties represent a Registry specific profile.
Examples of special or simplified classes and properities, follow below.
The Registry Assistant accepts data formatted using ordinary JSON. A special variant of JSON, JSON-LD, is used within the Registry. One of the features of the Registry Assistant API is that it handles conversion of ordinary JSON to JSON-LD for you. Explanations of JSON and JSON-LD are beyond the scope of this guide, but the remainder of this guide assumes at least a basic working knowledge of standard JSON. Note that the API does not care about the presence or lack of additional whitespace (sometimes known as "pretty printing") within your JSON, but for the purposes of readability, this guide will include it.
In some cases, a property can have multiple values. In these cases, you must always use an array if any values are present, even if there is only one value.
Upon successfully publishing data to the Registry, you will receive the resultant CER Envelope. The CER Envelope contains the entity that was published (the "payload") along with various other data about the publish event, such as the date and time the publish happened, the account responsible for it, cryptographic signature data to enable validation of the payload against tampering, and the identifier for the envelope itself (this is not the same as the CTID). While it is not necessary to reference a particular envelope in order to use the Registry, it may be useful to maintain a record of the envelope's ID within your system should you need to access a specific envelope in the future.
The general approach for each of the top level classes in the sections below works like this:
- Introduction to a top level class in CTDL and its Registry Assistant equivalent
- Required properties for that class
- Publishing a basic record using just the required properties and conversion of raw data to Registry Assistant API class to actual CTDL
- Recommended and optional properties for that class
- Summary
The high level steps for using the API include:
- Determine the source of the target data from your environment
- Develop process to retrieve the data
- Get/View the latest input classes from Github: View/Download the C# API Input Classes here
- These reference classes are in a C# syntax but can be easily adapted for alternate evironments
- Map your to the latter input classes
- Call the API
Sample Publishing of an Organization
To publish an organization, your system will need to:
- Create an Organization object used for the publishing request
- Populate the object with data from your system
- Create the API request object including the organization object and minimally the CTID of the organization that owns the resource being published
- Serialize the request object
- Call the appropriate API publish (POST) endpoint
Sample organization publishing code (C#)
            using System;
            using System.Collections.Generic;
            using System.Net.Http;
            using System.Net.Http.Headers;
            using System.Text;

            using Newtonsoft.Json;
            using RA.Models.Input;
            using MyOrganization = RA.Models.Input.Organization;

            namespace Publish_Test
            {
                public class OrganizationPublisher
                {
                    public string PublishSimpleRecord()
                    {
                        // Holds the result of the publish action
                        var result = "";
                        // Assign the api key - acquired from organization account of the organization doing the publishing
                        var apiKey = "xxxxxxxx-xxxx-xxxx-xxxx-xxxxxxxxxxxx";
                        // This is the CTID of the organization that owns the data being published
                        var organizationIdentifierFromAccountsSite = "ce-xxxxxxxx-xxxx-xxxx-xxxx-xxxxxxxxxxxx";
                        // Assign a CTID for the entity being published and keep track of it
                        var myOrgCTID = "ce-" + Guid.NewGuid().ToString();

                        // A simple object-see github for class definition
                        var myData = new MyOrganization()
                        {
                            Type = "CredentialOrganization",
                            Name = "My Organization Name",
                            LifeCycleStatusType="Active",
                            Description = "This is some required text that describes my organization.",
                            CTID = myOrgCTID,
                            SubjectWebpage = "https://example.com",
                            Email = new List<string>() { "info@myorg.net" }
                        };
                        //required-concept from AgentSector: https://credreg.net/ctdl/terms/agentSectorType#AgentSector
                        myData.AgentSectorType = "PrivateNonProfit";
                        //required-One or more concepts from OrganizationType: https://credreg.net/ctdl/terms/agentType#OrganizationType
                        myData.AgentType.Add( "Business" );
                        // Use organization reference to add a department for the organization
                        myData.Department.Add( new OrganizationReference()
                        {
                            Name = "A Department for my organization",
                            Description = "A test Department - third party format",
                            SubjectWebpage = "https://example.com?t=testDepartment",
                            Type = OrganizationReference.CredentialOrganization
                        } );
                        // If we know the CTID, then only specify CTID
                        myData.AccreditedBy.Add( new OrganizationReference()
                        {
                            CTID = "ce-541da30c-15dd-4ead-881b-729796024b8f"
                        } );

                        //This holds the Organization and the identifier (CTID) for the owning organization
                        var myRequest = new OrganizationRequest()
                        {
                            Organization = myData,
                            DefaultLanguage = "en-US",
                            PublishForOrganizationIdentifier = organizationIdentifierFromAccountsSite
                        };

                        //Serialize the request object
                        var payload = JsonConvert.SerializeObject( myRequest );
                        // Use HttpClient to perform the publish
                        using ( var client = new HttpClient() )
                        {
                            // Accept JSON
                            client.DefaultRequestHeaders.Accept.Add( new MediaTypeWithQualityHeaderValue( "application/json" ) );
                            // Add API Key (for a publish request)
                            client.DefaultRequestHeaders.Add( "Authorization", "ApiToken " + apiKey );
                            // Format the json as content
                            var content = new StringContent( payload, Encoding.UTF8, "application/json" );
                            // The endpoint to publish to
                            var publishEndpoint = "https://sandbox.credentialengine.org/assistant/Organization/publish/";
                            // Perform the actual publish action and return the result
                            result = client.PostAsync( publishEndpoint, content ).Result.Content.ReadAsStringAsync().Result;
                        };
                        return result;
                    }

                }//class
            }
Prototyping With Postman
Postman is a popular tool for building and testing APIs. It can be used to prototype the publishing of resources before implementing programming based publishing. Postman is a powerful tool for testing. Variables can be set by environment (sandbox, production, etc.) for many scenarios including:
- For the API URLs -
{{base_AssistantUrl}}organization/format - An organization's API key
ApiToken {{myOrgApiKey}} - An organization's CTID
"PublishForOrganizationIdentifier": "{{myOrgCTID}}",
Sample Postman Header
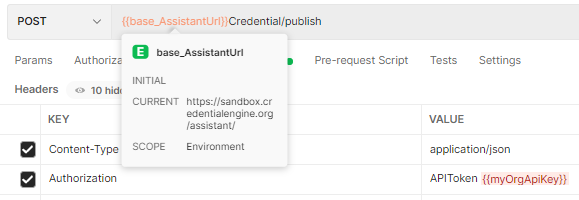
The API request class includes the required parameter: PublishForOrganizationIdentifier, and the JSON for the resource to be published.
Sample organization wrapper:
Sample credential wrapper:
Sample Postman Publish

Introduction
Usually, the first class you will want to publish is the Organization class. This is the class that represents your organization, and you will use its CTID to reference the data within it. There are two types of organization classes, the most common is the CredentialOrganization class. If your organization focuses on providing quality assurance, you will want to publish the ceterms:QACredentialOrganization class instead.
NOTE: The Assistant API uses a simplied approach for publishing organizations. There is a single organization endpoint with a single Organization class. A Type property (like you will see used with Credentials) is used to designate the type of organization to publish. The type of organization is one of:
- CredentialOrganization
- QACredentialOrganization
- Organization
References
- Organization class on credreg.net
- See github for the Organization Request class used by the Assistant API.
- See more detailed ready to run examples in github.
To format or publish an Organization, use the following endpoints:
Format Data (only)
https://sandbox.credentialengine.org/assistant/organization/format
Publish Data (automatically formats first)
https://sandbox.credentialengine.org/assistant/organization/publish
Required Properties
The Registry Assistant API uses a simplified version of the equivalent CTDL class to convey the data for an organization. This class is the same regardless of whether the resulting CTDL class is a QA Organization or not. Refer to the Minimum Data Policy for the required properties for the Credential Organization and QA Credential Organization classes.
Publishing a Basic Record
Your system will need to output the data in JSON format:
- Create an Organization object used for the publishing request
- Populate the object with data from your system
- Create the API request object including the organization object and minimally the CTID of the organization that owns the resource being publishe
- Serialize the request object
- Call the appropriate API POST endpoint
				//Create an Organization object used for the publishing request
				//Populate the object with data from your system
				var myData = new Organization()
				{
				Type = "ceterms:CredentialOrganization",
				Name = "My Organization Name",
				Description = "This is some text that describes my organization.",
				LifeCycleStatusType = "Active",
				CTID = "ce-a4041983-b1ae-4ad4-a43d-284a5b4b2d73",
				SubjectWebpage = "https://example.com",
				SocialMedia = new List
					()
					{
					"https://twitter.com/credengine",
					"https://www.facebook.com/credengine",
					"https://www.youtube.com/channel/UCyTpUktFYQNlLrLR4O_AcQA"
					},
					AgentSectorType = "agentSector:PrivateForProfit",
					AgentType = new List
						() { "PrimarilyOnline", "orgType:Vendor" },
						Keyword = new List
							() { "Credentials", "Technical Training", "Credential Registry Consulting" },
							Email = new List
								() { "info@myOrg.com" }
								};

								//populate the request object
								//This holds the organization and the identifier (CTID) for the owning organization
								var myRequest = new OrganizationRequest()
								{
								Organization = myData,
								PublishForOrganizationIdentifier = organizationIdentifierFromAccountsSite,
								DefaultLanguage="en-US"
								};

								//serialize the class to JSON
								string payload = JsonConvert.SerializeObject( myRequest, SampleServices.GetJsonSettings() );
Serialized request
Recommended Properties
In order to maximize the utility of the Organization data in the Registry, we recommend you also include data for the recommended properties for the organization classes. See the recommended properties for the Credential Organization and QA Credential Organization classes. For example:
Multiple Locations
As a general rule organizations are published to the registry once and if the organization has multiple locations include each location's name and complete address with the organization.
An organization object with multiple locations (C#)
                //SNIPPET
                var myData = new Organization()
                {
                    Type = "ceterms:CredentialOrganization",
                    Name = "My Organization Name",
                    Description = "This is some text that describes my organization.",
                    LifeCycleStatusType = "Active",
                    CTID = "ce-a4041983-b1ae-4ad4-a43d-284a5b4b2d73",
                    SubjectWebpage = "https://example.com",
                    SocialMedia = new List<string>()
                    {
                        "https://twitter.com/credengine",
                        "https://www.facebook.com/credengine",
                        "https://www.youtube.com/channel/UCyTpUktFYQNlLrLR4O_AcQA"
                    },
                    AgentSectorType = "agentSector:PrivateForProfit",
                    AgentType = new List<string>() { "PrimarilyOnline", "orgType:Vendor" },
                    Keyword = new List<string>() { "Credentials", "Technical Training", "Credential Registry Consulting" },
                    Email = new List<string>() { "info@myOrg.com" }
                };
                myData.Address.Add( new Place()
                {
                    Name = "Main Campus",
                    Address1 = "200 Daniels Way",
                    City = "Bloomington",
                    AddressRegion = "Indiana",
                    PostalCode = "47704"
                } );
                myData.Address.Add( new Place()
                {
                    Name="Evansville Campus",
                    Address1 = "2501 N. First Avenue", City ="Evansville", AddressRegion="Indiana", PostalCode="47710"
                } );
                myData.Address.Add( new Place()
                {
                    Name = "Madison Campus",
                    Address1 = "590 Ivy Tech Drive",
                    City = "Madison",
                    AddressRegion = "Indiana",
                    PostalCode = "47250"
                } );
                //populate the request object
                //This holds the organization and the identifier (CTID) for the owning organization
                var myRequest = new OrganizationRequest()
                {
                    Organization = myData,
                    DefaultLanguage = "en-US",
                    PublishForOrganizationIdentifier = organizationIdentifierFromAccountsSite
                };
                //serialize the class to JSON
                string payload = JsonConvert.SerializeObject( myRequest, SampleServices.GetJsonSettings() );
Sample
To publish the data, you will need to wrap it in an object that also contains a PublishForOrganizationIdentifier property. Naturally, this is where you specify the CTID of the owning organization (from the accounts site). The organization data itself will go in an Organization property:
Sample organization wrapper:
Below is some example code to publish a simple organization object, see github for the complete Organization Request class.
Sample organization publishing code (C#)
            using System;
            using System.Collections.Generic;
            using System.Net.Http;
            using System.Net.Http.Headers;
            using System.Text;

            using Newtonsoft.Json;
            using RA.Models.Input;
            using MyOrganization = RA.Models.Input.Organization;

            namespace Publish_Test
            {
                public class OrganizationPublisher
                {
                    public string PublishSimpleRecord()
                    {
                        // Holds the result of the publish action
                        var result = "";
                        // Assign the api key - acquired from organization account of the organization doing the publishing
                        var apiKey = "xxxxxxxx-xxxx-xxxx-xxxx-xxxxxxxxxxxx";
                        // This is the CTID of the organization that owns the data being published
                        var organizationIdentifierFromAccountsSite = "ce-xxxxxxxx-xxxx-xxxx-xxxx-xxxxxxxxxxxx";
                        // Assign a CTID for the entity being published and keep track of it
                        var myOrgCTID = "ce-" + Guid.NewGuid().ToString();

                        // A simple object-see github for class definition
                        var myData = new MyOrganization()
                        {
                            Type = "CredentialOrganization",
                            Name = "My Organization Name",
                            LifeCycleStatusType="Active",
                            Description = "This is some required text that describes my organization.",
                            CTID = myOrgCTID,
                            SubjectWebpage = "https://example.com",
                            Email = new List<string>() { "info@myorg.net" }
                        };
                        //required-concept from AgentSector: https://credreg.net/ctdl/terms/agentSectorType#AgentSector
                        myData.AgentSectorType = "PrivateNonProfit";
                        //required-One or more concepts from OrganizationType: https://credreg.net/ctdl/terms/agentType#OrganizationType
                        myData.AgentType.Add( "Business" );
                        // Use organization reference to add a department for the organization
                        myData.Department.Add( new OrganizationReference()
                        {
                            Name = "A Department for my organization",
                            Description = "A test Department - third party format",
                            SubjectWebpage = "https://example.com?t=testDepartment",
                            Type = OrganizationReference.CredentialOrganization
                        } );
                        // If we know the CTID, then only specify CTID
                        myData.AccreditedBy.Add( new OrganizationReference()
                        {
                            CTID = "ce-541da30c-15dd-4ead-881b-729796024b8f"
                        } );

                        //This holds the Organization and the identifier (CTID) for the owning organization
                        var myRequest = new OrganizationRequest()
                        {
                            Organization = myData,
                            DefaultLanguage = "en-US",
                            PublishForOrganizationIdentifier = organizationIdentifierFromAccountsSite
                        };

                        //Serialize the request object
                        var payload = JsonConvert.SerializeObject( myRequest );
                        // Use HttpClient to perform the publish
                        using ( var client = new HttpClient() )
                        {
                            // Accept JSON
                            client.DefaultRequestHeaders.Accept.Add( new MediaTypeWithQualityHeaderValue( "application/json" ) );
                            // Add API Key (for a publish request)
                            client.DefaultRequestHeaders.Add( "Authorization", "ApiToken " + apiKey );
                            // Format the json as content
                            var content = new StringContent( payload, Encoding.UTF8, "application/json" );
                            // The endpoint to publish to
                            var publishEndpoint = "https://sandbox.credentialengine.org/assistant/Organization/publish/";
                            // Perform the actual publish action and return the result
                            result = client.PostAsync( publishEndpoint, content ).Result.Content.ReadAsStringAsync().Result;
                        };
                        return result;
                    }

                }//class
            }
Summary
As you can see, once you get past the most basic properties, the Registry Assistant API alleviates a great deal of the complexity of the CTDL structure. This reduces the likelyhood of errors and ensures your data will be compatible with systems that consume data from the Registry.
Introduction
Once your organization has been published, you will often want to publish your first credential. For each credential you want to publish, you must first consider which type of credential it is. These types are defined by the subclasses of "Credential" in CTDL. Select the type that is most appropriate for your credential - note that you must pick exactly one type.
Note that some credentials may be one type and also include a badge to represent them. In these cases, the badge is considered a type of verification, and is handled elsewhere in CTDL. The badge credential types (ceterms:Badge, ceterms:OpenBadge, and ceterms:DigitalBadge) are reserved for credentials that are exclusively defined as badges.
NOTE: The Assistant API, like for organization, uses a simplied approach for publishing credentials. There is a single credential endpoint with a single Credential class. A Type property is used to designate the type of credential to publish. Again refer to the credential type definitions to ensure that you’ve selected the most appropriate credential type.
References
- Credential class on credreg.net
- See github for the Credential Request class used by the Assistant API.
- See more detailed ready to run examples in github.
To format or publish a Credential, use the following endpoints:
Format Data (only)
https://sandbox.credentialengine.org/assistant/credential/format
Publish Data (automatically formats first)
https://sandbox.credentialengine.org/assistant/credential/publish
Required Properties
Once you have selected a type for your credential, your system will need to output at least the required properties. Refer to the Minimum Data Policy for the required properties for the Credential classes.
Recommended Properties
In order to maximize the utility of the Credential data in the Registry, we recommend you also include data for the following properties. See the recommended properties for the Credential.
Sample
To publish the data, you will need to wrap it in an object that also contains a PublishForOrganizationIdentifier property. Naturally, this is where you specify the CTID of the owning organization (from the accounts site). The credential data itself will go in an Credential property:
Sample credential wrapper:
Below is some example code to publish a simple credential object, see github for the complete Credential Request class.
Sample credential publishing code (C#)
            using System.Net.Http.Headers;
            using System.Text;

            using Newtonsoft.Json;
            using RA.Models.Input;
            using MyCredential = RA.Models.Input.Credential;

            namespace Publish_Test
            {
                    public class CredentialPublisher
                    {
                        public string PublishSimpleRecord()
                        {
                        // Holds the result of the publish action
                        var result = "";
                        // Assign the api key - acquired from organization account of the organization doing the publishing
                        var apiKey = "xxxxxxxx-xxxx-xxxx-xxxx-xxxxxxxxxxxx";
                        // This is the CTID of the organization that owns the data being published
                        var organizationIdentifierFromAccountsSite = "ce-xxxxxxxx-xxxx-xxxx-xxxx-xxxxxxxxxxxx";
                        // Assign a CTID for the entity being published and keep track of it
                        var myCredCTID = "ce-" + Guid.NewGuid().ToString();

                        // A simple credential object-see below for sample class definition
                        var myData = new MyCredential()
                        {
                            Name = "My Credential Name",
                            Description = "This is some text that describes my credential.",
                            CTID = myCredCTID,
                            SubjectWebpage = "https:/example.org/credential/1234",
                            CredentialType = "ceterms: Certificate",
                            InLanguage = new List<string>() { "en-US" },
                            Keyword = new List<string>() { "Credentials", "Technical Information", "Credential Registry" },
                            Naics = new List<string>() { "333922", "333923", "333924" },
                            Requires = new List<ConditionProfile>()
                            {
                                new ConditionProfile()
                                {
                                    Description = "My requirements for this credential",
                                    Condition = new List<string>() { "Condition One", "Condition Two", "Condition Three" },
                                    TargetLearningOpportunity = new List<EntityReference>()
                                    {
                                        new EntityReference()
                                        {
                                            Type = "LearningOpportunity",
                                            CTID = "ce-" + Guid.NewGuid().ToString()
                                        }
                                    }
                                }
                            }
                        };

                        //typically the ownedBy is the same as the CTID for the data owner
                        myData.OwnedBy.Add( new OrganizationReference()
                        {
                            CTID = organizationIdentifierFromAccountsSite
                        } );
                        //This holds the Assessment and the identifier (CTID) for the owning organization
                        var myRequest = new CredentialRequest()
                        {
                            Credential = myData,
                            DefaultLanguage = "en-US",
                            PublishForOrganizationIdentifier = organizationIdentifierFromAccountsSite
                        };

                        //Serialize the request object
                        var payload = JsonConvert.SerializeObject( myRequest );
                        // Use HttpClient to perform the publish
                        using ( var client = new HttpClient() )
                        {
                            // Accept JSON
                            client.DefaultRequestHeaders.Accept.Add( new MediaTypeWithQualityHeaderValue( "application/json" ) );
                            // Add API Key (for a publish request)
                            client.DefaultRequestHeaders.Add( "Authorization", "ApiToken " + apiKey );
                            // Format the json as content
                            var content = new StringContent( payload, Encoding.UTF8, "application/json" );
                            // The endpoint to publish to
                            var publishEndpoint = "https://sandbox.credentialengine.org/assistant/credential/publish/";
                            // Perform the actual publish action and return the result
                            result = client.PostAsync( publishEndpoint, content ).Result.Content.ReadAsStringAsync().Result;
                        };
                        return result;
                    }
                }//class
            }
Below is an example for a more detailed credential. (C#)
	public class PublishCredential
	{

		public string PublishDetailedRecord( string requestType = "publish" )
		{
			//Holds the result of the publish action
			var result = "";

			// Assign the api key - acquired from organization account of the organization doing the publishing
			var apiKey = SampleServices.GetMyApiKey();
			if ( string.IsNullOrWhiteSpace( apiKey ) )
			{
				//ensure you have added your apiKey to the app.config
			}

			// This is the CTID of the organization that owns the data being published
			var organizationIdentifierFromAccountsSite = SampleServices.GetMyOrganizationCTID();
			if ( string.IsNullOrWhiteSpace( organizationIdentifierFromAccountsSite ) )
			{
				//ensure you have added your organization account CTID to the app.config
			}//


			//Assign a CTID for the entity being published and keep track of it
			var myCTID = "ce-5a33409a-f3db-42f3-8a3c-b00c7bb393af"; //"ce-" + Guid.NewGuid().ToString();

			//A simple credential object - see below for sample class definition
			//For a complete list of all credential types, see:
			//	https://credreg.net/page/typeslist#ceterms_Credential
			var myData = new APIRequestResource()
			{
				Name = "My Certification Name",
				Description = "This is some text that describes my credential.",
				CTID = myCTID,
				SubjectWebpage = "http://example.com/credential/1234",
				CredentialType = "ceterms:Certification",
				CredentialStatusType = "Active",
				InLanguage = new List<string>() { "en-US" },
				Keyword = new List<string>() { "Credentials", "Technical Information", "Credential Registry" },
				Naics = new List<string>() { "333922", "333923", "333924" }
			};
			//typically the ownedBy is the same as the CTID for the data owner
			myData.OwnedBy.Add( new OrganizationReference()
			{
				CTID = organizationIdentifierFromAccountsSite
			} );
			//Specify available delivery types
			myData.LearningDeliveryType = new List<string>()
			{
				"deliveryType:InPerson",
				"deliveryType:OnlineOnly"
			};
			myData.Identifier.Add( new IdentifierValue()
			{
				IdentifierTypeName = "Some Identifer For Credential",
				IdentifierValueCode = "Catalog: xyz1234 "        //Alphanumeric string identifier of the entity
			} );
			myData.VersionIdentifier.Add( new IdentifierValue()
			{
				IdentifierTypeName = "MyVersion",
				IdentifierValueCode = "2023-09-01"        //Alphanumeric string identifier of the entity
			} );
			//==================== QUALITY ASSURANCE RECEIVED ====================

			//CTID for Higher learning commission.
			myData.AccreditedBy.Add( new OrganizationReference()
			{
				CTID = "ce-541da30c-15dd-4ead-881b-729796024b8f"
			} );
			//Add organization that is NOT in the credential registry
			myData.AccreditedBy.Add( new OrganizationReference()
			{
				Type = "QACredentialOrganization",
				Name = "Council on Social Work Education (CSWE)",
				SubjectWebpage = "https://www.cswe.org/",
				Description = "Founded in 1952, the Council on Social Work Education (CSWE) is the national association representing social work education in the United States."
			} );
			myData.AvailableAt = new List<Place>()
			{
				new Place()
				{
					Address1="1101 S. Yakima",
					City="Tacoma",
					PostalCode="98405",
					AddressRegion="WA",
					Country="United States"
				}
			};
			//AvailabilityListing and are defined as objects to accommodate partners who initially used the API when these were defined as a single string. These will be published as lists
			//partners can define these properties as lists
			var list = new List<string>() { "https://example.org?availableListing=here" };
			myData.AvailabilityListing = list;
			list = new List<string>() { "https://example.org?availableOnline=here" };
			myData.AvailableOnlineAt= list;
			//optional identifier(s)
			myData.Identifier.Add( new IdentifierValue()
			{
				IdentifierTypeName = "Some Course Code",
				IdentifierValueCode = "0276"        //Alphanumeric string identifier of the identifier type
			} );

			//include valid concepts, with or without the namespace
			myData.AudienceType = new List<string>() { " audience:PublicEmployee", "Resident" };
			myData.AudienceLevelType = new List<string>() { "audLevel:BeginnerLevel", "IntermediateLevel" };
			//==================== JURISDICTION and Recognized In (specialized jurisdiction) ====================

			myData.Jurisdiction.Add( Jurisdictions.SampleJurisdiction() );
			//Add a jurisdiction assertion for Recognized in
			myData.RecognizedIn.Add( Jurisdictions.SampleJurisdictionAssertion() );

			//==================== CONDITION PROFILE ====================
			// add a requires Condition profile with conditions and a required learning opportunity.
			// See the code sample for a ConditionProfile for more detailed information
			//	https://github.com/CredentialEngine/Registry_Assistant/blob/master/src/SamplePublishing/RA.SamplesForDocumentation/SupportingData/ConditionProfiles.cs
			/*Scenario:
				- The learning opportunity will be published to the credential registry
				- The credential must be published before the learning opportunity
				- The learning opportunity is referenced using the Condition Profile property of TargetLearningOpportunity
				- Only the CTID need be provided for a learning opportunity that will be published

			*/
			myData.Requires = new List<ConditionProfile>()
			{
				new ConditionProfile()
				{
					Description = "To earn this credential the following conditions must be met, and the target learning opportunity must be completed.",
					Condition = new List<string>() { "Complete High School", "Have a drivers licence." },
					TargetLearningOpportunity = new List<EntityReference>()
					{
						//if the target learning opportunity exists in the registry, then only the CTID has to be provided in the EntityReference
						new EntityReference()
						{
							CTID="ce-ccd00a32-d5ad-41e7-b14c-5c096bc9eea0"
						},
						new EntityReference()
						{
							//Learning opportunities not in the registry may still be published as 'blank nodes'
							//The type, name, and subject webpage are required. The description while useful is optional.
							Type="LearningOpportunity",
							Name="Another required learning opportunity (external)",
							Description="A required learning opportunity that has not been published to Credential Registry. The type, name, and subject webpage are required. The description while useful is optional. ",
							SubjectWebpage="https://example.org?t=anotherLopp",
							 CodedNotation="Learning 101"
						}
					}
				},
				//a condition profile that indicate the required credit hours, using the CreditValue property and a credit type of SemesterHours
				new ConditionProfile()
				{
					Description = "To earn this credential the following conditions must be met.",
					//credit Value
					CreditValue = new List<ValueProfile>()
					{
						new ValueProfile()
						{
							//CreditUnitType- The type of credit associated with the credit awarded or required.
							// - ConceptScheme: ceterms:CreditUnit (https://credreg.net/ctdl/terms/CreditUnit#CreditUnit)
							// - Concepts: provide with the namespace (creditUnit:SemesterHour) or just the text (SemesterHour). examples
							// - creditUnit:ClockHour, creditUnit:ContactHour, creditUnit:DegreeCredit
							CreditUnitType = new List<string>() {"SemesterHour"},
							Value=10
						}
					}
				}
			};
			//common conditions
			//An organization may publish common condition information such as pre-requisties using a ConditionManifest.
			//Each credential can then reference these common conditions using the CommonCondition property rather than having to repeat the information.
			//This propery is a list of CTIDs (recommended) for each published ConditionManifest or the actual credential registry URIs
			myData.CommonConditions = new List<string>()
			{
				"ce-82a854b6-1e17-4cd4-845d-0b9b6df2fb5c"
			};

			//duration for a range from 8 to 12 weeks
			myData.EstimatedDuration = new List<DurationProfile>()
			{
				new DurationProfile()
				{
					MinimumDuration = new DurationItem()
                    {
						Weeks=8
                    },
					MaximumDuration = new DurationItem()
                    {
						Weeks=12
                    }
				}
			};
			//====================	COSTS	====================
			//Must be a valid CTDL cost type.
			// Example: Tuition, Application, AggregateCost, RoomOrResidency
			//see: https://credreg.net/ctdl/terms#CostType
			myData.EstimatedCost.Add( new CostProfile()
			{
				Description = "A required description of the cost profile",
				CostDetails = "https://example.com/t=loppCostProfile",
				Currency = "USD",
				CostItems = new List<CostProfileItem>()
				 {
					 new CostProfileItem()
					 {
						 DirectCostType="Application",
						 Price=100,
					 },
					 new CostProfileItem()
					 {
						 DirectCostType="Tuition",
						 Price=12999,
						 PaymentPattern="Full amount due at time of registration"
					 }
				 }
			} );

			//common costs
			//An organization may publish common cost information such as Tuition costs using a CostManifest. Each credential can then reference these common costs using the CommonCost property rather than having to repeat the information. This propery is a list of CTIDs (recommended) for each published costManifest or the actual credential registry URIs
			myData.CommonCosts = new List<string>()
			{
				"ce-a37b5ac4-6a15-4cf1-9f06-8132e18e95eb", "ce-975b466b-ed8e-46c7-8629-2f2dc74153a2"
			};
			//====================	OCCUPATIONS ====================
			PopulateOccupations( myData );
			//====================	INDUSTRIES	====================
			PopulateIndustries( myData );
			//====================	PROGRAMS	====================
			PopulatePrograms( myData );

			//====================	CONNECTIONS ====================
			//Connections between credentials can be published using properties such as
			//- isPreparationFor, PreparationFrom, isAdvancedStandingFor, AdvancedStandingFrom, IsRequiredFor, and IsRecommendedFor.
			//example of a connection to a credential for which the current credential will prepare a student.
			var isPreparationFor = new ConnectionProfile
			{
				Description = "This certification will prepare a student for the target credential",
				TargetCredential = new List<EntityReference>()
				{
					//the referenced credential could be for an external credential, not known to be in the credential registry
					new EntityReference()
					{
						Type="MasterDegree",
						Name="Cybersecurity Technology Master's Degree  ",
						Description="A helpful description",
						SubjectWebpage="https://example.org?t=masters"
					}
				}
			};
			myData.IsPreparationFor.Add( isPreparationFor );

			//add credential that prepares for this credential.
			var preparationFrom = new ConnectionProfile
			{
				Description = "This credential will prepare a student for this credential",
				TargetCredential = new List<EntityReference>()
				{
					//the referenced credential is known to be in the credential registry, so only the CTID need be provided
					new EntityReference()
					{
						CTID="ce-40c3e860-5034-4375-80e8-f7455ff86a48"
					}
				}
			};
			myData.PreparationFrom.Add( preparationFrom );

			//====================	CREDENTIAL REQUEST ====================
			//This holds the credential and the identifier (CTID) for the owning organization
			var myRequest = new APIRequest()
			{
				Credential = myData,
				DefaultLanguage = "en-US",
				PublishForOrganizationIdentifier = organizationIdentifierFromAccountsSite
			};

			//Serialize the credential request object
			//Preferably, use method that will exclude null/empty properties
			string payload = JsonConvert.SerializeObject( myRequest, SampleServices.GetJsonSettings() );

			//call the Assistant API

			SampleServices.AssistantRequestHelper req = new SampleServices.AssistantRequestHelper()
			{
				EndpointType = "credential",
				RequestType = requestType,
				OrganizationApiKey = apiKey,
				CTID = myRequest.Credential.CTID.ToLower(),   //added here for logging
				Identifier = "testing",     //useful for logging, might use the ctid
				InputPayload = payload
			};

			bool isValid = new SampleServices().PublishRequest( req );
			//Return the result
			return req.FormattedPayload;
		}

		/// <summary>
		/// Publish a credential using an input class
		/// An organization will have its data stored somewhere. The first step would be to have a process retrieve the information and send that data to a method to do the publishing.
		/// In this example:
		/// -	YourCredential would be defined by the organization
		///-	A process would be developed to read data from the organization data source( s) and populate the class
		///		o   Important: a CTID must be created in the data source and populated
		///-	The Publish method would be called with the credential data.
		///Steps:
		///		o Establishes the apiKey, and the CTID for the owning organization
		///		o   Instantiates the credential class the is part of the request class used by the API
		///		o   Maps input data to output
		///		o   Adds the OwnedBy property
		///		o A sample for adding AccreditedBY using just the CTID for The Higher Learning Commission
		///		o	( Add all applicable properties as needed)
		///		o Create the request class used by the API, and assign the Credential, and other properties
		///		o Serialize the request class into JSON
		///			The sample using the “Newtonsoft.Json” library
		///			JsonConvert.SerializeObject( myRequest);
		///		o Formats the HttpClient with the header, content
		///		o   Gets the desired publishing endpoint
		///		o   Calls the endpoint, and hopefully gets a successful result
		/// </summary>
		/// <param name="input"></param>
		/// <returns></returns>
		public string PublishFromInputClass( YourCredential input )
		{
			//Holds the result of the publish action
			var result = "";
			// Assign the api key - acquired from organization account of the organization doing the publishing
			var apiKey = SampleServices.GetMyApiKey();
			// This is the CTID of the organization that owns the data being published
			var organizationIdentifierFromAccountsSite = SampleServices.GetMyOrganizationCTID();

			var myData = new APIRequestResource
			{
				Name = input.Name,
				Description = input.Description,
				CredentialStatusType = input.CredentialStatusType,
				CredentialType = input.Type,
                InLanguage = new List<string>() { input.InLanguage },

                //*** the source data must assign a CTID and use for all transactions
                CTID = input.CTID,
				Keyword = input.Keyword
			};

            myData.ONET_Codes = input.OccupationCodes;

            //typically the ownedBy is the same as the CTID for the data owner
            myData.OwnedBy.Add( new OrganizationReference()
			{
				CTID = input.OwningOrganization.CTID
            } );

            //add offeredBy
            myData.OfferedBy.Add( new OrganizationReference()
            {
				//where a unique identifier like a Guid is being used, transform and prefix with "ce-"
                CTID = "ce-" + input.OwningOrganization.Guid.ToString()
            } );

            //==================== Quality Assurance Received ====================

            //CTID for Higher learning commission.
            myData.AccreditedBy.Add( new OrganizationReference()
			{
				CTID = "ce-541da30c-15dd-4ead-881b-729796024b8f"
			} );
			//Add organization that is not in the credential registry
			myData.AccreditedBy.Add( new OrganizationReference()
			{
				Type = "CredentialOrganization",
				Name = "Council on Social Work Education (CSWE)",
				SubjectWebpage = "https://www.cswe.org/",
				Description = "Founded in 1952, the Council on Social Work Education (CSWE) is the national association representing social work education in the United States."
			} );
			//add costs
			//Must be a valid CTDL cost type.
			// Example: Tuition, Application, AggregateCost, RoomOrResidency
			//see: https://credreg.net/ctdl/terms#CostType
			myData.EstimatedCost.Add( new CostProfile()
			{
				Description = "A required description of the cost profile",
				CostDetails = "https://example.com/t=loppCostProfile",
				Currency = "USD",
				CostItems = new List<CostProfileItem>()
				 {
					 new CostProfileItem()
					 {
						 DirectCostType="Application",
						 Price=100,
					 },
					 new CostProfileItem()
					 {
						 DirectCostType="Tuition",
						 Price=12999,
						 PaymentPattern="Full amount due at time of registration"
					 }
				 }
			} );

			//add occupations
			PopulateOccupations( myData );
			//industries
			PopulateIndustries( myData );
			//Programs
			PopulatePrograms( myData );
			//Financial Assistance
			FinancialAssistanceProfiles.PopulateSimpleFinancialAssistanceProfile( myData );

			//This holds the credential and the identifier (CTID) for the owning organization
			var myRequest = new APIRequest()
			{
				Credential = myData,
				DefaultLanguage = "en-US",
				PublishForOrganizationIdentifier = organizationIdentifierFromAccountsSite
			};
			//Serialize the credential request object
			//var payload = JsonConvert.SerializeObject( myRequest );
			//Preferably, use method that will exclude null/empty properties
			string payload = JsonConvert.SerializeObject( myRequest, SampleServices.GetJsonSettings() );
			//call the Assistant API
			result = new SampleServices().SimplePost( "credential", "publish", payload, apiKey );

			return result;
		}
		/// <summary>
		/// Possible Input Types
		/// - List of frameworks
		/// - list of occupation names
		/// - List of SOC codes
		///
		/// </summary>
		/// <param name="request"></param>
		public static void PopulateOccupations( Credential request )
		{
			request.OccupationType = new List<FrameworkItem>
			{

				//occupations from a framework like ONet - where the information is stored locally and can be included in publishing
				new FrameworkItem()
				{
					Framework = "https://www.onetcenter.org/taxonomy.html",
					FrameworkName = "Standard Occupational Classification",
					Name = "Information Security Analysts",
					TargetNode = "https://www.onetonline.org/link/summary/15-1122.00",
					CodedNotation = "15-1122.00",
					Description = "Plan, implement, upgrade, or monitor security measures for the protection of computer networks and information. May ensure appropriate security controls are in place that will safeguard digital files and vital electronic infrastructure. May respond to computer security breaches and viruses."
				},
				new FrameworkItem()
				{
					Framework = "https://www.onetcenter.org/taxonomy.html",
					FrameworkName = "Standard Occupational Classification",
					Name = "Computer Network Support Specialists",
					TargetNode = "https://www.onetonline.org/link/summary/15-1152.00",
					CodedNotation = "15-1152.00",
					Description = "Plan, implement, upgrade, or monitor security measures for the protection of computer networks and information. May ensure appropriate security controls are in place that will safeguard digital files and vital electronic infrastructure. May respond to computer security breaches and viruses."
				}
			};


			//Occupations not in a known framework, list of strings
			request.AlternativeOccupationType = new List<string>() { "Cybersecurity", "Forensic Scientist", "Forensic Anthropologist" };

			//O*Net helper - ALternately provided a list of O*Net codes. The Assistant API will validate the codes and format the output including the framework name and URL, the occupation, description, and code
			request.ONET_Codes = new List<string>() { "13-2099.01", "13-2052.00", "13-2061.00", "13-2051.00" };
		}

		/// <summary>
		/// Possible Input Types
		/// - List of frameworks
		/// - list of industry names
		/// - List of NAICS codes
		/// </summary>
		/// <param name="request"></param>
		public static void PopulateIndustries( Credential request )
		{
			request.IndustryType = new List<FrameworkItem>
			{

				//occupations from a framework like NAICS - where the information is stored locally and can be included in publishing
				new FrameworkItem()
				{
					Framework = "https://www.naics.com/",
					FrameworkName = "NAICS - North American Industry Classification System",
					Name = "National Security",
					TargetNode = "https://www.naics.com/naics-code-description/?code=928110",
					CodedNotation = "928110",
					Description = "This industry comprises government establishments of the Armed Forces, including the National Guard, primarily engaged in national security and related activities."
				},
				new FrameworkItem()
				{
					Framework = "https://www.naics.com/",
					FrameworkName = "NAICS - North American Industry Classification System",
					Name = "Regulation and Administration of Transportation Programs",
					TargetNode = "https://www.naics.com/naics-code-description/?code=926120",
					CodedNotation = "926120",
					Description = "This industry comprises government establishments primarily engaged in the administration, regulation, licensing, planning, inspection, and investigation of transportation services and facilities. Included in this industry are government establishments responsible for motor vehicle and operator licensing, the Coast Guard (except the Coast Guard Academy), and parking authorities."
				}
			};


			//Industries not in a known framework, list of strings
			request.AlternativeIndustryType = new List<string>() { "Cybersecurity", "Forensic Science", "Forensic Anthropology" };

			//NAICS helper - ALternately provided a list of NAICS codes. The Assistant API will validate the codes and format the output including the framework name and URL, the name, description, and code
			request.Naics = new List<string>() { "9271", "927110", "9281", "928110" };
		}

		/// <summary>
		/// Possible Input Types
		/// - List of frameworks
		/// - list of program names
		/// - List of CIP codes
		/// </summary>
		/// <param name="request"></param>
		public static void PopulatePrograms( Credential request )
		{
			request.InstructionalProgramType = new List<FrameworkItem>
			{

				//programs from a framework like Classification of Instructional Program - where the information is stored locally and can be included in publishing
				new FrameworkItem()
				{
					Framework = "https://nces.ed.gov/ipeds/cipcode/search.aspx?y=56",
					FrameworkName = "Classification of Instructional Program",
					Name = "Medieval and Renaissance Studies",
					TargetNode = "https://nces.ed.gov/ipeds/cipcode/cipdetail.aspx?y=56&cip=30.1301",
					CodedNotation = "30.1301",
					Description = "A program that focuses on the  study of the Medieval and/or Renaissance periods in European and circum-Mediterranean history from the perspective of various disciplines in the humanities and social sciences, including history and archeology, as well as studies of period art and music."
				},
				new FrameworkItem()
				{
					Framework = "https://nces.ed.gov/ipeds/cipcode/search.aspx?y=56",
					FrameworkName = "Classification of Instructional Program",
					Name = "Classical, Ancient Mediterranean and Near Eastern Studies and Archaeology",
					TargetNode = "https://nces.ed.gov/ipeds/cipcode/cipdetail.aspx?y=56&cip=30.2202",
					CodedNotation = "30.2202",
					Description = "A program that focuses on the cultures, environment, and history of the ancient Near East, Europe, and the Mediterranean basin from the perspective of the humanities and social sciences, including archaeology."
				}
			};


			//programs not in a known framework, list of strings
			request.AlternativeInstructionalProgramType = new List<string>() { "Cybersecurity 101", "Forensic Science 120", "Forensic Anthropology 400" };

			//CIP code helper - ALternately provided a list of CIP codes. The Assistant API will validate the codes and format the output including the framework name and URL, the name, description, and code
			request.CIP_Codes = new List<string>() { "31.0504", "31.0505", "31.0599", "31.9999" };
		}


	}
Credential Connections
Connections between credentials can be published using properties such as:
- isPreparationFor
- preparationFrom
- isAdvancedStandingFor
- advancedStandingFrom
- isRequiredFor
- isRecommendedFor
Below is an example of a connection to a credential for which the current credential will prepare a student:
            var isPreparationFor = new Connections
            {
                Description = "This certification will prepare a student for the target credential",
                TargetCredential = new List<EntityReference>()
                {
                    // The referenced credential could be for an external credential, not known to be in the credential registry
                    new EntityReference()
                    {
                        Type="MasterDegree",
                        Name="Cybersecurity Technology Master's Degree  ",
                        Description="A helpful description",
                        SubjectWebpage="https://example.org?t=masters"
                    }
                }
            };
            myData.IsPreparationFor.Add( isPreparationFor );

            // Add credential that prepares for this credential.
            var preparationFrom = new Connections
            {
                Description = "This credential will prepare a student for this credential",
                TargetCredential = new List<EntityReference>()
                {
                    // The referenced credential is known to be in the credential registry, so only the CTID need be provided
                    new EntityReference()
                    {
                        CTID="ce-40c3e860-5034-4375-80e8-f7455ff86a48"
                    }
                }
            };
            myData.PreparationFrom.Add( preparationFrom );
Summary
As you can see, the Registry Assistant API greatly reduces the amount of data your system needs to carefully construct by abstracting away many of the intricacies of JSON-LD. However, it is very useful to learn about and understand JSON-LD for the benefit of your own system and to aid in any further development or debugging or usage of the data you get back from the Registry Assistant API.
This section has introduced publishing credentials with the more common properties. There are a lot of other properties that may be published for a credential, including:
- Provide details such as required or recommended criteria using Condition Profiles
- Provide information on estimated costs with Cost Profiles
- Provide information on available financial assistance using Financial Assistance Profiles
- Provide estimated duration to achieve a credential using Duration Profiles
- Coming soon, information on publishing outcome data, using AggregateDataProfile. See sample code for publishing a credential with outcome data.
Introduction
The Assessment Profile class represents a description of a specific assessment related in some way to a credential. An assessment can be written, performance, and/or artifact-based. Generally, you only need to describe assessments that are significant and/or standalone (assessments such as exams, tests, and quizzes included in a learning opportunity do not need to be described unless there is a good reason to do so). For more information, review the CTDL Guide.
References
- Assessment class on credreg.net
- See github for the Assessment Request class used by the Assistant API.
- See more detailed ready to run examples in github.
To format or publish an Assessment, use the following endpoints:
Format Data (only)
https://sandbox.credentialengine.org/assistant/assessment/format
Publish Data (automatically formats first)
https://sandbox.credentialengine.org/assistant/assessment/publish
Required Properties
The Registry Assistant API uses a simplified version of the Assessment Profile class to convey the data for an assessment. Refer to the Minimum Data Policy for the required properties for the Assessment class.
Publishing a Basic Record
Your system will need to output the data above in JSON format. For example:
Recommended Properties
In order to maximize the utility of the Assessment Profile data in the Registry, we recommend you also include data for the following properties. See the recommended properties for the Assessment Profile
Sample
To publish the data, you will need to wrap it in an object that also contains a PublishForOrganizationIdentifier property. Naturally, this is where you specify the CTID of the owning organization (from the accounts site). The assessment data itself will go in an Assessment property:
Sample assessment wrapper:
Below is some example code to publish a simple assessment object, see github for the complete Assessment Request class.
Sample assessment publishing code (C#)
            using System;
            using System.Collections.Generic;
            using System.Net.Http;
            using System.Net.Http.Headers;
            using System.Text;
            using Newtonsoft.Json;
            using RA.Models.Input;
            using MyAssessment = RA.Models.Input.Assessment;

            namespace Publish_Test
            {
                public class AssessmentPublisher
                {
                    public string PublishSimpleRecord()
                    {
                        // Holds the result of the publish action
                        var result = "";
                        // Assign the api key - acquired from organization account of the organization doing the publishing
                        var apiKey = "xxxxxxxx-xxxx-xxxx-xxxx-xxxxxxxxxxxx";
                        // This is the CTID of the organization that owns the data being published
                        var organizationIdentifierFromAccountsSite = "ce-xxxxxxxx-xxxx-xxxx-xxxx-xxxxxxxxxxxx";
                        // Assign a CTID for the entity being published and keep track of it
                        var myCredCTID = "ce-" + Guid.NewGuid().ToString();

                        // A simple Assessment object-see below for sample class definition
                        var myData = new MyAssessment()
                        {
                            Name = "My Assessment Name",
                            Description = "This is some required text that describes my Assessment.",
                            CTID = myCredCTID,
                            SubjectWebpage = "https:/example.org/Assessment/1234",
                            InLanguage = new List<string>() { "en-US" },
                            Keyword = new List<string>() { "Assessments", "Technical Information"},
                            AssessmentMethodType = new List<string>() { "assessMethod:Exam", "assessMethod:Performance" },
                            Requires = new List<ConditionProfile>()
                            {
                                new ConditionProfile()
                                {
                                    Description = "My requirements for this Assessment",
                                    Condition = new List<string>() { "Condition One", "Condition Two", "Condition Three" }
                                }
                            }
                        };

                        //An assessment must have at one of AvailableOnlineAt, AvailabilityListing or AvailableAt
                        myData.AvailableOnlineAt = new List<string>() { "https://example.com/availableOnlineAt" };
                        myData.AvailabilityListing = new List<string>() { "https://example.com/AvailabilityListing" };
                        //typically the ownedBy is the same as the CTID for the data owner
                        myData.OwnedBy.Add( new OrganizationReference()
                        {
                            CTID = organizationIdentifierFromAccountsSite
                        } );
                        //This holds the Assessment and the identifier (CTID) for the owning organization
                        var myRequest = new AssessmentRequest()
                        {
                            Assessment = myData,
                            DefaultLanguage = "en-US",
                            PublishForOrganizationIdentifier = organizationIdentifierFromAccountsSite
                        };

                        //Serialize the request object
                        var payload = JsonConvert.SerializeObject( myRequest );
                        // Use HttpClient to perform the publish
                        using ( var client = new HttpClient() )
                        {
                            // Accept JSON
                            client.DefaultRequestHeaders.Accept.Add( new MediaTypeWithQualityHeaderValue( "application / json" ) );
                            // Add API Key (for a publish request)
                            client.DefaultRequestHeaders.Add( "Authorization", "ApiToken " + apiKey );
                            // Format the json as content
                            var content = new StringContent( payload, Encoding.UTF8, "application / json" );
                            // The endpoint to publish to
                            var publishEndpoint = "https://sandbox.credentialengine.org/assistant/Assessment/publish/";
                            // Perform the actual publish action and return the result
                            result = client.PostAsync( publishEndpoint, content ).Result.Content.ReadAsStringAsync().Result;
                        };
                        return result;
                    }
                }//class
            }
Introduction
The Learning Opportunity Profile is used to describe learning opportunities. In CTDL, a learning opportunity is a blanket term used to describe any significant educational experience, whether it is a one-day training class, a full degree program, or anything in between. For more information, review the CTDL Guide.
There are two subclasses of Learning Opportunity Profile: .
- Learning Program Set of learning opportunities that leads to an outcome, usually a credential like a degree or certificate.
- Course Single structured sequence of one or more educational activities that aims to develop a prescribed set of competencies of learners.
Course is distinct from Program, which aggregates several courses.
Currently the properties are identical for the three classes, except the property School Courses for the Exchange of Data code (SCED) which is only valid for Course.
References
- Learning Opportunity class on credreg.net
- Learning Program class on credreg.net
- Course class on credreg.net
- See github for the Learning Opportunity Request class used by the Assistant API. As for the CTDL classes, the Learning opportunity related endpoints all use the same input class.
- See more detailed ready to run examples in github. There is one method for each of publishing a learning opportunity, a learning program and a course.
To format or publish a Learning Opportunity, Learning Program, or Course use one of the following endpoints:
Format Data (only)
https://sandbox.credentialengine.org/assistant/learningopportunity/format
https://sandbox.credentialengine.org/assistant/learningprogram/format
https://sandbox.credentialengine.org/assistant/course/format
Publish Data (automatically formats first)
https://sandbox.credentialengine.org/assistant/learningopportunity/publish
https://sandbox.credentialengine.org/assistant/learningprogram/publish
https://sandbox.credentialengine.org/assistant/course/publish
Required Properties
The Registry Assistant API uses a simplified version of the Learning Opportunity Profile class to convey the data for a learning opportunity. Refer to the Minimum Data Policy for the required properties for the Learning Opportunity class.
Publishing a Basic Record
Your system will need to output the data above in JSON format. For example:
Recommended Properties
In order to maximize the utility of the Learning Opportunity Profile data in the Registry, we recommend you also include data for the following properties. See the recommended properties for the Learning Opportunity Profile.
Sample
To publish the data, you will need to wrap it in an object that also contains a PublishForOrganizationIdentifier property. Naturally, this is where you specify the CTID of the owning organization (from the accounts site). The learning opportunity data itself will go in an LearningOpportunity property:
Sample learning opportunity wrapper:
Below is some example code to publish a simple learning opportunity object, see github for the complete Learning Opportunity Request class.
Sample learning opportunity publishing code (C#)
	public class PublishLearningOpportunityTypes
	{
		/// <summary>
		/// The Learning Opportunity, Course and Learning Program all use the same input request class.
		/// Oct/2021 Currently the only difference is that SCED is only valid for a Course
		/// There is a separate endpoint for learningopportunity:
		///		/assistant/learningopportunity/publish
		/// </summary>
		/// <returns></returns>
		public string PublishLearningOpportunity( string requestType = "format" )
		{
			//Holds the result of the publish action
			var result = "";
			//assign the api key - acquired from organization account of the organization doing the publishing
			var apiKey = SampleServices.GetMyApiKey();
			if ( string.IsNullOrWhiteSpace( apiKey ) )
			{
				//ensure you have added your apiKey to the app.config
			}
			var organizationIdentifierFromAccountsSite = SampleServices.GetMyOrganizationCTID();
			if ( string.IsNullOrWhiteSpace( organizationIdentifierFromAccountsSite ) )
			{
				//ensure you have added your organization account CTID to the app.config
			}//

			//Assign a CTID for the entity being published and keep track of it
			var myCTID = "ce-" + Guid.NewGuid().ToString().ToLower();
			//typically would have been stored prior to retrieving for publishing
			//DataService.SaveLearningOpportunityCTID( myCTID );

			//Populate the learning opportunity object
			var myData = new LearningOpportunity()
			{
				Name = "My Learning Opportunity Name",
				Description = "This is some text that describes my learning opportunity.",
				CTID = myCTID,
				LifeCycleStatusType="Active",
				SubjectWebpage = "https://example.org/?t=learningopportunity1234",
				Keyword = new List<string>() { "Credentials", "Technical Information", "Credential Registry" },
				LearningMethodType = new List<string>() { "learnMethod:Lecture", "learnMethod:Laboratory" },
				DeliveryType = new List<string>() { "BlendedLearning" },
				Requires = new List<ConditionProfile>()
				{
					new ConditionProfile()
					{
						Description = "My Requirements",
						Condition = new List<string>() { "Condition One", "Condition Two", "Condition Three" }
					}
				}
			};
			//add one of ownedBy or offeredBy, or both
			myData.OwnedBy.Add( new OrganizationReference()
			{
				CTID = organizationIdentifierFromAccountsSite
			} );
			myData.OfferedBy.Add( new OrganizationReference()
			{
				CTID = organizationIdentifierFromAccountsSite
			} );
			//
			myData.AvailableAt = new List<Place>()
			{
				new Place()
				{
					Address1="One University Plaza",
					City="Springfield",
					PostalCode="62703",
					AddressRegion="IL",
					Country="United States"
				}
			};
			myData.Identifier.Add( new IdentifierValue()
			{
				IdentifierTypeName = "Some Identifer For Resource",
				IdentifierValueCode = "Catalog: xyz1234 "        //Alphanumeric string identifier of the entity
			} );
			myData.VersionIdentifier.Add( new IdentifierValue()
			{
				IdentifierTypeName = "MyVersion",
				IdentifierValueCode = "2023-09-01"        //Alphanumeric string identifier of the entity
			} );
			//								Teaches competencies
			//	Where a learning opportunity teaches one or more competencies, they can be published in the Teaches property
			//	List<CredentialAlignmentObject> Teaches
			//  Ideally, the competencies would be part of a competency framework that could be published to the registry.
			//  If the competencies are 'free floating' they can be published just using the name and an optional description
			myData.Teaches = new List<CredentialAlignmentObject>()
            {
                new CredentialAlignmentObject()
                {
                    TargetNodeName="Upon successful completion of this course, the student will be able to recognize causes and effects of chemically induced illness"
                },
                new CredentialAlignmentObject()
                {
                    TargetNodeName="And understand the role proper nutrition plays in avoiding and/or mitigating the damage these chemicals cause"
                },
                new CredentialAlignmentObject()
                {
                    TargetNodeName="Know how to find alternative solutions to chemicals",
					TargetNodeDescription = "An important description providing more details about this competency"
                }
            };
			//if the competencies are from a published framework, additional properties can be included
			myData.Teaches.Add( new CredentialAlignmentObject()
			{
                Framework= "https://credentialengineregistry.org/resources/ce-6fdd56d3-0214-4a67-b0c4-bb4c16ce9a13",
				TargetNode= "https://credentialengineregistry.org/resources/ce-a3246950-f245-4da5-9fa1-ee697db66d7f",
				FrameworkName ="SNHU Competency Framework",
				TargetNodeName = "Balance competing priorities in making decisions for your team that support organizational goals",
				CodedNotation="balance101"
			} );

            //A competency framework can contain many competencies. If a learning opportunity teaches all competencies in a framework, the helper property: TeachesCompetencyFramework may be used for efficiency. Rather than listing 10, 50, 500 competencies, only the CTID for the competency framework needs to be provided. The API will validate the framework, then fetch all competencies in the framework and populate the Teaches property.
            //NOTE: The framework must have already been published to the credential registry.
            myData.TeachesCompetencyFramework = new List<string>()
			{
                "ce-6fdd56d3-0214-4a67-b0c4-bb4c16ce9a13"
            };

            //
            //A learning opportunity is usually connected to a credential. It is useful to provide the relationships where possible
            //The connection can be made using a Required condition profile in the Credential or using a RequiredFor from the learning opportunity

            myData.IsRequiredFor = new List<ConditionProfile>()
			{
				new ConditionProfile()
				{
					Description="This learning opportunity is required for the 'Acme Credential'.",
					TargetCredential = new List<EntityReference>()
					{
						new EntityReference()
						{
							Type="Certificate", //optional, but helpful
							CTID="ce-f5d9bf2a-d930-4e77-a69b-85788943851c"
						}
					}
				},
				//if the credential is not in the registry (often where the owner is not the same as the owner of the learning opportunity), or the publisher doesn't have the CTID, a full EntityReference can be provided.
				new ConditionProfile()
				{
					Description="This learning opportunity is required for the 'Third Party Credential'.",
					TargetCredential = new List<EntityReference>()
					{
						new EntityReference()
						{
							Type="Certificate", //required here
							Name="Third Party Credential",
							SubjectWebpage="https://example.com?t=thisCredential",
							Description="Description of this credential"
						}
					}
				}
			};
			//duration for a program that is exactly 9 months
			myData.EstimatedDuration = new List<DurationProfile>()
			{
				new DurationProfile()
				{
					ExactDuration = new DurationItem()
					{
						Months=9
					}
				}
			};
			//add occupationType, IndustryType, InstructionalProgram
            List<string> alternateTypes = new List<string>();
            List<string> codes = new List<string>();
            //====================	OCCUPATIONS ====================
            myData.OccupationType = OccupationsHelper.PopulateOccupations( ref alternateTypes, ref codes );
            if (alternateTypes != null && alternateTypes.Count > 0)
                myData.AlternativeOccupationType = alternateTypes;
            if (codes != null && codes.Count > 0)
                myData.ONET_Codes = codes;
            //====================	INDUSTRIES	====================
            myData.IndustryType = Industries.PopulateIndustries( ref alternateTypes, ref codes );
            if (alternateTypes != null && alternateTypes.Count > 0)
                myData.AlternativeIndustryType = alternateTypes;
            if (codes != null && codes.Count > 0)
                myData.NaicsList = codes;
            //====================	INSTRUCTIONAL PROGRAMS	====================
            myData.InstructionalProgramType = InstructionalPrograms.PopulatePrograms( ref alternateTypes, ref codes );
            if (alternateTypes != null && alternateTypes.Count > 0)
                myData.AlternativeInstructionalProgramType = alternateTypes;
            if (codes != null && codes.Count > 0)
                myData.CIP_Codes = codes;

            //add costs
            //Must be a valid CTDL cost type.
            // Example: Tuition, Application, AggregateCost, RoomOrResidency
            //see: https://credreg.net/ctdl/terms#CostType
            //Description and CostDetails are required properties
            myData.EstimatedCost.Add( new CostProfile()
			{
				Description = "A required description of the cost profile",
				CostDetails = "https://example.com/t=loppCostProfile",
				Currency="USD",
				CostItems = new List<CostProfileItem>()
				 {
					 new CostProfileItem()
					 {
						 DirectCostType="Application",
						 Price=100,
					 },
					 new CostProfileItem()
					 {
						 DirectCostType="Tuition",
						 Price=12999,
						 PaymentPattern="Full amount due at time of registration"
					 }
				 }
			} );

			//Add organization that is not in the credential registry
			myData.AccreditedBy.Add( new OrganizationReference()
			{
				Type = "ceterms:QACredentialOrganization",
				Name = "Council on Social Work Education (CSWE)",
				SubjectWebpage = "https://www.cswe.org/",
				Description = "Founded in 1952, the Council on Social Work Education (CSWE) is the national association representing social work education in the United States."
			} );

            //NEW for use with registered apprenticeships
            //	Add organization that is not in the credential registry
            //	NOTE: an open item is defining any rules as to when this can be used. One example could be the requirement for learning types like learnMethod:WorkBased
            myData.RegisteredBy.Add( new OrganizationReference()
            {
                Type = "ceterms:QACredentialOrganization",
                Name = "United States Department of Labor, Employment and Training Administration, Office of Apprenticeship",
                SubjectWebpage = "https://www.dol.gov/agencies/eta/apprenticeship"
            } );

            //This holds the learning opportunity and the identifier (CTID) for the owning organization
            var myRequest = new LearningOpportunityRequest()
			{
				LearningOpportunity = myData,
				DefaultLanguage = "en-US",
				PublishForOrganizationIdentifier = organizationIdentifierFromAccountsSite
			};

			//Serialize the credential request object
			//var payload = JsonConvert.SerializeObject( myRequest );
			//Preferably, use method that will exclude null/empty properties
			string payload = JsonConvert.SerializeObject( myRequest, SampleServices.GetJsonSettings() );

			//call the Assistant API
			result = new SampleServices().SimplePost( "learningopportunity", "publish", payload, apiKey );

			//Return the result
			return result;
		}

		/// <summary>
		/// The Course request uses the same request class as Learning Opportunity, and Learning Program.
		/// There is a separate endpoint for course:
		///		/assistant/course/publish
		/// </summary>
		/// <returns></returns>
		public string PublishCourse( string requestType = "format" )
		{
			//Holds the result of the publish action
			var result = "";
			// Assign the api key - acquired from organization account of the organization doing the publishing
			var apiKey = SampleServices.GetMyApiKey();
			if ( string.IsNullOrWhiteSpace( apiKey ) )
			{
				//ensure you have added your apiKey to the app.config
			}

			// This is the CTID of the organization that owns the data being published
			var organizationIdentifierFromAccountsSite = SampleServices.GetMyOrganizationCTID();
			if ( string.IsNullOrWhiteSpace( organizationIdentifierFromAccountsSite ) )
			{
				//ensure you have added your organization account CTID to the app.config
			}//

			//Assign a CTID for the entity being published and keep track of it
			var myCTID = "ce-aaa5d617-f00d-4e94-89af-ad77e9f26389";// "ce-" + Guid.NewGuid().ToString().ToLower();
			//typically would have been stored prior to retrieving for publishing
			//DataService.SaveLearningOpportunityCTID( myCTID );

			//Populate the learning opportunity/Course object
			var myData = new LearningOpportunity()
			{
				Name = "My Course Name",
				Description = "This is some text that describes my Course.",
				CTID = myCTID,
				LifeCycleStatusType = "Active",
				SubjectWebpage = "https://example.org/?t=course1234",
				Keyword = new List<string>() { "Credentials", "Technical Information", "Credential Registry" },
				LearningMethodType = new List<string>() { "learnMethod:Lecture", "learnMethod:Laboratory" },
				DeliveryType = new List<string>() { "BlendedDelivery" },
				Requires = new List<ConditionProfile>()
				{
					new ConditionProfile()
					{
						Description = "My Requirements",
						Condition = new List<string>() { "Condition One", "Condition Two", "Condition Three" }
					}
				}
			};
			//School Courses for the Exchange of Data
			myData.SCED = "100-101";
			//add one of ownedBy or offeredBy, or both
			myData.OwnedBy.Add( new OrganizationReference()
			{
				CTID = organizationIdentifierFromAccountsSite
			} );
			myData.OfferedBy.Add( new OrganizationReference()
			{
				CTID = organizationIdentifierFromAccountsSite
			} );
			//
			myData.AvailableAt = new List<Place>()
			{
				new Place()
				{
					Address1="One University Plaza",
					City="Springfield",
					PostalCode="62703",
					AddressRegion="IL",
					Country="United States"
				}
			};
			//
			//The connection can be made using a Required condition profile in the Credential or using a RequiredFor from the Course

			myData.IsRequiredFor = new List<ConditionProfile>()
			{
				new ConditionProfile()
				{
					Description="This Course is required for the 'Acme Credential'.",
					TargetCredential = new List<EntityReference>()
					{
						new EntityReference()
						{
							Type="Certificate", //optional, but helpful
							CTID="ce-f5d9bf2a-d930-4e77-a69b-85788943851c"
						}
					}
				},
				//if the credential is not in the registry (often where the owner is not the same as the owner of the Course), or the publisher doesn't have the CTID, a full EntityReference can be provided.
				new ConditionProfile()
				{
					Description="This Course is required for the 'Third Party Credential'.",
					TargetCredential = new List<EntityReference>()
					{
						new EntityReference()
						{
							Type="Certificate", //required here
							Name="Third Party Credential",
							SubjectWebpage="https://example.com?t=thisCredential",
							Description="Description of this credential"
						}
					}
				}
			};
			//duration for a program that is exactly 9 months
			myData.EstimatedDuration = new List<DurationProfile>()
			{
				new DurationProfile()
				{
					ExactDuration = new DurationItem()
					{
						Months=9
					}
				}
			};
			//add costs
			//Must be a valid CTDL cost type.
			// Example: Tuition, Application, AggregateCost, RoomOrResidency
			//see: https://credreg.net/ctdl/terms#CostType
			//Description and CostDetails are required properties
			myData.EstimatedCost.Add( new CostProfile()
			{
				Description = "A required description of the cost profile",
				CostDetails = "https://example.com/t=loppCostProfile",
				Currency = "USD",
				CostItems = new List<CostProfileItem>()
				 {
					 new CostProfileItem()
					 {
						 DirectCostType="Application",
						 Price=100,
					 },
					 new CostProfileItem()
					 {
						 DirectCostType="Tuition",
						 Price=12999,
						 PaymentPattern="Full amount due at time of registration"
					 }
				 }
			} );

			//Add organization that is not in the credential registry
			myData.AccreditedBy.Add( new OrganizationReference()
			{
				Type = "ceterms:QACredentialOrganization", //should not be a requirement?
				Name = "Council on Social Work Education (CSWE)",
				SubjectWebpage = "https://www.cswe.org/",
				Description = "Founded in 1952, the Council on Social Work Education (CSWE) is the national association representing social work education in the United States."
			} );

			//This holds the resource being published and the identifier (CTID) for the owning organization
			var myRequest = new LearningOpportunityRequest()
			{
				LearningOpportunity = myData,
				DefaultLanguage = "en-US",
				PublishForOrganizationIdentifier = organizationIdentifierFromAccountsSite
			};

			//Serialize the credential request object
			//var payload = JsonConvert.SerializeObject( myRequest );
			//Preferably, use method that will exclude null/empty properties
			string payload = JsonConvert.SerializeObject( myRequest, SampleServices.GetJsonSettings() );

			//call the Assistant API
			SampleServices.AssistantRequestHelper req = new SampleServices.AssistantRequestHelper()
			{
				EndpointType = "course",
				RequestType = requestType,
				OrganizationApiKey = apiKey,
				CTID = myRequest.LearningOpportunity.CTID.ToLower(),   //added here for logging
				Identifier = "testing",     //useful for logging, might use the ctid
				InputPayload = payload
			};

			bool isValid = new SampleServices().PublishRequest( req );
			//Return the result
			return req.FormattedPayload;

		}


		/// <summary>
		/// The Learning Program request uses the same request class as Learning Opportunity, and Course.
		/// There is a separate endpoint for Learning Program:
		///		/assistant/LearningProgram/publish
		/// </summary>
		/// <returns></returns>
		public string PublishLearningProgram( string requestType = "format" )
		{
			//Holds the result of the publish action
			var result = "";
			//assign the api key - acquired from organization account of the organization doing the publishing
			var apiKey = SampleServices.GetMyApiKey();
			if ( string.IsNullOrWhiteSpace( apiKey ) )
			{
				//ensure you have added your apiKey to the app.config
			}
			var organizationIdentifierFromAccountsSite = SampleServices.GetMyOrganizationCTID();
			if ( string.IsNullOrWhiteSpace( organizationIdentifierFromAccountsSite ) )
			{
				//ensure you have added your organization account CTID to the app.config
			}//

			//Assign a CTID for the entity being published and keep track of it
			var myCTID = "ce-" + Guid.NewGuid().ToString().ToLower();
			//typically would have been stored prior to retrieving for publishing
			//DataService.SaveLearningOpportunityCTID( myCTID );

			//Populate the learning opportunity/Learning Program object
			var myData = new LearningOpportunity()
			{
				Name = "My Learning Program Name",
				Description = "This is some text that describes my Learning Program.",
				CTID = myCTID,
				LifeCycleStatusType = "Active",
				SubjectWebpage = "https://example.org/?t=LearningProgram1234",
				Keyword = new List<string>() { "Credentials", "Technical Information", "Credential Registry" },
				LearningMethodType = new List<string>() { "learnMethod:Lecture", "learnMethod:Laboratory" },
				DeliveryType = new List<string>() { "BlendedLearning" },
				Requires = new List<ConditionProfile>()
				{
					new ConditionProfile()
					{
						Description = "My Requirements",
						Condition = new List<string>() { "Condition One", "Condition Two", "Condition Three" }
					}
				}
			};
			//add one of ownedBy or offeredBy, or both
			myData.OwnedBy.Add( new OrganizationReference()
			{
				CTID = organizationIdentifierFromAccountsSite
			} );
			myData.OfferedBy.Add( new OrganizationReference()
			{
				CTID = organizationIdentifierFromAccountsSite
			} );
			//
			myData.AvailableAt = new List<Place>()
			{
				new Place()
				{
					Address1="One University Plaza",
					City="Springfield",
					PostalCode="62703",
					AddressRegion="IL",
					Country="United States"
				}
			};
			//
			//A Learning Program *must* be connected to a credential in order to be published.
			//The connection can be made using a Required condition profile in the Credential or using a RequiredFor from the Learning Program

			myData.IsRequiredFor = new List<ConditionProfile>()
			{
				new ConditionProfile()
				{
					Description="This Learning Program is required for the 'Acme Credential'.",
					TargetCredential = new List<EntityReference>()
					{
						new EntityReference()
						{
							Type="Certificate", //optional, but helpful
							CTID="ce-f5d9bf2a-d930-4e77-a69b-85788943851c"
						}
					}
				},
				//if the credential is not in the registry (often where the owner is not the same as the owner of the Learning Program), or the publisher doesn't have the CTID, a full EntityReference can be provided.
				new ConditionProfile()
				{
					Description="This Learning Program is required for the 'Third Party Credential'.",
					TargetCredential = new List<EntityReference>()
					{
						new EntityReference()
						{
							Type="Certificate", //required here
							Name="Third Party Credential",
							SubjectWebpage="https://example.com?t=thisCredential",
							Description="Description of this credential"
						}
					}
				}
			};
			//duration for a program that is exactly 9 months
			myData.EstimatedDuration = new List<DurationProfile>()
			{
				new DurationProfile()
				{
					ExactDuration = new DurationItem()
					{
						Months=9
					}
				}
			};
			//add costs
			//Must be a valid CTDL cost type.
			// Example: Tuition, Application, AggregateCost, RoomOrResidency
			//see: https://credreg.net/ctdl/terms#CostType
			//Description and CostDetails are required properties
			myData.EstimatedCost.Add( new CostProfile()
			{
				Description = "A required description of the cost profile",
				CostDetails = "https://example.com/t=loppCostProfile",
				Currency = "USD",
				CostItems = new List<CostProfileItem>()
				 {
					 new CostProfileItem()
					 {
						 DirectCostType="Application",
						 Price=100,
					 },
					 new CostProfileItem()
					 {
						 DirectCostType="Tuition",
						 Price=12999,
						 PaymentPattern="Full amount due at time of registration"
					 }
				 }
			} );

			//Add organization that is not in the credential registry
			myData.AccreditedBy.Add( new OrganizationReference()
			{
				Type = "ceterms:QACredentialOrganization",
				Name = "Council on Social Work Education (CSWE)",
				SubjectWebpage = "https://www.cswe.org/",
				Description = "Founded in 1952, the Council on Social Work Education (CSWE) is the national association representing social work education in the United States."
			} );

			//This holds the Learning Program and the identifier (CTID) for the owning organization
			var myRequest = new LearningOpportunityRequest()
			{
				LearningOpportunity = myData,
				DefaultLanguage = "en-US",
				PublishForOrganizationIdentifier = organizationIdentifierFromAccountsSite
			};

			//Serialize the credential request object
			//var payload = JsonConvert.SerializeObject( myRequest );
			//Preferably, use method that will exclude null/empty properties
			string payload = JsonConvert.SerializeObject( myRequest, SampleServices.GetJsonSettings() );
			//call the Assistant API
			SampleServices.AssistantRequestHelper req = new SampleServices.AssistantRequestHelper()
			{
				EndpointType = "learningProgram",
				RequestType = requestType,
				OrganizationApiKey = apiKey,
				CTID = myRequest.LearningOpportunity.CTID.ToLower(),   //added here for logging
				Identifier = "testing",     //useful for logging, might use the ctid
				InputPayload = payload
			};

			bool isValid = new SampleServices().PublishRequest( req );
			//Return the result
			return req.FormattedPayload;

		}

	};
Introduction
The Cost Manifest Profile class represents a description of a specific Cost Manifest for an organization. Generally, you only need to describe Cost Manifests that are used for many credentials, assessments or learning opportunities. Use of cost manifests will remove or reduce the reference to costs in many entities. For more information, review the CTDL Guide.
References
- CostManifest class on credreg.net
- See github for the CostManifest Request class used by the Assistant API.
- See more detailed ready to run examples in github.
To format or publish an Cost Manifest, use the following endpoints:
Format Data (only)
https://sandbox.credentialengine.org/assistant/CostManifest/format
Publish Data (automatically formats first)
https://sandbox.credentialengine.org/assistant/CostManifest/publish
Required Properties
The Registry Assistant API uses a simplified version of the Cost Manifest Profile class to convey the data for an Cost Manifest. Refer to the Minimum Data Policy for the required properties for this class.
Publishing a Basic Record
Your system will need to output the data above in JSON format. For example:
Recommended Properties
In order to maximize the utility of the Cost Manifest Profile data in the Registry, we recommend you also include data for the following properties:
Sample
To publish the data, you will need to wrap it in an object that also contains a PublishForOrganizationIdentifier property. Naturally, this is where you specify the CTID of the owning organization (from the accounts site). The cost manifest data itself will go in an CostManifest property:
Sample cost manifest wrapper:
Below is some example code to publish a simple cost manifest object:
Sample cost manifest wrapper, see github for the complete Cost Manifest Request class.
            using System;
            using System.Collections.Generic;
            using System.Text;
            using System.Net.Http;
            using System.Net.Http.Headers;
            using Newtonsoft.Json;
            using RA.Models.Input;

            namespace RA.SamplesForDocumentation
            {
                public class PublishCostManifest
                {
                    public string PublishSimpleRecord()
                    {
                        //Holds the result of the publish action
                        var result = "";
                        //assign the api key - acquired from organization account of the organization doing the publishing
                        var apiKey = SampleServices.GetMyApiKey();
                        // This is the CTID of the organization that owns the data being published
                        var organizationIdentifierFromAccountsSite = SampleServices.GetMyOrganizationCTID();

                        //Assign a CTID for the entity being published and keep track of it
                        var myCTID = "ce-" + Guid.NewGuid().ToString().ToLower();
                        //DataService.SaveCostManifestCTID( myCTID );
                        //provide the ctid of the organization that 'owns' this cost manifest.
                        var myOrgCTID = "ce-" + Guid.NewGuid().ToString().ToLower();
                        //A simple CostManifest object - see below for sample class definition
                        var myData = new CostManifest()
                        {
                            Name = "My CostManifest Name",
                            Description = "This is some required text that describes my CostManifest.",
                            CTID = myCTID,
                            CostDetails = "https:/example.org/CostManifest/1234",
                            CostManifestOf = new OrganizationReference()
                            {
                                CTID = myOrgCTID
                            }
                        };
                        //add a cost profile with cost profile item
                        CostProfile cp = new CostProfile()
                        {
                            Name = "My Cost Profile",
                            Description = "Required description of a cost profile.",
                            Currency = "USD",
                            StartDate = "2017-09-01",
                            Condition = new List<string>() { "Condition One", "Condition Two", "Condition Three" }
                        };
                        //DirectCostType uses concepts from https://credreg.net/ctdl/terms/estimatedCost#CostType
                        cp.CostItems.Add( new CostProfileItem()
                        {
                            Price = 99.99M,
                            PaymentPattern = "yearly",
                            DirectCostType = "costType:Application"
                        } );
                        cp.CostItems.Add( new CostProfileItem()
                        {
                            Price = 19999M,
                            PaymentPattern = "yearly",
                            DirectCostType = "costType:Tuition"
                        } );
                        myData.EstimatedCost.Add( cp );

                        //This holds the CostManifest and the identifier (CTID) for the owning organization
                        var myRequest = new CostManifestRequest()
                        {
                            CostManifest = myData,
                            DefaultLanguage = "en-US",
                            PublishForOrganizationIdentifier = organizationIdentifierFromAccountsSite
                        };

                        //Serialize the request object
                        var payload = JsonConvert.SerializeObject( myRequest );
                        // Use HttpClient to perform the publish
                        using ( var client = new HttpClient() )
                        {
                            // Accept JSON
                            client.DefaultRequestHeaders.Accept.Add( new MediaTypeWithQualityHeaderValue( "application / json" ) );
                            // Add API Key (for a publish request)
                            client.DefaultRequestHeaders.Add( "Authorization", "ApiToken " + apiKey );
                            // Format the json as content
                            var content = new StringContent( payload, Encoding.UTF8, "application / json" );
                            // The endpoint to publish to
                            var publishEndpoint = "https://sandbox.credentialengine.org/assistant/costmanifest/publish/";
                            // Perform the actual publish action and return the result
                            result = client.PostAsync( publishEndpoint, content ).Result.Content.ReadAsStringAsync().Result;
                        };

                        //Return the result
                        return result;
                    }
                }
            }
Introduction
The Condition Manifest Profile class represents a description of a specific Condition Manifest for an organization. Generally, you only need to describe Condition Manifests that are used for many credentials, assessments or learning opportunities. Use of condition manifests will remove or reduce the reference to conditions in many entities. For more information, review the CTDL Guide.
References:
- ConditionManifest class on credreg.net
- See github for the ConditionManifest Request class used by the Assistant API.
- See more detailed ready to run examples in github.
To format or publish an Condition Manifest, use the following endpoints:
Format Data (only)
https://sandbox.credentialengine.org/assistant/ConditionManifest/format
Publish Data (automatically formats first)
https://sandbox.credentialengine.org/assistant/ConditionManifest/publish
Required Properties
The Registry Assistant API uses a simplified version of the Condition Manifest Profile class to convey the data for an Condition Manifest. Refer to the Minimum Data Policy for the required properties for this class.
Publishing a Basic Record
Your system will need to output the data above in JSON format. For example:
Recommended Properties
In order to maximize the utility of the Condition Manifest Profile data in the Registry, we recommend you also include data for the following properties. See the recommended properties for the Condition Manifest Profile.
Sample
To publish the data, you will need to wrap it in an object that also contains a PublishForOrganizationIdentifier property. Naturally, this is where you specify the CTID of the owning organization (from the accounts site). The condition manifest data itself will go in an ConditionManifest property:
Below is some example code to publish a simple condition manifest object, see github for the complete Condition Manifest Request class.
Sample condition manifest publishing code (C#)
            using System;
            using System.Collections.Generic;
            using System.Text;
            using System.Net.Http;
            using System.Net.Http.Headers;
            using Newtonsoft.Json;

            using RA.Models.Input;

            namespace RA.SamplesForDocumentation
            {
                public class PublishConditionManifest
                {
                    public string PublishSimpleRecord()
                    {
                        //Holds the result of the publish action
                        var result = "";
                        //assign the api key - acquired from organization account of the organization doing the publishing
                        var apiKey = SampleServices.GetMyApiKey();
                        // This is the CTID of the organization that owns the data being published
                        var organizationIdentifierFromAccountsSite = SampleServices.GetMyOrganizationCTID();

                        //Assign a CTID for the entity being published and keep track of it
                        var myCTID = "ce-" + Guid.NewGuid().ToString().ToLower();

                        //A simple ConditionManifest object - see github for full class definition
                        var myData = new ConditionManifest()
                        {
                            Name = "My ConditionManifest Name",
                            Description = "This is some text that describes my assessment.",
                            CTID = myCTID,
                            SubjectWebpage = "http://example.com?t=subjectwebpage",
                            //if this ID/CTID is not known, use a third party reference
                            ConditionManifestOf = new OrganizationReference()
                            {
                                Type = "CredentialOrganization",
                                Name = "Owning Organization of this CostManifest",
                                SubjectWebpage = "http://example.com?t=subjectWebpage"
                            }
                        };

                        myData.Requires = new List<ConditionProfile>()
                        {
                            new ConditionProfile()
                            {
                                Description = "My Requirements",
                                Condition = new List<string>() { "Condition One", "Condition Two", "Condition Three" }
                            }
                        };

                        //This holds the assessment and the identifier (CTID) for the owning organization
                        var myRequest = new ConditionManifestRequest()
                        {
                            ConditionManifest = myData,
                            DefaultLanguage = "en-US",
                            PublishForOrganizationIdentifier = organizationIdentifierFromAccountsSite
                        };

                        //Serialize the request object
                        var payload = JsonConvert.SerializeObject( myRequest );
                        // Use HttpClient to perform the publish
                        using ( var client = new HttpClient() )
                        {
                            // Accept JSON
                            client.DefaultRequestHeaders.Accept.Add( new MediaTypeWithQualityHeaderValue( "application / json" ) );
                            // Add API Key (for a publish request)
                            client.DefaultRequestHeaders.Add( "Authorization", "ApiToken " + apiKey );
                            // Format the json as content
                            var content = new StringContent( payload, Encoding.UTF8, "application / json" );
                            // The endpoint to publish to
                            var publishEndpoint = "https://sandbox.credentialengine.org/assistant/conditionmanifest/publish/";
                            // Perform the actual publish action and return the result
                            result = client.PostAsync( publishEndpoint, content ).Result.Content.ReadAsStringAsync().Result;
                        };

                        //Return the result
                        return result;
                    }
                }
            }
Introduction
The Competency Framework class represents a description of a specific Competency Framework for an organization. For more information, review the CTDL Guide.
References
- Competency Framework class on credreg.net
- See github for the Competency Framework Request class used by the Assistant API.
- See more detailed ready to run examples in github.
To format or publish an Competency Framework, use the following endpoints:
Format Data (only)
https://sandbox.credentialengine.org/assistant/CompetencyFramework/format
Publish Data (automatically formats first)
https://sandbox.credentialengine.org/assistant/CompetencyFramework/publish
Required Properties
The Registry Assistant API uses a simplified version of the Competency Framework class to convey the data for an Competency Framework. Refer to the Minimum Data Policy for the required properties for a competency framework and Minimum Data Policy for a competency.
Publishing a Basic Record
Your system will need to output the data above in JSON format. For example:
Recommended Properties
In order to maximize the utility of the Competency Framework data in the Registry, we recommend you also include data for the following properties. See the recommended properties for the Competency Framework.
Sample
To publish the data, you will need to wrap it in an object that also contains a PublishForOrganizationIdentifier property. Naturally, this is where you specify the CTID of the owning organization (from the accounts site). The competency framework data itself will go in an CompetencyFramework property:
Sample competency framework wrapper:
Below is some example code to publish a simple competency framework object, see github for the complete Competency FrameworkRequest class.
Sample competency framework publishing code (C#)
	public class PublishCompetencyFrameworks
	{
		#region examples
		public string PublishSimpleRecord()
		{
			//Holds the result of the publish action
			var result = "";
			//assign the api key - acquired from organization account of the organization doing the publishing
			var apiKey = SampleServices.GetMyApiKey();
			if ( string.IsNullOrWhiteSpace( apiKey ) )
			{
				//ensure you have added your apiKey to the app.config
			}
			// This is the CTID of the organization that owns the data being published
			var organizationIdentifierFromAccountsSite = SampleServices.GetMyOrganizationCTID();

			//Assign a CTID for the entity being published and keep track of it
			var myCTID = "ce-" + Guid.NewGuid().ToString().ToLower();

			//A simple CompetencyFramework object - see github for full class definition
			var myData = new CompetencyFramework()
			{
				name = "My Competency Framework Name",
				description = "This is some text that describes my Competency Framework.",
				CTID = myCTID,
				publicationStatusType="Published",
				publisher = new List<string>() { organizationIdentifierFromAccountsSite }
			};

			//This holds the data and the identifier (CTID) for the owning organization
			var myRequest = new CompetencyFrameworkRequest()
			{
				CompetencyFramework = myData,
				DefaultLanguage = "en-US",
				PublishForOrganizationIdentifier = organizationIdentifierFromAccountsSite
			};
			//add competencies
			//example of a flat framework
			myRequest.Competencies.Add( MapCompetency( myCTID, "Looks both ways before crossing street" ) );
			myRequest.Competencies.Add( MapCompetency( myCTID, "Looks before leaping" ) );
			myRequest.Competencies.Add( MapCompetency( myCTID, "Deals with the faults of others as gently as their own" ) );
			myRequest.Competencies.Add( MapCompetency( myCTID, "Knows what he/she knows and does not know what he/she does not know " ) );

			//Serialize the request object
			var payload = JsonConvert.SerializeObject( myRequest );
			// Use HttpClient to perform the publish
			using ( var client = new HttpClient() )
			{
				// Accept JSON
				client.DefaultRequestHeaders.Accept.Add( new MediaTypeWithQualityHeaderValue( "application/json" ) );
				// Add API Key (for a publish request)
				client.DefaultRequestHeaders.Add( "Authorization", "ApiToken " + apiKey );
				// Format the json as content
				var content = new StringContent( payload, Encoding.UTF8, "application/json" );
				// The endpoint to publish to
				var publishEndpoint = "https://sandbox.credentialengine.org/assistant/CompetencyFramework/publish/";
				// Perform the actual publish action and return the result
				result = client.PostAsync( publishEndpoint, content ).Result.Content.ReadAsStringAsync().Result;
			};

			//Return the result
			return result;
		}
		public static Competency MapCompetency( string frameworkCTID, string competency )
		{
			Competency output = new Competency()
			{
				competencyText_map = new LanguageMap( competency ),
				CTID = "ce-" + Guid.NewGuid().ToString().ToLower(),
				isPartOf = frameworkCTID
			};
			//add keywords
			//output.conceptKeyword_maplist = new LanguageMapList( new List<string>() { "concept 1", "concept 2", "concept 3" } );
			//output.conceptKeyword_maplist.Add( "fr", new List<string>() { "le concept un", "la concept deux", "les concept thois" } );
			return output;
		}

		#endregion


	}
Introduction
A Collection is defined as an aggregation of related member resources. As the name of the class indicates, it is a resource that "collects" already existing instances of resource types including Competency, Course, Job, Learning Opportunity Profile, Learning Program, Task and Work Role. These instances may be members of one or more Collections. A Collection may be defined for any useful purpose. For more information, review the CTDL Guide.
There are three main properies that are used to reference the members of a collection:
- Collection.HasMember - a list of CTIDs for resources that already exist in the registry
- Request.CollectionMembers - a list of CollectionMember objects that minimally include ProxyFor containing a CTID for a resource that already exists in the registry and at least one of Start Date or End Date
- Request.Members - list of objects for supported resource types
Generally
References
- Collection class on credreg.net
- See github for the Collection Request class used by the Assistant API.
- See more detailed ready to run examples in github.
To format or publish an Collection, use the following endpoints:
Format Data (only)
https://sandbox.credentialengine.org/assistant/Collection/format
Publish Data (automatically formats first)
https://sandbox.credentialengine.org/assistant/Collection/publish
Required Properties
The Registry Assistant API uses a simplified version of the Collection class to convey the data for an Collection. Refer to the Minimum Data Policy for the required properties for a collection and Minimum Data Policy for a collection member.
Publishing a Basic Record
Your system will need to output the data above in JSON format. For example:
Recommended Properties
In order to maximize the utility of the Collection data in the Registry, we recommend you also include data for the recommended properties. See the recommended properties for the Collection.
Sample
To publish the data, you will need to wrap it in an object that also contains a PublishForOrganizationIdentifier property. Naturally, this is where you specify the CTID of the owning organization (from the accounts site). The collection data itself will go in an Collection property:
Sample collection wrapper:
Below is some example code to publish a simple collection object, see github for the complete CollectionRequest class.
Sample collection publishing code (C#)
    /// <summary>
    /// Code samples for publishing collections
    /// </summary>
    public class PublishCollection
    {
		List<string> testCollectionCredentials = new List<string>()
			{
				"ce-db250674-0dc5-4f1b-af90-a86992b6e741",
				"ce-db91447a-23da-4949-a71a-4203031d9032",
				"ce-474a55b1-0806-4f5d-ae27-d3ca79b20e29",
				"ce-34d50921-dff5-4613-9dcf-f9732bbfe88a",
				"ce-34d50921-dff5-4613-9dcf-f9732bbfe88a", //yes a duplicate to test that a duplicate will be recognized and ignored
			};
	/// <summary>
	/// Simple example just using HasMember and URIs
	/// </summary>
	/// <param name="requestType">Format or Publish</param>
	/// <returns></returns>
	public bool Simple( string requestType = "format" )
		{

			// Assign the api key - acquired from organization account of the organization doing the publishing
			var apiKey = SampleServices.GetMyApiKey();
			if ( string.IsNullOrWhiteSpace( apiKey ) )
			{
				//ensure you have added your apiKey to the app.config
			}
			var organizationIdentifierFromAccountsSite = SampleServices.GetMyOrganizationCTID();
			if ( string.IsNullOrWhiteSpace( organizationIdentifierFromAccountsSite ) )
			{
				//ensure you have added your organization account CTID to the app.config
			}//
			 //Assign a CTID for the entity being published and keep track of it
			var myCTID = "ce-bb733c95-1df3-445e-98b6-bdaf7ca74a36";// "ce-" + Guid.NewGuid().ToString();

			var myData = new APIRequestResource()
			{
				Name = "A sample collection of credentials - College Of DuPage.",
				Description = "This collection uses the HasMember property to list members of this collection using the CTIDs of a published credentials.",
				CTID = myCTID,
				InLanguage = new List<string>() { "en-US" },

			};
			//typically the ownedBy is the same as the CTID for the data owner
			myData.OwnedBy.Add( new OrganizationReference()
			{
				CTID = organizationIdentifierFromAccountsSite
			} );

			//a few members to start with
			myData.HasMember = testCollectionCredentials;
			//myData.HasMember.Add( "ce-34d50921-dff5-4613-9dcf-f9732bbfe88a" ); //test a duplicate that should be skipped.

			//This holds the main entity and the identifier (CTID) for the owning organization
			var myRequest = new APIRequest()
			{
				Collection = myData,
				DefaultLanguage = "en-US",
				PublishForOrganizationIdentifier = organizationIdentifierFromAccountsSite
			};

			//Serialize the request object
			string payload = JsonConvert.SerializeObject( myRequest, SampleServices.GetJsonSettings() );
			//call the Assistant API
			SampleServices.AssistantRequestHelper req = new SampleServices.AssistantRequestHelper()
			{
				EndpointType = "collection",
				RequestType = requestType,
				OrganizationApiKey = apiKey,
				CTID = myRequest.Collection.CTID.ToLower(),   //added here for logging
				Identifier = "testing",     //useful for logging, might use the ctid
				InputPayload = payload
			};

			var result = new SampleServices().PublishRequest( req );
			if ( req.Messages.Count > 0 )
			{

			}
			return result;

		}

		/// <summary>
		/// Code sample including a MemberCondition, CollectionType, and LifeCycleStatusType.
		/// As well uses the CollectionMember class to provide additional information about members of this collection including:
		/// - Name
		/// - Optional start and end dates (for membership in this collection)
		///
		/// <see href="https://sandbox.credentialengineregistry.org/graph/ce-3bc3d4a3-c2de-4c16-8d7b-caca771b12f4"/>
		/// </summary>
		/// <param name="requestType">Format or Publish</param>
		/// <returns></returns>
		public bool PublishWithCollectionMembers( string requestType = "format" )
		{

			// Assign the api key - acquired from organization account of the organization doing the publishing
			var apiKey = SampleServices.GetMyApiKey();
			if ( string.IsNullOrWhiteSpace( apiKey ) )
			{
				//ensure you have added your apiKey to the app.config
			}
			var organizationIdentifierFromAccountsSite = SampleServices.GetMyOrganizationCTID();
			if ( string.IsNullOrWhiteSpace( organizationIdentifierFromAccountsSite ) )
			{
				//ensure you have added your organization account CTID to the app.config
			}//
			 //Assign a CTID for the entity being published and keep track of it
			var myCTID = "ce-3bc3d4a3-c2de-4c16-8d7b-caca771b12f4";// "ce-" + Guid.NewGuid().ToString();

			var myData = new APIRequestResource()
			{
				Name = "A sample collection of credentials using CollectionMembers.",
				AlternateName = new List<string>() { "alternate Dos", "Alternate Deux" },
				Description = "This collection uses the CollectionMembers property (part of the CollectionRequest object) to list members of this collection. A CollectionMember has additional properties to describe the member such as the (optional) start date and end date, as well as a name and description. The CollectionMember uses teh ProxyFor proper to 'point' to a publshed resource. Typically just a CTID is used for this property. The API will create a property credential registry URI based on the current publishing environment.",
				CTID = myCTID,
				SubjectWebpage="https://example.org?t=collectionSWP",
				DateEffective="2017-12-07",
				ExpirationDate="2035-12-31",
				InLanguage = new List<string>() { "en-US" },
				Subject = new List<string>() { "testing publishing", "complete testing" },
				Keyword = new List<string>() { "testing publishing", "complete testing" },
			};
			//typically the ownedBy is the same as the CTID for the data owner
			myData.OwnedBy.Add( new OrganizationReference()
			{
				CTID = organizationIdentifierFromAccountsSite
			} );
			//list type
			myData.CollectionType = new List<string>() { "ETPL" };
			//lifeCycleStatus
			myData.LifeCycleStatusType = "Active";
			myData.License = "https://example.com/t=license";
			//in this case, HasMember is empty - a mix can be used however.
			myData.HasMember = new List<string>();
			//add membership conditions
			myData.MembershipCondition.Add( new ConditionProfile()
			{
				Description= "Text describing the requirements for a resource to be a member of this collection",
				Condition = new List<string>()
                {
					"Requirement one",
					"Requirement two",
					"Requirement three",
				}
			} );

			List<string> alternateTypes = new List<string>();
			List<string> codes = new List<string>();
			//====================	OCCUPATIONS ====================
			myData.OccupationType = OccupationsHelper.PopulateOccupations( ref alternateTypes, ref codes );
			if (alternateTypes != null && alternateTypes.Any())
				myData.AlternativeOccupationType = alternateTypes;
            if (codes != null && codes.Any())
                myData.ONET_Codes = codes;
			//====================	INDUSTRIES	====================
			myData.IndustryType = Industries.PopulateIndustries( ref alternateTypes, ref codes );
            if (alternateTypes != null && alternateTypes.Any())
                myData.AlternativeIndustryType = alternateTypes;
            if (codes != null && codes.Any())
                myData.NaicsList = codes;
			//====================	INSTRUCTIONAL PROGRAMS	====================
			myData.InstructionalProgramType = InstructionalPrograms.PopulatePrograms( ref alternateTypes, ref codes);
            if (alternateTypes != null && alternateTypes.Any())
                myData.AlternativeInstructionalProgramType = alternateTypes;
            if (codes != null && codes.Any())
                myData.CIP_Codes = codes;

			//This holds the learningOpportunity and the identifier (CTID) for the owning organization
			var myRequest = new APIRequest()
			{
				Collection = myData,
				DefaultLanguage = "en-US",
				PublishForOrganizationIdentifier = organizationIdentifierFromAccountsSite
			};
			//add collection members that have additional information about members
			//CollectionMembers is a property of the Request object, not the Collection. Upon publish, blank nodes will be added to the graph, and the Ids of the blank nodes will be added to the HasMembers property.
			myRequest.CollectionMembers.Add( new CollectionMember()
			{
				Name = "Associate’s Degree A.A Indigenous Leadership",
				Description = "An optional description.",
				ProxyFor = testCollectionCredentials[0],//a published object
				StartDate = "2020-01-01",
				EndDate = "2023-12-31"
			} );
			myRequest.CollectionMembers.Add( new CollectionMember()
			{
				Name = "Associate’s Degree A.A. Early Childhood Education",
				Description = "An optional description.",
				ProxyFor = testCollectionCredentials[1],	//a published object
				StartDate = "2020-01-01",
				EndDate = "2023-12-31"
			} );
			myRequest.CollectionMembers.Add( new CollectionMember()
			{
				Name = "Associate’s Degree A.A. Liberal Education",
				Description = "An optional description.",
				ProxyFor = testCollectionCredentials[2],    //a published object
				StartDate = "2020-01-01",
				EndDate = "2023-12-31"
			} );
			myRequest.CollectionMembers.Add( new CollectionMember()
			{
				Name = "Associate’s Degree A.A.S. Business Management",
				Description = "An optional description.",
				ProxyFor = testCollectionCredentials[3],    //a published object
				StartDate = "2020-01-01",
				EndDate = "2023-12-31"
			} );
			myRequest.CollectionMembers.Add( new CollectionMember()
			{
				Name = "Associate’s Degree A.A. Liberal Education, STEM Emphasis",
				Description = "An optional description.",
				ProxyFor = testCollectionCredentials[4],    //this is a duplicate CTID and should be rejected
				StartDate = "2020-01-01",
				EndDate = "2023-12-31"
			} );

			//Serialize the request object
			//Preferably, use method that will exclude null/empty properties
			string payload = JsonConvert.SerializeObject( myRequest, SampleServices.GetJsonSettings() );
			//call the Assistant API
			SampleServices.AssistantRequestHelper req = new SampleServices.AssistantRequestHelper()
			{
				EndpointType = "collection",
				RequestType = requestType,
				OrganizationApiKey = apiKey,
				CTID = myRequest.Collection.CTID.ToLower(),   //added here for logging
				Identifier = "testing",     //useful for logging, might use the ctid
				InputPayload = payload
			};

			var result = new SampleServices().PublishRequest( req );
			if (req.Messages.Count > 0)
            {

            }
			return result;

		}

		#region publish like a framework
		public bool PublishLikeAFrameworkWithCompetencies( string requestType = "format" )
		{
			//Holds the result of the publish action
			var result = "";
			//assign the api key - acquired from organization account of the organization doing the publishing
			var apiKey = SampleServices.GetMyApiKey();
			if ( string.IsNullOrWhiteSpace( apiKey ) )
			{
				//ensure you have added your apiKey to the app.config
			}
			// This is the CTID of the organization that owns the data being published
			var organizationIdentifierFromAccountsSite = SampleServices.GetMyOrganizationCTID();

			//Assign a CTID for the entity being published and keep track of it
			var myCTID = "ce-" + Guid.NewGuid().ToString().ToLower();

			//A simple CompetencyFramework object - see github for full class definition
			var myData = new APIRequestResource()
			{
				Name = "My Sample Collection",
				Description = "This is some text that describes my Collection.",
				CTID = myCTID,
				Keyword = new List<string>() { "Testing", "Prototype"},

				ONET_Codes= new List<string>() { "19-4090", "21-1090" },
				OwnedBy = new List<OrganizationReference>()
				{
					new OrganizationReference()
					{
						Type="Organization",
						CTID = organizationIdentifierFromAccountsSite
					}
				}
			};

			//This holds the data and the identifier (CTID) for the owning organization
			var myRequest = new APIRequest()
			{
				Collection = myData,
				DefaultLanguage = "en-US",
				PublishForOrganizationIdentifier = organizationIdentifierFromAccountsSite
			};
			//add competencies
			//example of a flat framework
			myRequest.Members.Add( MapCompetency( myCTID, "Looks both ways before crossing street" ) );
			myRequest.Members.Add( MapCompetency( myCTID, "Looks before leaping" ) );
			myRequest.Members.Add( MapCompetency( myCTID, "Deals with the faults of others as gently as their own" ) );
			myRequest.Members.Add( MapCompetency( myCTID, "Knows what he/she knows and does not know what he/she does not know " ) );

			//Serialize the request object
			string payload = JsonConvert.SerializeObject( myRequest, SampleServices.GetJsonSettings() );
			//call the Assistant API
			SampleServices.AssistantRequestHelper req = new SampleServices.AssistantRequestHelper()
			{
				EndpointType = "collection",
				RequestType = requestType,
				OrganizationApiKey = apiKey,
				CTID = myRequest.Collection.CTID.ToLower(),   //added here for logging
				Identifier = "testing",     //useful for logging, might use the ctid
				InputPayload = payload
			};

			//Serialize the request object
			return new SampleServices().PublishRequest( req );

		}
		public static Competency MapCompetency( string frameworkCTID, string competency )
		{
			Competency output = new Competency()
			{
				competencyText_map = new LanguageMap( competency ),
				CTID = "ce-" + Guid.NewGuid().ToString().ToLower(),
				isPartOf = frameworkCTID
			};
			//add keywords
			//output.conceptKeyword_maplist = new LanguageMapList( new List<string>() { "concept 1", "concept 2", "concept 3" } );
			//output.conceptKeyword_maplist.Add( "fr", new List<string>() { "le concept un", "la concept deux", "les concept thois" } );
			return output;
		}

		#endregion
	}
Introduction
The Concept Scheme class represents a description of a specific Concept Scheme for an organization. For more information, review the CTDL Guide.
References:
- ConceptScheme class on credreg.net
- See github for the ConceptScheme Request class used by the Assistant API.
- See more detailed ready to run examples in github.
To format or publish an Concept Scheme, use the following endpoints:
Format Data (only)
https://sandbox.credentialengine.org/assistant/ConceptScheme/format
Publish Data (automatically formats first)
https://sandbox.credentialengine.org/assistant/ConceptScheme/publish
Required Properties
The Registry Assistant API uses a simplified version of the Concept Scheme class to convey the data for an Concept Scheme. Refer to the Minimum Data Policy for the required properties for a Concept Scheme and Minimum Data Policy for concepts.
Publishing a Basic Record
Your system will need to output the data above in JSON format. For example:
Recommended Properties
In order to maximize the utility of the Concept Scheme data in the Registry, we recommend you also include data for the following properties:
Sample
To publish the data, you will need to wrap it in an object that also contains a PublishForOrganizationIdentifier property. Naturally, this is where you specify the CTID of the owning organization (from the accounts site). The concept scheme data itself will go in an ConceptScheme property:
Sample concept scheme wrapper:
Below is some example code to publish a simple concept scheme object:
Sample concept scheme publishing code (C#)
            using System;
            using System.Net.Http;
            using System.Net.Http.Headers;
            using System.Text;
            using Newtonsoft.Json;
            using RA.Models.Input;

            namespace RA.SamplesForDocumentation
            {
                public class PublishConceptSchemes
                {

                    public string PublishSimpleRecord()
                    {
                        //Holds the result of the publish action
                        var result = "";
                        //assign the api key - acquired from organization account of the organization doing the publishing
                        var apiKey = SampleServices.GetMyApiKey();
                        if ( string.IsNullOrWhiteSpace( apiKey ) )
                        {
                            //ensure you have added your apiKey to the app.config
                        }
                        // This is the CTID of the organization that owns the data being published
                        var organizationIdentifierFromAccountsSite = SampleServices.GetMyOrganizationCTID();

                        //Assign a CTID for the entity being published and keep track of it
                        var myCTID = "ce-" + Guid.NewGuid().ToString().ToLower();

                        //A simple ConceptScheme object - see github for full class definition
                        var myData = new ConceptScheme()
                        {
                                Name = "My Concept Scheme Name",
                            Description = "This is some text that describes my Concept Scheme.",
                            CTID = myCTID,
                            Publisher = new OrganizationReference() { CTID = organizationIdentifierFromAccountsSite }
                        };

                        //This holds the data and the identifier (CTID) for the owning organization
                        var myRequest = new ConceptSchemeRequest()
                        {
                            ConceptScheme = myData,
                            DefaultLanguage = "en-US",
                            PublishForOrganizationIdentifier = organizationIdentifierFromAccountsSite
                        };
                        //add competencies
                        //example of a flat framework
                        myRequest.Concepts.Add( MapConcept( myCTID, "Beginner Level" ) );
                        myRequest.Concepts.Add( MapConcept( myCTID, "Medium Level" ) );
                        myRequest.Concepts.Add( MapConcept( myCTID, "Advanced Level" ) );
                        //Serialize the request object
                        var payload = JsonConvert.SerializeObject( myRequest );
                        // Use HttpClient to perform the publish
                        using ( var client = new HttpClient() )
                        {
                            // Accept JSON
                            client.DefaultRequestHeaders.Accept.Add( new MediaTypeWithQualityHeaderValue( "application / json" ) );
                            // Add API Key (for a publish request)
                            client.DefaultRequestHeaders.Add( "Authorization", "ApiToken " + apiKey );
                            // Format the json as content
                            var content = new StringContent( payload, Encoding.UTF8, "application / json" );
                            // The endpoint to publish to
                            var publishEndpoint = "https://sandbox.credentialengine.org/assistant/ConceptScheme/publish/";
                            // Perform the actual publish action and return the result
                            result = client.PostAsync( publishEndpoint, content ).Result.Content.ReadAsStringAsync().Result;
                        };

                        //Return the result
                        return result;
                    }
                    public static Concept MapConcept( string conceptSchemeCTID, string concept )
                    {
                        var output = new Concept()
                        {
                            PrefLabel = concept,
                            CTID = "ce-" + Guid.NewGuid().ToString().ToLower(),
                            InScheme = conceptSchemeCTID
                        };
                        return output;
                    }
                }
            }
Introduction
The Progression Model class represents a model of identifiable points along a developmental progression including increasing levels of competence, achievement or temporal position (e.g., "Second Quarter"). For more information, review the CTDL Guide.
References:
- ProgressionModel class on credreg.net
- See github for the ProgressionModel Request class used by the Assistant API.
- See more detailed ready to run examples in github.
To format or publish an Progression Model, use the following endpoints:
Format Data (only)
https://sandbox.credentialengine.org/assistant/ProgressionModel/format
Publish Data (automatically formats first)
https://sandbox.credentialengine.org/assistant/ProgressionModel/publish
Required Properties
The Registry Assistant API uses a simplified version of the Progression Model class to convey the data for an Progression Model.
ProgressionModel: Refer to the Minimum Data Policy for the required properties for a Progression Model
- CTID
- Name
- Description
- PublicationStatusType
- Publisher
- HasTopConcept
- InLanguage. Required unless DefaultLanguage is provided
- ProgressionLevels
ProgressionLevel: Refer to the Minimum Data Policy for progression levels.
- CTID
- PrefLabel
Publishing a Basic Record
Your system will need to output the data above in JSON format. For example:
Recommended Properties
In order to maximize the utility of the Progression Model data in the Registry, we recommend you also include data for the following properties:
Sample
To publish the data, you will need to wrap it in an object that also contains a PublishForOrganizationIdentifier property. Naturally, this is where you specify the CTID of the owning organization (from the accounts site). The progression model data itself will go in an ProgressionModel property:
Sample progression model wrapper:
Below is some example code to publish a simple progression model object:
Sample progression model publishing code (C#)
            using System;
            using System.Net.Http;
            using System.Net.Http.Headers;
            using System.Text;
            using Newtonsoft.Json;
            using RA.Models.Input;

            namespace RA.SamplesForDocumentation
            {
                public class PublishProgressionModels
                {

                    public string PublishSimpleRecord()
                    {
                        //Holds the result of the publish action
                        var result = "";
                        //assign the api key - acquired from organization account of the organization doing the publishing
                        var apiKey = SampleServices.GetMyApiKey();
                        if ( string.IsNullOrWhiteSpace( apiKey ) )
                        {
                            //ensure you have added your apiKey to the app.config
                        }
                        // This is the CTID of the organization that owns the data being published
                        var organizationIdentifierFromAccountsSite = SampleServices.GetMyOrganizationCTID();

                        //Assign a CTID for the entity being published and keep track of it
                        var myCTID = "ce-" + Guid.NewGuid().ToString().ToLower();

                        //A simple ProgressionModel object - see github for full class definition
                        var myData = new ProgressionModel()
                        {
                                Name = "My Progression Model Name",
                            Description = "This is some text that describes my Progression Model.",
                            Ctid = myCTID,
                            Publisher = new OrganizationReference() { CTID = organizationIdentifierFromAccountsSite }
                        };

                        //This holds the data and the identifier (CTID) for the owning organization
                        var myRequest = new ProgressionModelRequest()
                        {
                            ProgressionModel = myData,
                            DefaultLanguage = "en-US",
                            PublishForOrganizationIdentifier = organizationIdentifierFromAccountsSite
                        };
                        //add competencies
                        //example of a flat framework
                        myRequest.ProgressionLevels.Add( MapProgressionLevel( myCTID, "Beginner Level" ) );
                        myRequest.ProgressionLevels.Add( MapProgressionLevel( myCTID, "Medium Level" ) );
                        myRequest.ProgressionLevels.Add( MapProgressionLevel( myCTID, "Advanced Level" ) );
                        //Serialize the request object
                        var payload = JsonConvert.SerializeObject( myRequest );
                        // Use HttpClient to perform the publish
                        using ( var client = new HttpClient() )
                        {
                            // Accept JSON
                            client.DefaultRequestHeaders.Accept.Add( new MediaTypeWithQualityHeaderValue( "application / json" ) );
                            // Add API Key (for a publish request)
                            client.DefaultRequestHeaders.Add( "Authorization", "ApiToken " + apiKey );
                            // Format the json as content
                            var content = new StringContent( payload, Encoding.UTF8, "application / json" );
                            // The endpoint to publish to
                            var publishEndpoint = "https://sandbox.credentialengine.org/assistant/ProgressionModel/publish/";
                            // Perform the actual publish action and return the result
                            result = client.PostAsync( publishEndpoint, content ).Result.Content.ReadAsStringAsync().Result;
                        };

                        //Return the result
                        return result;
                    }
                    public static ProgressionLevel MapProgressionLevel( string conceptSchemeCTID, string concept )
                    {
                        var output = new ProgressionLevel()
                        {
                            PrefLabel = concept,
                            Ctid = "ce-" + Guid.NewGuid().ToString().ToLower(),
                        };
                        return output;
                    }
                }
            }
Introduction
The Pathway class represents a description of a specific pathway. In the context of Credential Engine, a pathway consists of structured sets of objectives and qualifying conditions defining points (milestones) along a route to fulfillment of a job, occupation or career. Qualifying conditions include homogeneous or heterogeneous sets of prescribed, preferred or recommended evidentiary artifacts such as competencies attained (knowledge, skills, abilities), relevant awards, other forms of recognition such as credentials earned and relevant experience. For more information, review the CTDL Guide.
To format or publish an Pathway, use the following endpoints:
Format Data (only). Recommended to use the format endpoint to validate the data without publishing.
https://sandbox.credentialengine.org/assistant/pathway/format
Publish Data (automatically formats first)
https://sandbox.credentialengine.org/assistant/pathway/publish
Delete Data
https://sandbox.credentialengine.org/assistant/pathway/delete
References
See:
- Pathway class on credreg.net
- The Pathway Minimum Data Policy for the required properties for the pathway class.
- The Pathway Component Minimum Data Policy for the required properties for the pathway component class.
- The Registry Assistant API Pathway request input class in Github.
- Sample code to publish Pathways in Github.
Required Properties
The Registry Assistant API uses a simplified version of the Pathway class to convey the data for an pathway. Refer to the Minimum Data Policy for the required properties for the Pathway and Pathway Component classes.
Publishing a Basic Record
Your system will need to output the data above in JSON format. For example:
Recommended Properties
In order to maximize the utility of the Pathway data in the Registry, we recommend you also include data for the following properties:
Sample
To publish the data, you will need to wrap it in an object that also contains a PublishForOrganizationIdentifier property. Naturally, this is where you specify the CTID of the owning organization (from the accounts site). The pathway data itself will go in an Pathway property:
Sample pathway wrapper:
Below is some example code to publish a simple pathway object:
Sample pathway publishing code (C#)
            using System;
            using System.Collections.Generic;
            using System.Text;
            using System.Net.Http;
            using System.Net.Http.Headers;
            using Newtonsoft.Json;
            using RA.Models.Input;

            namespace RA.SamplesForDocumentation
            {
                public class PublishPathway
                {
                    public string PublishSimpleRecord( string requestType = "publish" )
                    {
                        // Holds the result of the publish action
                        var result = "";
                        // Assign the api key - acquired from organization account of the organization doing the publishing
                        var apiKey = SampleServices.GetMyApiKey();
                        // This is the CTID of the organization that owns the data being published
                        var organizationIdentifierFromAccountsSite = SampleServices.GetMyOrganizationCTID();
                        // Assign a CTID for the entity being published and keep track of it
                        var myCTID = "ce-" + Guid.NewGuid().ToString().ToLower();

                        // A simple pathway object - see below for sample class definition
                        var myData = new Pathway()
                        {
                            Name = "Associate Degree: Biotechnology Pathway",
                            Description = "This is some text that describes my pathway.",
                            CTID = myCTID,
                            SubjectWebpage = "https://example.org/pathway/1234",
                            //add CTID for Destination component
                            HasDestinationComponent = new List<string>() { "ce-5e7fcaaf-74e2-47be-a4a9-2bed98f282d7" },
                            HasChild = new List<string>() { "ce-5e7fcaaf-74e2-47be-a4a9-2bed98f282d7" },
                            Keyword = new List<string>() { "High School", "Chemistry" }
                        };
                        // OwnedBy, etc. are organization references. As a convenience just the CTID is necessary.
                        // The ownedBY CTID is typically the same as the CTID for the data owner.
                        myData.OwnedBy.Add( new OrganizationReference()
                        {
                            CTID = "ce-541da30c-15dd-4ead-881b-729796024b8f"
                        } );

                        //list of pathway components to publish
                        List pathwayComponents = new List<string>();
                        //add the destination component (uses the same CTID as for HasDestinationComponent
                        var destinationComponent = new PathwayComponent()
                        {
                            PathwayComponentType = "CredentialComponent",
                            CTID = "ce-5e7fcaaf-74e2-47be-a4a9-2bed98f282d7",
                            Name = "Associate Degree: Biotechnology",
                            Description = "This badge is earned in Canvas for completing BIO 193 and BIO 202.",
                            CredentialType = "DigitalBadge"
                        };

                        //add to input component list
                        pathwayComponents.Add( destinationComponent );
                        //add some more components
                        pathwayComponents.Add( new PathwayComponent()
                        {
                            PathwayComponentType = "CourseComponent",
                            CTID = "ce-1f8d3d06-3953-4bd8-8750-7dc5e9a062eb",
                            Name = "Programming Concepts and Methology I",
                            Description = "Description of the course",
                            ProgramTerm = "1st Term",
                            CodedNotation = "COMP B11"
                        } );
                        //add a selection component
                        pathwayComponents.Add( AddSelectionComponent() );

                        // The input request class holds the pathway and the identifier (CTID) for the owning organization
                        var myRequest = new PathwayRequest()
                        {
                            Pathway = myData,
                            DefaultLanguage = "en-US",
                            PublishForOrganizationIdentifier = organizationIdentifierFromAccountsSite
                        };
                        //add pathway components to the request
                        myRequest.PathwayComponents.AddRange( pathwayComponents );


                        // Serialize the request object
                        var payload = JsonConvert.SerializeObject( myRequest );
                        //call the Assistant API
                        result = new SampleServices().SimplePost( "pathway", requestType, payload, apiKey );
                        // Return the result
                        return result;
                    }
                    public PathwayComponent AddSelectionComponent()
                    {
                        var output = new PathwayComponent()
                        {
                            Name = "Selection Component",
                            CTID = "ce-44cfeece-214a-47f0-94ce-f49b972bbecd",
                            Description = "Description of this component",
                            SubjectWebpage = "https://example.com?t=selectionComponent",
                            ComponentCategory = "Selection",
                            HasChild = new List<string>() { "ce-e1d14d25-f9cf-45e9-b625-ef79ed003f6b", "ce-39da55fa-140b-4c0a-92e2-c8e38e5f07f0", "ce-88d5a63d-4ca5-4689-bec1-55c88b6a5529" }
                        };

                        var conditions = new ComponentCondition()
                        {
                            Name = "Conditions for this SelectionComponent",
                            Description = "Require two of the target components.",
                            RequiredNumber = 3,
                            TargetComponent = new List<string>() { "ce-e1d14d25-f9cf-45e9-b625-ef79ed003f6b", "ce-39da55fa-140b-4c0a-92e2-c8e38e5f07f0", "ce-88d5a63d-4ca5-4689-bec1-55c88b6a5529" }
                        };
                        output.HasCondition.Add( conditions );

                        return output;
                    }
                }
            }
Introduction
The PathwaySet class represents a description of multiple related pathways. A pathway set must include at least two pathways. A publish request can include the actual pathway data (using the Pathway input class in Github) or a reference to a pathway that has already been published. For more information, review the CTDL Guide.
To format or delete a PathwaySet, use the following endpoints:
Format Data (only). Recommended to use the format endpoint to validate the data without publishing.
https://sandbox.credentialengine.org/assistant/pathwaySet/format
Publish Data (automatically formats first)
https://sandbox.credentialengine.org/assistant/pathwaySet/publish
Delete Data
https://sandbox.credentialengine.org/assistant/pathwaySet/delete
References
See:
- PathwaySet class on credreg.net
- The Pathway Set Minimum Data Policy for the required properties for the pathway set class.
- The Pathway Minimum Data Policy for the required properties for the pathway class.
- The Pathway Component Minimum Data Policy for the required properties for the pathway component class.
- The Registry Assistant API PathwaySet request input class in Github.
- Sample code to publish Pathway Sets in Github.
References
The Registry Assistant API uses a simplified version of the Pathway Set class to convey the data for a pathway set. Refer to the Minimum Data Policy for the required properties for the PathwaySet.
Sample
To publish the data, you will need to wrap it in an object that also contains a PublishForOrganizationIdentifier property. Naturally, this is where you specify the CTID of the owning organization (from the accounts site). The pathwaySet data itself will go in an PathwaySet property:
Sample PathwaySet wrapper:
References
Below is some example code to publish a simple PathwaySet object:
Sample PathwaySet publishing code (C#)
            using System;
            using System.Collections.Generic;
            using System.Text;
            using System.Net.Http;
            using System.Net.Http.Headers;
            using Newtonsoft.Json;
            using RA.Models.Input;

            namespace RA.SamplesForDocumentation
            {
                public class PublishPathwaySet
                {
                    public string PublishSimpleRecord( string requestType = "publish" )
                    {
                        // Holds the result of the publish action
                        var result = "";
                        // Assign the api key - acquired from organization account of the organization doing the publishing
                        var apiKey = SampleServices.GetMyApiKey();
                        // This is the CTID of the organization that owns the data being published
                        var organizationIdentifierFromAccountsSite = SampleServices.GetMyOrganizationCTID();
                        // Assign a CTID for the entity being published and keep track of it
                        var myCTID = "ce-" + Guid.NewGuid().ToString().ToLower();

                        // A simple pathwaySet object - see below for sample class definition
                        var myData = new PathwaySet()
                        {
                            Name = "Biotechnology PathwaySet",
                            Description = "This is some text that describes my pathwaySet.",
                            CTID = myCTID,
                            SubjectWebpage = "https://example.org/pathwaySet/1234"
                        };

                        // OwnedBy, etc. are organization references. As a convenience just the CTID is necessary.
                        // The ownedBY CTID is typically the same as the CTID for the data owner.
                        myData.OwnedBy.Add( new OrganizationReference()
                        {
                            CTID = organizationIdentifierFromAccountsSite
                        } );

                        //provide the CTIDs for the pathways in HasPathway. There must be a minimum of two pathways.
                        //HasPathway can also refer to a pathway already published, that is, not in the current list of Pathways
                        var pathway1CTID = "ce-5e7fcaaf-74e2-47be-a4a9-2bed98f282d1";
                        var pathway2CTID = "ce-5e7fcaaf-74e2-47be-a4a9-2bed98f282d2";
                        var pathway3CTID = "ce-5e7fcaaf-74e2-47be-a4a9-2bed98f282d3";
                        //add CTIDs for pathways
                        myData.HasPathway.AddRange( new List<string>() { pathway1CTID, pathway2CTID, pathway3CTID } );

                        // The input request class holds the pathwaySet and the identifier (CTID) for the owning organization
                        var myRequest = new PathwaySetRequest()
                        {
                            PathwaySet = myData,
                            DefaultLanguage = "en-US",
                            PublishForOrganizationIdentifier = organizationIdentifierFromAccountsSite
                        };

                        //add pathways to the request
                        //Note for this example, the third pathway is not provided, as it has already been published. The API will validate that the pathway has been published.
                        //NOTE: see code in github for AddPathway1 and AddPathway2.
                        myRequest.Pathways.Add( AddPathway1( pathway1CTID, organizationIdentifierFromAccountsSite));
                        myRequest.Pathways.Add( AddPathway2( pathway2CTID, organizationIdentifierFromAccountsSite ) );

                        // Serialize the request object
                        //var payload = JsonConvert.SerializeObject( myRequest );
                        //Preferably, use method that will exclude null/empty properties
                        string payload = JsonConvert.SerializeObject( myRequest, SampleServices.GetJsonSettings() );
                        //call the Assistant API
                        result = new SampleServices().SimplePost( "pathwaySet", requestType, payload, apiKey );
                        // Return the result
                        return result;
                    }

                }
            }
Introduction
The Transfer Value Profile class represents a description of a specific Transfer Value Profile. In the context of Credential Engine, a transfer value is used in education, training and credentialing to determine qualification for advanced standing. CTDL defines advanced standing as, reduces the time or cost required to earn or complete the referenced credential, assessment, or learning opportunity.
Transfer value can be determined based on a number of factors such as: completion of learning opportunities or assessments, work experience (e.g., military), demonstration of knowledge, skills or abilities. For more information, review the CTDL Guide.
References
- TransferValueProfile class on credreg.net
- The Transfer Value Profile Minimum Data Policy for the required properties for the transfer value profile class.
- See github for the TransferValueProfile Request class used by the Assistant API.
- See more detailed ready to run examples in github.
To format or publish a Transfer Value Profile, use the following endpoints:
Format Data (only)
https://sandbox.credentialengine.org/assistant/transfervalue/format
Publish Data (automatically formats first)
https://sandbox.credentialengine.org/assistant/transfervalue/publish
Bulk Publish Data (allows publishing multiple transfer value profiles at one time.)
https://sandbox.credentialengine.org/assistant/transfervalue/bulkpublish
Required Properties
The Registry Assistant API uses a simplified version of the Transfer Value Profile class to publish the data for a Transfer Value Profile. Refer to the Minimum Data Policy for the required properties for the Transfer Value Profile class.
Publishing a Basic Record
Your system will need to output the data above in JSON format. For example:
Recommended Properties
In order to maximize the utility of the Transfer Value Profile data in the Registry, we recommend you also include data for the following properties:
Sample
To publish the data, you will need to wrap it in an object that also contains a PublishForOrganizationIdentifier property. Naturally, this is where you specify the CTID of the owning organization (from the accounts site). The transfervalueprofile data itself will go in an Transfer Value Profile property:
Sample TransferValueProfile wrapper:
Below is some example code to publish a simple TransferValueProfile object:
            using System;
            using System.Collections.Generic;
            using System.Linq;
            using System.Net.Http;
            using System.Net.Http.Headers;
            using System.Runtime.InteropServices;
            using System.Text;
            using System.Threading.Tasks;
            using Newtonsoft.Json;
            using RA.Models.Input;
            using InputEntity = RA.Models.Input.TransferValueProfile;

            namespace RA.SamplesForDocumentation
            {
                public class PublishTransferValueProfile
                {
                    //Usage
                    // - update App.config with your ApiKey and CTID of the owning org
                    // - note the apiKey is not required in the sandbox
                    // Example of this record published on sandbox
                    // https://sandbox.credentialengineregistry.org/graph/ce-fd515001-6a9c-4f43-b401-3e65127fc807

                    /// Sample publish method
                    ///
                    /// If successful, returns the formatted graph from the registry.
                    public string PublishSimpleRecord( bool usingSimplePost = true )
                    {
                        // Holds the result of the publish action
                        var result = "";
                        // Assign the api key - acquired from organization account of the organization doing the publishing
                        var apiKey = SampleServices.GetAppKeyValue( "myOrgApiKey" );
                        // This is the CTID of the organization that owns the data being published
                        var organizationIdentifierFromAccountsSite = SampleServices.GetAppKeyValue( "myOrgCTID" );

                        // Assign a CTID for the entity being published and keep track of it
                        //NOTE: afer being generated, this value be saved and used for successive tests or duplicates will occur.
                        var myCTID = "ce-" + Guid.NewGuid().ToString().ToLower();
                        //from previous test
                        myCTID = "ce-fd515001-6a9c-4f43-b401-3e65127fc807";

                        // A simple transfer value profile object - required properties
                        var myData = new TransferValueProfile()
                        {
                            Name = "My Transfer Value Profile Name",
                            Description = "This is some text that describes my transfer value profile.",
                            CTID = myCTID,
                            SubjectWebpage = "http://example.com/transferValueProfile/1234"
                        };
                        myData.StartDate = "2020-01-01";
                        myData.EndDate = "2021-12-21";
                        // OwnedBy is a list of OrganizationReferences. As a convenience just the CTID is necessary.
                        // The ownedBY CTID is typically the same as the CTID for the data owner.
                        myData.OwnedBy.Add( new OrganizationReference()
                        {
                            CTID = organizationIdentifierFromAccountsSite
                        } );
                        myData.Identifier.Add( new IdentifierValue()
                        {
                            IdentifierTypeName = "ACE Course Code",
                            IdentifierType = "Internal Code",   //Formal name or acronym of the identifier type
                            IdentifierValueCode = "0276"        //Alphanumeric string identifier of the entity
                        } );

                        //				TransferValue
                        //Required.
                        //A suggested or articulated credit - or point - related transfer value.
                        myData.TransferValue = new List<ValueProfile>()
                        {
                            new ValueProfile()
                            {
                                Value=3,
                                CreditUnitType = new List<string>() { "DegreeCredit" },
                                CreditLevelType = new List<string>() { "LowerDivisionLevel" }
                            }
                        };

                        //			transferValueFrom
                        //If not provided as much information as is available
                        //see: https://github.com/CredentialEngine/Registry_Assistant/blob/master/src/RA.Models/Input/profiles/EntityReference.cs
                        //NOTE: you must provide owned by or offered by with TransferValueFrom or TransferValueFor
                        var transferValueFrom = new LearningOpportunity()
                        {
                            //Type = "LearningOpportunityProfile",
                            Name = "name of the learning opportunity",
                            Description = "Description of the learning opportunity",
                            SubjectWebpage = "https://example.com/anotherlOPP",
                            LearningMethodDescription = "A useful description of the learning method",
                            AssessmentMethodDescription = "How the learning opportunity is assessed."
                        };
                        var ownedBy = new OrganizationReference()
                        {
                            Type = "CredentialOrganization",
                            Name = "Organization that owns this LearningOpportunity",
                            SubjectWebpage = "https://myOrganization.com",
                            Description = "While optional, a description is helpful."
                        };

                        transferValueFrom.OwnedBy.Add( ownedBy );
                        //The properties: TransferValueFrom/TransferValueFor are defined as a list of objects. You would format a LearningOpportunity or Assessment and add these to TransferValueFrom/TransferValueFor.
                        myData.TransferValueFrom.Add( transferValueFrom );

                        // This holds the transfer value profile and the identifier (CTID) for the owning organization
                        var myRequest = new TransferValueProfileRequest()
                        {
                            TransferValueProfile = myData,
                            DefaultLanguage = "en-US",
                            PublishForOrganizationIdentifier = organizationIdentifierFromAccountsSite
                        };
                        // Serialize the request object
                        string payload = JsonConvert.SerializeObject( myRequest, SampleServices.GetJsonSettings() );

                        //assign publish endpoint
                        var assistantUrl = SampleServices.GetAppKeyValue( "registryAssistantApi" ) + "transfervalue/publish/";
                        if ( usingSimplePost )
                        {
                            //use a simple method that returns a string
                            result = new SampleServices().SimplePost( assistantUrl, payload, apiKey );

                            // Return the result
                            return result;
                        }
                        //otherwise use a method where return status can be inspected
                        SampleServices.AssistantRequestHelper req = new SampleServices.AssistantRequestHelper()
                        {
                            EndpointType = "transfervalue",
                            RequestType = "publish",
                            OrganizationApiKey = apiKey,
                            CTID = myRequest.TransferValueProfile.CTID.ToLower(),   //added here for logging
                            Identifier = "testing",     //useful for logging, might use the ctid
                            InputPayload = payload
                        };

                        bool isValid = new SampleServices().PublishRequest( req );

                        return req.FormattedPayload;

                    private LearningOpportunity AddTransferFromLearningOpportunity()
                    {
                        var myLopp = new LearningOpportunity()
                        {
                            Type = "LearningOpportunityProfile",
                            Name = "Packet Switched Networks",
                            Description = "Understanding of terminology and issues and their application in functioning packet switched networks.",
                            LearningMethodDescription = "Methods of instruction include lecture, discussion, laboratory exercises, videotapes, and a final examination."
                        };
                        myLopp.Teaches = new List<CredentialAlignmentObject>() {
                            new CredentialAlignmentObject()
                            {
                                TargetNodeDescription="Upon successful completion of this course, the student will be able to describe packet technology; and discuss the history of public packet networks--their practical implementation and management issues related to implementation."
                            }
                        };

                        myLopp.OwnedBy = new List<OrganizationReference>() {
                            new OrganizationReference()
                            {
                                Type="CredentialOrganization",
                                Name="Ameritech",
                                SubjectWebpage="https://www.ameritech.edu/",
                                Address = new List{ new Place()
                                {
                                    City= "Waukesha",
                                    AddressRegion= "WI",
                                    Country="United States"
                                } }

                            }
                        };

                        return myLopp;
Introduction
The Transfer Intermediary class represents a description of a specific Transfer Intermediary. In the context of Credential Engine, a transfer intermediary is a surrogate resource to which other resources are mapped in order to indicate their common transferability. It is used when multiple resources such as courses are grouped together to indicate they have mutually agreed upon transfer value.
References
- Transfer Intermediary class on credreg.net
- The Transfer Intermediary Minimum Data Policy for the required properties for the transfer intermediary class.
- See github for the TransferIntermediary Request class used by the Assistant API.
- See more detailed ready to run examples in github.
To format or publish a Transfer Intermediary Profile, use the following endpoints:
Format Data (only). Note the format endpoint for transfer intermediary only handles a request with just the IntermediaryFor property, not with embedded transfer values like the bulk publish endpoint.
https://sandbox.credentialengine.org/assistant/TransferIntermediary/format
Publish Data (automatically formats first)
https://sandbox.credentialengine.org/assistant/TransferIntermediary/publish
Publish Bulk Data (enables publishing transfer value profiles in the same request as a transfer intermediary)
https://sandbox.credentialengine.org/assistant/TransferIntermediary/bulkpublish
Required Properties
The Registry Assistant API uses a simplified version of the Transfer Intermediary class to publish the data to the registry. Refer to the Minimum Data Policy for the required properties for the Transfer Intermediary Profile class.
Publishing a Basic Record
Your system will need to output the data above in JSON format. For example:
Recommended Properties
In order to maximize the utility of the Transfer Intermediary data in the Registry, we recommend you also include data for the following properties:
Sample
To publish the data, you will need to wrap it in an object that also contains a PublishForOrganizationIdentifier property. Naturally, this is where you specify the CTID of the owning organization (from the accounts site). The transfer intermediary data itself will go in an Transfer Intermediary property:
Sample Transfer Intermediary wrapper:
See more detailed ready to run publishing example in github.
Bulk Publish of Transfer Intermediary with Transfer Value Profiles
There is a separate endpoint that can be used to publish a list of transfer value profiles in the same request as a transfer intermediary:
https://sandbox.credentialengine.org/assistant/TransferIntermediary/bulkpublish
This endpoint may be useful where there is a smaller number of transfer value profiles and it would be considered more efficient to be able to publish all or some of the transfer value profile in one request.
Below is some example code to publish a list of Transfer Value Profiles with a Transfer Intermediary:
using System;
using System.Collections.Generic;
using Newtonsoft.Json;
using RA.Models.Input;
using APIRequestEntity = RA.Models.Input.TransferIntermediary;
namespace RA.SamplesForDocumentation
{
public class TransferIntermediaryBulkPublish
{
static string thisClassName = "TransferIntermediaryBulkPublish";
#region TransferIntermediary with transfer value objects
/// <summary>
/// Publish a Transfer Intermediary with a list of transfer values included
/// If the publish request includes all of the applicable transfer value profiles, then the TransferIntermediary.IntermediaryFor does NOT have to be included as it will be populated during the publishing process.
/// </summary>
/// <returns></returns>
public bool PublishWithRelatedTransferValues()
{
// Assign the api key - acquired from organization account of the organization doing the publishing
var apiKey = SampleServices.GetMyApiKey();
if ( string.IsNullOrWhiteSpace( apiKey ) )
{
//ensure you have added your apiKey to the app.config
}
var organizationIdentifierFromAccountsSite = SampleServices.GetMyOrganizationCTID();
if ( string.IsNullOrWhiteSpace( organizationIdentifierFromAccountsSite ) )
{
//ensure you have added your organization account CTID to the app.config
}
// Assign a CTID for the entity being published and keep track of it
var myCTID = "ce-c6b70e53-f7db-4df8-b48e-56bbee89ed91";// "ce -" + Guid.NewGuid().ToString().ToLower();
//===================================================================================
var myData = new APIRequestEntity()
{
Name = "A Transfer Intermediary for ....",
Description = "A useful description is coming soon. .",
CodedNotation = "Accounting 101",
CTID = myCTID,
Subject = new List<string>() { "Finance", "Accounting", "Bookkeeping" },
SubjectWebpage = "https://example.org?t=ti22"
};
myData.OwnedBy.Add( new OrganizationReference()
{
CTID = organizationIdentifierFromAccountsSite
} );
myData.CreditValue = new List<ValueProfile>()
{
new ValueProfile()
{
Value=3,
CreditUnitType = new List<string>() {"DegreeCredit"},
CreditLevelType = new List<string>() {"LowerDivisionLevel"}
}
};
//This holds the main entity and the identifier (CTID) for the owning organization
//NOTE use of a separate request class!
var myRequest = new TransferIntermediaryBulkRequest()
{
TransferIntermediary = myData,
DefaultLanguage = "en-US",
PublishForOrganizationIdentifier = organizationIdentifierFromAccountsSite
};
//add some transfer value profiles
myRequest.TransferValueProfiles.Add( GetTVPOne( organizationIdentifierFromAccountsSite ) );
myRequest.TransferValueProfiles.Add( GetTVPTwo( organizationIdentifierFromAccountsSite ) );
myRequest.TransferValueProfiles.Add( GetTVPEnvironmentalChallenges( organizationIdentifierFromAccountsSite ) );
// Serialize the request object
string payload = JsonConvert.SerializeObject( myRequest, SampleServices.GetJsonSettings() );
//call the Assistant API
SampleServices.AssistantRequestHelper req = new SampleServices.AssistantRequestHelper()
{
EndpointType = "TransferIntermediary",
RequestType = "bulkpublish", //note different name - no format endpoint for a bulk request!
OrganizationApiKey = apiKey,
CTID = myRequest.TransferIntermediary.CTID.ToLower(), //added here for logging
Identifier = "testing", //useful for logging, might use the ctid
InputPayload = payload
};
var isvalid = new SampleServices().PublishRequest( req );
if ( req.Messages.Count > 0 )
{
string status = string.Join( ",", req.Messages.ToArray() );
LoggingHelper.DoTrace( 5, thisClassName + " Publish request had some error messages: " + status );
}
return isvalid;
}
/// <summary>
/// uses transferValueFrom and TransferValueFor
/// </summary>
/// <param name="owningOrganizationCtid"></param>
/// <returns></returns>
public TransferValueProfile GetTVPOne( string owningOrganizationCtid )
{
// Assign a CTID for the entity being published and keep track of it
//NOTE: afer being generated, this value be saved and used for successive tests or duplicates will occur.
var myCTID = "ce-" + Guid.NewGuid().ToString().ToLower();
//from previous test
myCTID = "ce-fd515001-6a9c-4f43-b401-3e65127fc807";
var myData = new TransferValueProfile()
{
Name = "My Transfer Value Profile Name",
Description = "This is some text that describes my transfer value profile.",
CTID = myCTID,
SubjectWebpage = "http://example.com/transferValueProfile/tvp1"
};
// OwnedBy is a list of OrganizationReferences. As a convenience just the CTID is necessary.
// The ownedBY CTID is typically the same as the CTID for the data owner.
myData.OwnedBy.Add( new OrganizationReference()
{
CTID = owningOrganizationCtid
} );
//============== TransferValue ====================================================
myData.TransferValue = new List<ValueProfile>()
{
new ValueProfile()
{
Value=3,
CreditUnitType = new List<string>() {"DegreeCredit"},
CreditLevelType = new List<string>() {"LowerDivisionLevel"}
}
};
//============== transfer value from ===========================================
//Resource that provides the transfer value described by this resource, according to the entity providing this resource.
//A list of entity references. If the CTID is known, then just provide it.
//A type is also required
//22-02-11 mp - this has to be verified/looked up, so do we really need the type? Perhaps as an xref?
myData.TransferValueFrom.Add( new EntityReference()
{
Type = "ceterms:LearningOpportunityProfile",
CTID = "ce-568e16ad-9697-4429-8c02-6428f49e87cc"
} );
//If not provided as much information as is available
//see: https://github.com/CredentialEngine/Registry_Assistant/blob/master/src/RA.Models/Input/profiles/EntityReference.cs
myData.TransferValueFrom.Add( new LearningOpportunity()
{
Type = "LearningOpportunityProfile",
Name = "name of the learning opportunity",
Description = "Description of the learning opportunity",
SubjectWebpage = "https://example.com/anotherlOPP",
LearningMethodDescription = "A useful description of the learning method",
AssessmentMethodDescription = "How the learning opportunity is assessed.",
OwnedBy = new List<OrganizationReference>()
{
new OrganizationReference()
{
Type="Organization", Name="ACME Publications", SubjectWebpage="https://example.org?t=acme"
}
}
} );
// optional
//coded Notation could be replaced by Identifier in the near future
myData.StartDate = "2015-01-01";
myData.EndDate = "2021-12-21";
return myData;
}
public TransferValueProfile GetTVPTwo( string owningOrganizationCtid )
{
// Assign a CTID for the entity being published and keep track of it
//NOTE: afer being generated, this value be saved and used for successive tests or duplicates will occur.
var myCTID = "ce-e909559d-925c-4f12-a579-a05f8935eaea";// "ce-" + Guid.NewGuid().ToString().ToLower();
//from previous test
//
var myData = new TransferValueProfile()
{
Name = "My Transfer Value Profile Number Two ",
Description = "This is some text that describes my transfer value profile number 2.",
CTID = myCTID,
SubjectWebpage = "http://example.com/transferValueProfile/tvp2"
};
// OwnedBy is a list of OrganizationReferences. As a convenience just the CTID is necessary.
// The ownedBY CTID is typically the same as the CTID for the data owner.
myData.OwnedBy.Add( new OrganizationReference()
{
CTID = owningOrganizationCtid
} );
//============== TransferValue ====================================================
//REQUIRED
myData.TransferValue = new List<ValueProfile>()
{
new ValueProfile()
{
Value=3,
CreditUnitType = new List<string>() {"DegreeCredit"},
CreditLevelType = new List<string>() {"LowerDivisionLevel"}
}
};
//============== transfer value from ===========================================
//Resource that provides the transfer value described by this resource, according to the entity providing this resource.
//TransferValueFrom is list of objects. Currently the classes handled are LearningOpportunity and Assessment.
myData.TransferValueFrom.Add( new LearningOpportunity()
{
Type = "LearningOpportunityProfile",
Name = "name of the learning opportunity",
Description = "Description of the learning opportunity",
SubjectWebpage = "https://example.com/anotherlOPP",
LearningMethodDescription = "A useful description of the learning method",
AssessmentMethodDescription = "How the learning opportunity is assessed.",
OwnedBy = new List<OrganizationReference>()
{
new OrganizationReference()
{
Type="Organization", Name="ACME Publications", SubjectWebpage="https://example.org?t=acme"
}
}
} );
//============== transfer value For
//Resource that accepts the transfer value described by this resource, according to the entity providing this resource.
//TransferValueFor is list of objects. Currently the classes handled are LearningOpportunity and Assessment.
myData.TransferValueFor.Add( new Assessment()
{
Type = "AssessmentProfile",
Name = "name of the target assessment",
Description = "Description of the assessment",
SubjectWebpage = "https://example.com/targetAssessment",
LearningMethodDescription = "A useful description of the learning method",
AssessmentMethodDescription = "How the assessment is conducted.",
OwnedBy = new List<OrganizationReference>()
{
new OrganizationReference()
{
Type="Organization", Name="ACME Publications", SubjectWebpage="https://example.org?t=acme"
}
}
} );
// optional
myData.StartDate = "2020-01-01";
myData.EndDate = "2021-12-21";
myData.Identifier.Add( new IdentifierValue()
{
IdentifierTypeName = "ACE Course Code",
IdentifierValueCode = "0276" //Alphanumeric string identifier of the entity
} );
return myData;
}
/// <summary>
/// Environmental Challenges And Solutions
/// </summary>
/// <param name="owningOrganizationCtid"></param>
/// <returns></returns>
public TransferValueProfile GetTVPEnvironmentalChallenges( string owningOrganizationCtid )
{
//from previous test
//
var myData = new TransferValueProfile()
{
Name = "Environmental Challenges And Solutions",
Description = "To provide knowledge of the scope and severity of environmental illnesses.",
CTID = "ce-489406de-1c64-40bd-af31-f7a502b8b850",
SubjectWebpage = "https://hunter-undergraduate.catalog.cuny.edu/departments/GEOG-HTR/overview"
};
// OwnedBy is a list of OrganizationReferences. As a convenience just the CTID is necessary.
// The ownedBY CTID is typically the same as the CTID for the data owner.
//then
var huntingtonCollegeCTID = "ce-9c1c2d37-e525-43a3-9cea-97f076b2fe38";
//this might require a third party relationship?
myData.OwnedBy.Add( new OrganizationReference()
{
CTID = huntingtonCollegeCTID
} );
myData.StartDate = "1994-09-01";
myData.EndDate = "2001-06-30";
//============== TransferValue ====================================================
myData.TransferValue = new List<ValueProfile>()
{
new ValueProfile()
{
Value=3,
CreditUnitType = new List<string>() {"DegreeCredit"},
CreditLevelType = new List<string>() {"LowerDivisionLevel"}
}
};
//============== transfer value from ===========================================
//see: https://github.com/CredentialEngine/Registry_Assistant/blob/master/src/RA.Models/Input/profiles/EntityReference.cs
var learningOpportunity = new LearningOpportunity()
{
Type = "LearningOpportunityProfile",
Name = "Environmental Challenges And Solutions",
Description = "To provide knowledge of the scope and severity of environmental illnesses.",
SubjectWebpage = "https://hunter-undergraduate.catalog.cuny.edu/departments/GEOG-HTR/overview",
DateEffective = "1994-09-01",
ExpirationDate = "2001-06-30",
EstimatedDuration = new List<DurationProfile>()
{
new DurationProfile() { Description= "135 hours (self-paced)" }
}
};
learningOpportunity.OwnedBy = new List<OrganizationReference>() { new OrganizationReference()
{
Type = "CredentialOrganization",
Name = "Huntington College of Health Sciences",
Description = "To provide knowledge of the scope and severity of environmental illnesses.",
SubjectWebpage = "https://hunter-undergraduate.catalog.cuny.edu/departments/GEOG-HTR/overview"
} };
learningOpportunity.Teaches = new List<CredentialAlignmentObject>()
{
new CredentialAlignmentObject()
{
TargetNodeName="Upon successful completion of this course, the student will be able to recognize causes and effects of chemically induced illness"
},
new CredentialAlignmentObject()
{
TargetNodeName="And understand the role proper nutrition plays in avoiding and/or mitigating the damage these chemicals cause"
},
new CredentialAlignmentObject()
{
TargetNodeName="Know how to find alternative solutions to chemicals"
}
};
myData.TransferValueFrom.Add( learningOpportunity );
return myData;
}
#endregion
}
}
See more detailed ready to run publishing example in github.
Introduction
The SupportService references resources and assistance that help people overcome barriers to succeed in their education and career goals.
Support services can be provided at any stage of an individual's education or career, and may be targeted towards people with or without direct affiliation with an organization. The goal of support services is to provide people with the assistance they need to achieve their full potential. Examples of Support Services include career advice, job placement, childcare, transportation, tools, mentorship, counseling, and other forms of aid.
References
- SupportService class on credreg.net
- The Support Service Minimum Data Policy for the required properties for the support service class.
- See github for the SupportService Request class used by the Assistant API which includes the SupportService class.
- See more detailed ready to run examples in github.
To format or publish a SupportService Profile, use the following endpoints:
Format Data (only).
https://sandbox.credentialengine.org/assistant/SupportService/format
Publish Data (automatically formats first)
https://sandbox.credentialengine.org/assistant/SupportService/publish
Required Properties
The Registry Assistant API uses a simplified version of the SupportService class to publish the data to the registry. Refer to the Minimum Data Policy for the required properties for the SupportService Profile class.
Publishing a Basic Record
Your system will need to output the data above in JSON format. For example:
Recommended Properties
In order to maximize the utility of the SupportService data in the Registry, we recommend you also include data for the following properties:
Sample
To publish the data, you will need to wrap it in an object that also contains a PublishForOrganizationIdentifier property. Naturally, this is where you specify the CTID of the owning organization (from the accounts site). The SupportService data itself will go in a SupportService property:
Sample SupportService wrapper:
See more detailed ready to run publishing example in github.
Introduction
The Verification Service Profile class is used in describing the means by which someone can verify whether a credential has been attained.
As well, it includes, but is not limited to, verification of whether quality assurance credentials have been issued for organizations, learning opportunities, and assessments.
References
- Verification Service Profile class on credreg.net
- The Verification Service Profile Minimum Data Policy: CTID, Description, and OfferedBy are the only required properties.
- See github for the VerificationServiceProfile Request class used by the Assistant API and the input class.
- See more detailed ready to run examples in github.
To format or publish a Verification Service Profile Profile, use the following endpoints:
Format Data (only).
https://sandbox.credentialengine.org/assistant/VerificationServiceProfile/format
Publish Data (automatically formats first)
https://sandbox.credentialengine.org/assistant/VerificationServiceProfile/publish
Required Properties
The Registry Assistant API uses a simplified version of the Verification Service Profile class to publish the data to the registry. Refer to the Minimum Data Policy for the required properties for the Verification Service Profile Profile class.
Publishing a Basic Record
Your system will need to output the data above in JSON format. For example:
Recommended Properties
In order to maximize the utility of the Verification Service Profile data in the Registry, we recommend you also include data for the following properties:
Sample
To publish the data, you will need to wrap it in an object that also contains a PublishForOrganizationIdentifier property. Naturally, this is where you specify the CTID of the owning organization (from the accounts site). The Verification Service Profile data itself will go in a Verification Service Profile property:
Sample Verification Service Profile wrapper:
See more detailed ready to run publishing example in github.
Summary
The Registry Assistant API makes it easy to publish data about Verification Service Profiles.
Introduction
The Occupation references a profession, trade, or career field that may involve training and/or a formal qualification.
References
- Occupation class on credreg.net
- The Occupation Minimum Data Policy for the required properties for the Occupation class.
- See github for the Occupation Request class used by the Assistant API which includes the Occupation class.
- See more detailed ready to run examples in github.
To format or publish a Occupation Profile, use the following endpoints:
Format Data (only).
https://sandbox.credentialengine.org/assistant/Occupation/format
Publish Data (automatically formats first)
https://sandbox.credentialengine.org/assistant/Occupation/publish
Required Properties
The Registry Assistant API uses a simplified version of the Occupation class to publish the data to the registry. Refer to the Minimum Data Policy for the required properties for the Occupation Profile class.
Publishing a Basic Record
Your system will need to output the data above in JSON format. For example:
Recommended Properties
In order to maximize the utility of the Occupation data in the Registry, we recommend you also include data for the following properties:
Sample
To publish the data, you will need to wrap it in an object that also contains a PublishForOrganizationIdentifier property. Naturally, this is where you specify the CTID of the owning organization (from the accounts site). The Occupation data itself will go in a Occupation property:
Sample Occupation wrapper:
See more detailed ready to run publishing example in github.
Introduction
The Job references a set of responsibilities based on work roles within an occupation as defined by an employer./p>
References
- Job class on credreg.net
- The Job Minimum Data Policy for the required properties for the Job class.
- See github for the Job Request class used by the Assistant API which includes the Job class.
- See more detailed ready to run examples in github.
To format or publish a Job Profile, use the following endpoints:
Format Data (only).
https://sandbox.credentialengine.org/assistant/Job/format
Publish Data (automatically formats first)
https://sandbox.credentialengine.org/assistant/Job/publish
Required Properties
The Registry Assistant API uses a simplified version of the Job class to publish the data to the registry. Refer to the Minimum Data Policy for the required properties for the Job Profile class.
Publishing a Basic Record
Your system will need to output the data above in JSON format. For example:
Recommended Properties
In order to maximize the utility of the Job data in the Registry, we recommend you also include data for the following properties:
Sample
To publish the data, you will need to wrap it in an object that also contains a PublishForOrganizationIdentifier property. Naturally, this is where you specify the CTID of the owning organization (from the accounts site). The Job data itself will go in a Job property:
Sample Job wrapper:
See more detailed ready to run publishing example in github.
Introduction
The WorkRole references a set of responsibilities based on work roles within an occupation as defined by an employer./p>
References
- Work Role class on credreg.net
- The Work Role Minimum Data Policy for the required properties for the WorkRole class.
- See github for the Work Role Request class used by the Assistant API which includes the Work Role class.
- See more detailed ready to run examples in github.
To format or publish a WorkRole Profile, use the following endpoints:
Format Data (only).
https://sandbox.credentialengine.org/assistant/WorkRole/format
Publish Data (automatically formats first)
https://sandbox.credentialengine.org/assistant/WorkRole/publish
Required Properties
The Registry Assistant API uses a simplified version of the WorkRole class to publish the data to the registry. Refer to the Minimum Data Policy for the required properties for the WorkRole Profile class.
Publishing a Basic Record
Your system will need to output the data above in JSON format. For example:
Recommended Properties
In order to maximize the utility of the WorkRole data in the Registry, we recommend you also include data for the following properties:
Sample
To publish the data, you will need to wrap it in an object that also contains a PublishForOrganizationIdentifier property. Naturally, this is where you specify the CTID of the owning organization (from the accounts site). The WorkRole data itself will go in a WorkRole property:
Sample WorkRole wrapper:
See more detailed ready to run publishing example in github.
Introduction
The Task references a specific activity, typically related to performing a function or achieving a goal.
References
- Task class on credreg.net
- The Task Minimum Data Policy for the required properties for the Task class.
- See github for the Task Request class used by the Assistant API which includes the Task class.
- See more detailed ready to run examples in github.
To format or publish a Task Profile, use the following endpoints:
Format Data (only).
https://sandbox.credentialengine.org/assistant/Task/format
Publish Data (automatically formats first)
https://sandbox.credentialengine.org/assistant/Task/publish
Required Properties
The Registry Assistant API uses a simplified version of the Task class to publish the data to the registry. Refer to the Minimum Data Policy for the required properties for the Task Profile class.
Publishing a Basic Record
Your system will need to output the data above in JSON format. For example:
Recommended Properties
In order to maximize the utility of the Task data in the Registry, we recommend you also include data for the following properties:
Sample
To publish the data, you will need to wrap it in an object that also contains a PublishForOrganizationIdentifier property. Naturally, this is where you specify the CTID of the owning organization (from the accounts site). The Task data itself will go in a Task property:
Sample Task wrapper:
See more detailed ready to run publishing example in github.
Introduction
The Quality Assurance Action (Credentialing Action) references an action taken by an agent affecting the status of an object entity..
References
- Credentialing Action class on credreg.net
- The Quality Assurance Action Minimum Data Policy for the required properties for the Quality Assurance Action class.
- See github for the Quality Assurance Action Request class used by the Assistant API which includes the Quality Assurance Action class.
- See more detailed ready to run examples in github.
To format or publish a Quality Assurance Action Profile, use the following endpoints:
Format Data (only).
https://sandbox.credentialengine.org/assistant/Quality Assurance Action/format
Publish Data (automatically formats first)
https://sandbox.credentialengine.org/assistant/Quality Assurance Action/publish
Types of credentialing actions
- AccreditAction
- AdvancedStandingAction
- ApproveAction
- OfferAction
- RecognizeAction
- RegulateAction
- RenewAction
- RevokeAction
- RightsAction
- WorkforceDemandAction
Required Properties
The Registry Assistant API uses a simplified version of the Quality Assurance Action class to publish the data to the registry. Refer to the Minimum Data Policy for the required properties for the Quality Assurance Action Profile class.
Publishing a Basic Record
Your system will need to output the data above in JSON format. For example:
Recommended Properties
In order to maximize the utility of the Quality Assurance Action data in the Registry, we recommend you also include data for the following properties:
Sample
To publish the data, you will need to wrap it in an object that also contains a PublishForOrganizationIdentifier property. Naturally, this is where you specify the CTID of the owning organization (from the accounts site). The Quality Assurance Action data itself will go in a Quality Assurance Action property:
Sample Quality Assurance Action wrapper:
See more detailed ready to run publishing example in github.
Introduction
The Rubric references a structured and systematic evaluation tool used to assess performance, quality, and/or criteria..
References
- Rubric class on credreg.net
- The Rubric Minimum Data Policy for the required properties for the Rubric class.
- See github for the Rubric Request class used by the Assistant API which includes the Rubric class.
- See more detailed ready to run examples in github.
To format or publish a Rubric, use the following endpoints:
Format Data (only).
https://sandbox.credentialengine.org/assistant/Rubric/format
Publish Data (automatically formats first)
https://sandbox.credentialengine.org/assistant/Rubric/publish
Required Properties
The Registry Assistant API uses a simplified version of the Rubric class to publish the data to the registry. Refer to the Minimum Data Policy for the required properties for the Rubric class.
Publishing a Basic Record
Your system will need to output the data above in JSON format. For example:
Recommended Properties
In order to maximize the utility of the Rubric data in the Registry, we recommend you also include data for the following properties (see recommended policy.):
Sample
To publish the data, you will need to wrap it in an object that also contains a PublishForOrganizationIdentifier property. Naturally, this is where you specify the CTID of the owning organization (from the accounts site). The Rubric data itself will go in a Rubric property:
Sample Rubric wrapper:
See more detailed ready to run publishing example in github.
Embedded Classes
Within CTDL, there are a number of classes that are published as objects nested within the top level classes described above. The Registry Assistant API works the same basic way. Some of the classes below may be used within more than one of the top level classes. In addition, more than one instance of the classes below may be present in many cases.
Condition Profile
Condition Profile is the workhorse of CTDL. It is a large profile encompassing a variety of properties that define the complex data which forms the glue between resources like Credentials and most other entities: assessments, learning opportunities, competencies, other credentials, etc. The condition profile is in the range of common properties like:
- Requires - Requirement or set of requirements for a resource.
- Recommends - Recommended credential, learning opportunity or assessment.
- Renewal - Entity describing the constraints, prerequisites, entry conditions, or requirements necessary to maintenance and renewal of an awarded credential..
- Advanced Standing From - Credential that has its time or cost reduced by another credential, assessment or learning opportunity./li>
- Entry Conditions - Requirements for entry into a credentialing program, a learning opportunity, or an assessment, including credentials, transcripts, records of previous experience, or other forms of entry documentation.
References
See:
- The Minimum Data Policy for the required properties for this class.
- The Registry Assistant API Condition Profile class in Github. The latter class will indicate which properties are lists and which are singles.
- Sample code to populate a Condition Profile in Github.
Commonly Used Condition Profile Properties
Below are some of the most relevant properties. Refer to the CTDL documentation for the full listing. The following Usage section will have examples of these (from GitHub).
Description
Nov. 13, 2023 Description is NO longer a required property.
If description is provided, the minimum length is 15 characters.
Condition
This property is a list of strings. Useful for listing required conditions such as:
{ "Complete High School", "Have a drivers licence." },
Target Credentials, Assessments, and Learning Opportunities
A credential may require the completion of other resources like assessments, learning opportunities, or other credentials. This requirement can be expressed through a condition profile and one or more of the following properties.
- Target Learning Opportunity - Learning opportunity that is the focus of a condition, process or another learning opportunity.
- Target Assessment - Assessment that provides direct, indirect, formative or summative evaluation or estimation of the nature, ability, or quality for an entity.
- Target Credential - Credential that is a focus or target of the condition, process or verification service.
The above properties are URIs in the credential registry. The API uses the Entity Reference class when publishing these target properties. See the Entity Reference class in Github for all available properties.
This class enables a flexible approach to providing references to other entities, depending on what is available in the publishing system. There are three approaches:
-
Provide just CTID (recommended):
- If the related entity is in the registry, or soon will be, then just the CTID needs to be provided.
- The preference between providing a CTID or Id would be the CTID. Then the API can format the URL correctly based on the target credential registry and community/private registry where applicable.
- There may be a case where a reference is needed for an entity that is in a different community/private registry than the current target (rare, and not yet completely handled). In this case, then the full URL should be provided in the Id property.
-
Provide just Id:
- If the entity being referenced is already published in the registry, the full URI can be provided, like:
https://sandbox.credentialengineregistry.org/resources/ce-a4041983-b1ae-4ad4-a43d-284a5b4b2d73. - Note: The convention is to provide the /resources URI, not the /graph URI.
- If the entity being referenced is already published in the registry, the full URI can be provided, like:
-
Provide Reference Properties:
-
A reference can be made to an entity that doesn’t exist in the registry but does have a URL. In this case, the following can be provided:
- Type (required). This would be one of ceterms:AssessmentProfile, ceterms:LearningOpportunityProfile, or one of the Credential subclasses such as ceterms:Badge, ceterms:Certification, etc.
- Name (required)
- SubjectWebpage (required)
- Description (optional)
- See the Entity Reference class in Github for all available properties.
-
A reference can be made to an entity that doesn’t exist in the registry but does have a URL. In this case, the following can be provided:
Note: only one of the three options should be provided. The CTID is checked first, then the Id, then the external reference.
Target Competency
A credential may require competencies relevant to the condition being described. The information about a competency is formatted as a Credential Alignment Object and published via the TargetCompetency property.
The commonly used properties are:
- Framework (Optional) - public URL for the framework. Note this would be the credential registry URI for a competency framework published in the credential registry.
- FrameworkName (Optional) - name of the framework.
- TargetNode (Optional) - public URL to this competency. Note this would be the credential registry URI for a competency published in the credential registry.
- TargetNodeName (Required) - name of this competency.
- TargetNodeDescription (Optional) - a description of this competency.
- CodedNotation (Optional) - for example a SOC code of 49-9081.00 (Wind Turbine Service Technicians).
Helper Property: TargetCompetencyFramework
NEW Feb. 03, 2023. The process to format a list of credential alignment objects for a large number of competencies can be difficult depending on how the data is available to the publishing system.
A new helper property was added to condition profile to ease the process of publishing all of the competencies required for a condition: TargetCompetencyFramework. This property will contain one or more CTIDs for a framework that has been published to the credential registry. The API will:
- Validate that a provided CTID is for a framework that exists in the registry
- If valid, the API will extract all competencies from the framwork and format a credential alignment object for each one
- TargetCompetency will be populated with the latter list and published with the ConditionProfile
- NOTE: only one of TargetCompetency or TargetCompetencyFramework may be provided at this time.
Credit Value
The credit value property has a range of Value Profile. A common use for this property is to specify a specified number of semester hours, or degree credits, or clock hours that may be required for a resource.
Alternative Conditions
Alternative Condition are constraints, prerequisites, entry conditions, or requirements in a context where more than one alternative condition or path has been defined and from which any one path fulfills the parent condition. A set of alternative conditions are not necessarily mutually exclusive paths; for example, a set of alternative concentrations for a degree may allow a person to optionally complete more than one concentration even though only one is required to earn the degree.
Usage
Usage
The intended interpretation and usage of the data in a Condition Profile depends entirely on which property it is associated with. For instance, A Condition Profile attached to the "requires" property defines requirements for earning a Credential, whereas a Condition Profile attached to "recommends" is merely informational or advisory in nature, and does not define requirements. Often, such information only applies in certain circumstances - Condition Profile is designed to allow designating and describing these circumstances as well. Other properties also use Condition Profile to define connections between other entities in CTDL, but here we will focus on Credentials.
Note that multiple Condition Profiles defined under the same property (e.g., requires) are considered to all apply to that property if the person pursuing the credential meets the conditions of those profiles. For example, if a credential has 3 Condition Profiles under "requires" and a person pursuing that Credential meets the conditions for two of those Condition Profiles, then that person must meet all of the conditions defined in both of those profiles to earn the Credential.
	public class ConditionProfiles
	{
		/// <summary>
		/// Sample data for most properties of a condition profile
		/// Required:
		/// - Description
		///
		/// Recommended
		/// - Name: Name or title of the resource.
		/// - Submission Of: Artifact to be submitted such as a transcript, portfolio, or an affidavit.
		/// - Condition: Single constraint, prerequisite, entry condition, requirement, or cost.
		/// - Subject Webpage: Webpage that describes this entity.
		/// - Target Entity
		///			In the context of requirements, this points to the entity or entities that are required
		///			for the credential, assessment, or learning opportunity that is using this Condition Profile.
		///			In other contexts, these properties connect their target to the entity using this Condition Profile.
		///		<see href="https://credreg.net/ctdl/terms/ConditionProfile">ConditionProfile</see>
		/// </summary>
		/// <returns></returns>
		public ConditionProfile PopulateRequires()
		{

			var output = new ConditionProfile()
			{
				Description = "To earn this credential the following conditions must be met, and the target learning opportunity must be completed.",
				SubjectWebpage = "https://example.org/mypage",
				AudienceType = new List<string>() { "Citizen", "audience:NonResident" },
				AudienceLevelType = new List<string>() { "BeginnerLevel", "audLevel:IntermediateLevel" },
				Condition = new List<string>() { "Complete High School", "Have a drivers licence." },
				Experience = "A little life experience is preferred.",
				MinimumAge =18,
				YearsOfExperience=3,
				Weight =.95M,

			};
			//name is optional
			output.Name = "A useful name for this condition profile";
			//AssertedBy is a list of OrganizationReference. If the organization exists in the registry, only the CTID needs to be provided.
			output.AssertedBy = new List<OrganizationReference>()
			{
				new OrganizationReference()
				{
					Type= "Organization",
					Name="Asserting Organization",
					SubjectWebpage="https://example.org/assertingOrg"
				},
				new OrganizationReference()
                {
					CTID="ce-231a1022-43c7-41ed-9b0d-9a4c6b59ffc3"
				}
			};
			//CreditValue. see: https://credreg.net/ctdl/terms/creditValue
			//CreditValue is of type ValueProfile (https://credreg.net/ctdl/terms/ValueProfile)
			output.CreditValue = new List<ValueProfile>()
			{
				new ValueProfile()
				{
					//CreditUnitType- The type of credit associated with the credit awarded or required.
					//			ConceptScheme: ceterms:CreditUnit (https://credreg.net/ctdl/terms/CreditUnit#CreditUnit)
					//			Concepts: provide with the namespace (creditUnit:SemesterHour) or just the text (SemesterHour). examples
					//			creditUnit:ClockHour, creditUnit:ContactHour, creditUnit:DegreeCredit
					CreditUnitType = new List<string>() {"SemesterHour"},
					Value=10
				}
			};
			output.CreditUnitTypeDescription = "Perhaps a clarification on rules for credit value.";
			//Submission Of - Artifact to be submitted such as a transcript, portfolio, or an affidavit.
			output.SubmissionOf = new List<string>() { "https://example.com/howtoapply", "https://example.com/usefulinfo" };
			//Name, label, or description of an artifact to be submitted such as a transcript, portfolio, or an affidavit.
			output.SubmissionOfDescription = "As a companion to SubmissionOf, or where is no online resource, provide useful information.";

			//costs
			output.EstimatedCost.Add( CostProfiles.PopulateCostProfile());

			// List of CTIDs (recommended) or full URLs for a CostManifest published by the owning organization
			output.CommonCosts = new List<string>()
			{
				"ce-c9ced959-2924-481a-b8dd-7590b37dd07f"
			};

			//jurisdictions
			output.Jurisdiction.Add( Jurisdictions.SampleJurisdiction() );
			output.ResidentOf.Add( Jurisdictions.SampleJurisdiction() );


			//target entities.
			//Often a credential must be preceded by a learning opportunity and/or an assessment. Use an EntityFramework to provide the resource, either using just a CTID for a resource in the Credential Registry, or minimally the type, name, and subject webpage for other resources.
			output.TargetLearningOpportunity = new List<EntityReference>()
			{
				//if the target learning opportunity exists in the registry, then only the CTID has to be provided in the EntityReference
				new EntityReference()
				{
					CTID="ce-ccd00a32-d5ad-41e7-b14c-5c096bc9eea0"
				},
				new EntityReference()
				{
					//Learning opportunities not in the registry may still be published as 'blank nodes'
					//The type, name, and subject webpage are required. The description while useful is optional.
					Type="LearningOpportunity",
					Name="Another required learning opportunity (external)",
					Description="A required learning opportunity that has not been published to Credential Registry. The type, name, and subject webpage are required. The description while useful is optional. ",
					SubjectWebpage="https://example.org?t=anotherLopp",
						CodedNotation="Learning 101"
				},
				new EntityReference()
				{
					//New: LearningOpportunities now have two subclasses: Course and LearningProgram
					//The type, name, and subject webpage are required. The description while useful is optional.
					Type="Course",
					Name="Name for a course that is required for this entity",
					Description="A description for a course that has not been published to Credential Registry. The type, name, and subject webpage are required. The description while useful is optional. ",
					SubjectWebpage="https://example.org?t=aCousre",
						CodedNotation="Course 200"
				}
			};
			//same idea for assessments and credentials
			output.TargetAssessment = new List<EntityReference>();
			output.TargetCredential = new List<EntityReference>();

			//target competencies are Credential Alignment Objects
			//- add an entry for each relevent competency
			output.TargetCompetency = new List<CredentialAlignmentObject>()
			{
				//if not in the registry, include at least the TargetNodeName
				new CredentialAlignmentObject()
				{
					TargetNodeName="Outcome item",
					TargetNodeDescription="Description of this outcome item"
				},
				//if not in the registry, include framework information, even if just in a PDF
				new CredentialAlignmentObject()
                {
                    TargetNodeName="Outcome item",
                    TargetNodeDescription="Description of this outcome item",
                    FrameworkName="Optional name of this framework",
                    Framework="https://example.org/somepdf"
                },

				//example for a competency in the credential registry.
				//NOTE: only the CTID needs to be supplied. The API will format the proper URL for the target environment.
				new CredentialAlignmentObject()
				{
					Framework= "ce-fa61f374-c455-4f76-8795-d2d16ba40549",
					TargetNode= "ce-93dbdedb-c455-4b03-9b3a-0b0edc3f43a7",
					FrameworkName= "Financial Accounting - CORE OUTCOMES",
					TargetNodeName= "Identify and demonstrate the effects of transactions and economic events on the financial statements in corporations and other business entities"
				},

				//coming SOON just the CTID for a competency in the registry (so parnter doesn't have to look up other data).
				//	The API will take care of validating that the competency exists, and formats the framework and competency information
                 new CredentialAlignmentObject()
                {
                    TargetNode= "ce-93dbdedb-c455-4b03-9b3a-0b0edc3f43a7",
                },
            };

            //***** Feb. 03, 2023 *****
            //NEW helper property
            //This property was added to simplify referencing competencies that may have been entered in an external system such as CaSS.
            //Rather than populating the TargetCompetency list, just provide the CTID for a competency framework in the registry.
            //The API will:
            //	- validate that a provided CTID is for a framework that exists in the registry
            //	- if valid, the API will extract all competencies from the framwork and format a credential alignment object for each one
            //	- TargetCompetency will be populated with the latter list and published with the ConditionProfile
            output.TargetCompetencyFramework = new List<string>() { "ce-fa61f374-c455-4f76-8795-d2d16ba40549" };

            //Alternative Condition
            //Constraints, prerequisites, entry conditions, or requirements in a context where more than one alternative condition or path has been defined and from which any one path fulfills the parent condition.

            //when use the description would probably provide some direction such as
            //			"...one of the programs referenced in the AlternativeCondition must be completed."
            output.AlternativeCondition = GetAlternativeConditions();
			return output;
		}

		private List<ConditionProfile> GetAlternativeConditions()
        {
			var alternativeConditions = new List<ConditionProfile>()
			{
				new ConditionProfile()
				{
					Name="campus 1",
					Description = "To earn this credential the following program is one that would satisfy this requirement.",
					TargetLearningOpportunity = new List<EntityReference>()
					{
						new EntityReference()
						{
							CTID="ce-bdd69580-1dba-4aad-a2fe-608ae14e19a0"
						}
					}
				},
				new ConditionProfile()
				{
					Name="campus 2",
					Description = "To earn this credential the following program is one that would satisfy this requirement.",
					TargetLearningOpportunity = new List<EntityReference>()
					{
						new EntityReference()
						{
							CTID="ce-34d92f0d-1a09-4bab-8144-41147df5f531"
						}
					}
				},
				new ConditionProfile()
				{
					Name="campus 3",
					Description = "To earn this credential the following program is one that would satisfy this requirement.",
					TargetLearningOpportunity = new List<EntityReference>()
					{
						new EntityReference()
						{
							CTID="ce-35fdd620-4fa6-4919-9ab8-33ded8f0f0b8"
						}
					}
				},
				new ConditionProfile()
				{
					Name="campus 4",
					Description = "To earn this credential the following program is one that would satisfy this requirement.",
					TargetLearningOpportunity = new List<EntityReference>()
					{
						new EntityReference()
						{
							CTID="ce-6a8dc43a-5347-4160-a4c6-804f13f02113"
						}
					}
				},
				new ConditionProfile()
				{
					Name="campus 5",
					Description = "To earn this credential the following program is one that would satisfy this requirement.",
					TargetLearningOpportunity = new List<EntityReference>()
					{
						new EntityReference()
						{
							CTID="ce-38614e2e-dc03-454f-834a-971107268aa7"
						}
					}
				}
			};
			return alternativeConditions;
		}
	}
Cost Profile
Cost Profile is a detailed class meant to convey how much something costs in the context of certain circumstances. There are many situations in which the cost of something depends on some factor of the person trying to earn it, such as residency, military status, citizenship, etc. Use as many Cost Profiles as are necessary to convey the different overall costs for these different combinations of circumstances. You may provide one "general" Cost Profile, and only need to provide additional Cost Profiles for particular situations that are relevant to your credential. You should not provide a Cost Profile for every possible combination of the properties/vocabulary terms listed below unless each of those combinations is significantly different.
References
See:
- The Minimum Data Policy for the required properties for this class.
- The Registry Assistant API Cost Profile class in Github.
- Sample code to populate a Cost Profile in Github.
Usage
A credential registry cost profile includes one direct cost and price per profile. The Assistant API helps simplify the entry of cost profiles with multiple costs. The main cost profile information is provided once, and the individual cost types and price can be provided in a list.
	public class CostProfiles
	{
		/// <summary>
		/// Sample Cost Profile
		/// Required: <see cref="https://credreg.net/registry/policy#costprofile_required"/>
		/// - Description
		/// - CostDetails URL
		/// Recommended
		/// - Currency
		///   - For list of valid ISO 4217 currency codes, see: https://en.wikipedia.org/wiki/ISO_4217#List_of_ISO_4217_currency_codes
		/// - CostProfileItem
		///   - helper for Direct Cost Type
		///   Must be a valid CTDL cost type.<see cref="https://credreg.net/ctdl/terms#CostType"/>
		///		 Example: Tuition, Application, AggregateCost, RoomOrResidency
		///   - price, AudienceType, ResidencyType
		/// </summary>
		/// <returns></returns>
		public static CostProfile PopulateCostProfile()
		{
			var output = new CostProfile()
			{
				Description = "A required description of the cost profile",
				CostDetails = "https://example.com/t=loppCostProfile",
				Currency = "USD",
				CostItems = new List<CostProfileItem>()
				 {
					 new CostProfileItem()
					 {
						 DirectCostType="Application",
						 Price=100,
					 },
					 new CostProfileItem()
					 {
						 DirectCostType="Tuition",
						 Price=12999,
						 PaymentPattern="Full amount due at time of registration"
					 }
				 }
			};
			output.Jurisdiction = new List<JurisdictionProfile>()
			{
				//example of a jurisdiction is for the United States, except Oregon
				new JurisdictionProfile()
				{
					GlobalJurisdiction=false,
					 Description="Description of the Jurisdiction. This could be used if the finer details are not available.",
					  MainJurisdiction = new Place()
					  {
						   Country="United States"
					  },
					  JurisdictionException = new List<Place>()
					  {
						  new Place()
						  {
							  AddressRegion="Oregon"
						  }
					  }
				}
			};
			return output;
		}

		public static List<CostProfile> PopulateFullCostProfile()
		{
			var output = new List<CostProfile>();
			//instate cost profile
			var profile = new CostProfile()
			{
				Name="Costs for an in-state student.",
				Description = "A required description of the cost profile",
				CostDetails = "https://example.com/t=loppCostProfile",
				Currency = "USD",
				Condition = new List<string>()
				{
					"Must have been a resident of the state for at least one year.",
				}
			};
			//instate
			profile.CostItems = new List<CostProfileItem>()
			{
				new CostProfileItem()
					 {
						 DirectCostType="Application",
						 Price=100,
						 AudienceType = new List<string>()
						 {
							 "audience:Resident"
						 }
					 },
					 new CostProfileItem()
					 {
						 DirectCostType="Tuition",
						 Price=12999,
						 PaymentPattern="Full amount due at time of registration",
						 AudienceType = new List<string>()
						 {
							 "audience:Resident"
						 }
					 },
					 new CostProfileItem()
					 {
						 DirectCostType="RoomOrResidency",
						 Price=5999,
						 PaymentPattern="Payable before the start of each term.",
						 AudienceType = new List<string>()
						 {
							 "audience:Resident"
						 }
					 }
			};

			output.Add( profile );

			//out of state
			profile = new CostProfile()
			{
				Name = "Costs for an out of state student.",
				Description = "A required description of the cost profile",
				CostDetails = "https://example.com/t=loppCostProfile",
				Currency = "USD",
				Condition = new List<string>()
				{
					"Must a resident of the United States.",
				}
			};
			profile.CostItems = new List<CostProfileItem>()
			{
				new CostProfileItem()
					 {
						 DirectCostType="Application",
						 Price=150,
						 AudienceType = new List<string>()
						 {
							 "audience:NonResident"
						 }
					 },
					 new CostProfileItem()
					 {
						 DirectCostType="Tuition",
						 Price=14999,
						 PaymentPattern="Full amount due at time of registration",
						 AudienceType = new List<string>()
						 {
							 "audience:NonResident"
						 }
					 },
					 new CostProfileItem()
					 {
						 DirectCostType="RoomOrResidency",
						 Price=7999,
						 PaymentPattern="Payable before the start of each term.",
						 AudienceType = new List<string>()
						 {
							 "audience:NonResident"
						 }
					 }
			};

			output.Add( profile );

			return output;
		}
	}
Populating a Cost Profile
The following shows how a cost profile is populated using simple statements.
            //Likely a source of data would be provided to this input class.
            //We will use hard-coded values for clarity.
            public void SampleMethod( SourceData sourceCost )
            {
                var cp = new CostProfile();
                cp.CostDetails = "http://example.com/CostInfo"
                cp.Currency = "USD";
                cp.Description = "Description of this Cost Profile";
                cp.Name = "An optional name for this profile.";
                //include start and end dates for this profile if applicable
                if ( !string.IsNullOrEmpty( sourceCost.EndDate ) )
                    cp.EndDate = Convert.ToDateTime( sourceCost.EndDate ).ToString( "yyyy-MM-dd" );

                if ( !string.IsNullOrEmpty( sourceCost.StartDate ) )
                    cp.StartDate = Convert.ToDateTime( sourceCost.StartDate ).ToString( "yyyy-MM-dd" );

                //Add any individual costItems
                var costProfileItem = new CostProfileItem();

                //Provide a valid cost type.
                //See: https://credreg.net/ctdl/terms/directCostType#CostType
                //The namespace of costType doesn't need to be included. So costType:Tuition or just Tuition is valid.
                costProfileItem.DirectCostType = "Tuition;
                costProfileItem.Price = "9000.00";
                costProfileItem.PaymentPattern = "One time payment";
                //Add to cost profile CostItems
                cp.CostItems.Add( costProfileItem );
                //add another cost item
                costProfileItem = new CostProfileItem();
                costProfileItem.DirectCostType = "costType:LearningResource;
                costProfileItem.Price = 499.00;
                cp.CostItems.Add( costProfileItem );
            }
Cost Profile As JSON
The following shows how that latter code is formatted as JSON (when sent to the Assistant API, not in the registry).
Financial Assistance Profile
Financial Assistance Profile is a class that describes financial assistance that is offered or available. Provide the data that is most appropriate for your situation.
References
See:
- The Minimum Data Policy for the required properties for this class.
- The Registry Assistant API Financial Assistance Profile class in Github.
- Sample code to populate a Financial Assistance Profile in Github.
Usage
A Financial Assistance Profile must include a name and at least one of the following: Description, Subject Webpage, or Financial Assistance Type.
            var faProfile = new FinancialAssistanceProfile()
            {
                Name = "Scholarships and Grants",
                Description = "description of funding",
                SubjectWebpage = "http://example.com",
                //two types of financial assistance
                FinancialAssistanceType = new List<string>() { "Scholarship", "Grant" }
            } ;
The financial assistance type is a list of one or more concepts that must exist in the ceterms:FinancialAssistance concept scheme. Multiple terms may be included:
FinancialAssistanceType = new List
Use Financial Assistance Value to provide the actual value of financial assistance available. This property is a list of QuantitativeValues. The QuantitativeValue includes the UnitText property. Financial Assistance Value, the UnitText if present, is expected to be a currency. It is not required if a description is available.
            var financialAssistanceValue = new List<QuantitativeValue>()
            {
                new QuantitativeValue()
                {
                    Value = 5768,
                    UnitText = "USD"
                }
            };
Duration Profile
Duration Profile is a small utility class meant to convey how long something takes. In this case, it is used to indicate approximately how long it will take for the average person to earn this credential. This is often the same as the length of a degree credential's degree program, or the length of a certificate's assessment. Duration Profile allows expressing either an exact duration or a minimum and maximum duration. Provide the data that is most appropriate for your situation.
References
See:
- The Minimum Data Policy for the required properties for this class.
- The Registry Assistant API Duration Profile class in Github.
- Sample code to populate a Duration Profile in Github.
Usage
A Duration Profile can contain an exact duration or minimum and maximum durations. A description can be used to describe the above. Alternately just the descripion can be provided to describe more intricate scenarios.
            // Either enter an ExactDuration or a range using Minimum duration, and maximum duration
            public class DurationProfile
            {
                public DurationProfile()
                {
                    MinimumDuration = new DurationItem();
                    MaximumDuration = new DurationItem();
                    ExactDuration = new DurationItem();
                }

                /// <summary>
                /// Description of this duration profile - optional
                /// </summary>
                public string Description { get; set; }
                public LanguageMap Description_Map { get; set; } = new LanguageMap();
                public DurationItem MinimumDuration { get; set; }
                public DurationItem MaximumDuration { get; set; }
                public DurationItem ExactDuration { get; set; }

            }
            //

            /// <summary>
            /// Enter either the Duration_ISO8601 value, OR the necessary combination of years, months, weeks, etc
            /// </summary>
            public class DurationItem
            {
                /// <summary>
                /// A duration in the registry is stored using the ISO8601 durations format.
                /// P is the duration designator (for period) placed at the start of the duration representation. P is always required, even if only time related designators are included.
                ///		Y is the year designator that follows the value for the number of years.
                ///		M is the month designator that follows the value for the number of months.
                ///		W is the week designator that follows the value for the number of weeks.
                ///		D is the day designator that follows the value for the number of days
                /// T is the time designator that precedes the time components of the representation.
                ///		H is the hour designator that follows the value for the number of hours.
                ///		M is the minute designator that follows the value for the number of minutes.
                ///		S is the second designator that follows the value for the number of seconds.
                ///	Examples:
                ///	P2Y		- two years
                ///	P10M	- 10 months
                ///	PT10H	- 10 hours
                /// </summary>
                public string Duration_ISO8601 { get; set; }
                public int Years { get; set; }
                public int Months { get; set; }
                public int Weeks { get; set; }
                public int Days { get; set; }
                public int Hours { get; set; }
                public int Minutes { get; set; }
            }
Examples
	public class DurationProfiles
	{
        /// <summary>
        /// Sample Duration profiles
        /// </summary>
        /// <returns></returns>
        public List<DurationProfile> SampleDurationProfiles()
        {
            //duration for a range from 8 to 12 weeks
            var estimatedDurations = new List<DurationProfile>()
            {
                new DurationProfile()
                {
                    MinimumDuration = new DurationItem()
                    {
                        Weeks=8
                    },
                    MaximumDuration = new DurationItem()
                    {
                        Weeks=12
                    }
                }
            };

            //duration for a program that is exactly 9 months
            estimatedDurations.Add( new DurationProfile()
            {
                ExactDuration = new DurationItem()
                {
                    Months = 9
                }

            } );
            //duration profile with just a description
            estimatedDurations.Add( new DurationProfile()
            {
                Description = "This course typically takes 6 weeks full time or 8 to 12 weeks part-time."
            } );

            //duration use the ISO8601 coded format
            estimatedDurations.Add( new DurationProfile()
            {
                ExactDuration = new DurationItem()
                {
                    Duration_ISO8601 = "PT10H"  //10 hours
                }
            } );
            return estimatedDurations;
        }
	}
Validation
A duration profile cannot contain a mix of time related data (hours and minutes) with day related data (years, months, weeks, and days). A common scenario can be to indicate that, say a course is 10 weeks in duration, and the total hours is 50 (with 5 hours per week). The total hours could be included in the description.
Jurisdiction Profile
Jurisdiction Profile is a class that describes applicable geographic areas and their exceptions. Provide the data that is most appropriate for your situation.
References
See:
- The Minimum Data Policy for the required properties for this class.
- The Registry Assistant API Jurisdiction Profile class in Github.
- Sample code to populate a Jurisdiction Profile in Github.
Usage
A Jurisdiction Profile must have at least one of the following: A global jurisdiction of true, or just a description, or a main Jurisdiction with possible exceptions (jurisdiction exception).
	public class Jurisdictions
	{
		public static List<JurisdictionProfile> SampleJurisdictions()
		{
			var output = new List<JurisdictionProfile>();
			output.Add( SampleJurisdiction());
			return output;
		}

		public static JurisdictionProfile SampleJurisdiction()
		{
			var entity = new JurisdictionProfile()
			{
				Description = "Description of Jurisdiction",
				GlobalJurisdiction = false
			};
			//A main jurisdiction is defined using the Place class.
			//The Place GEO properties such as Country, AddressRegion or City
			//Or the Name property could be used for say, a continent
			entity.MainJurisdiction = new Place()
			{
				Country = "United States"
			};
			//Include any exceptions to the MainJurisdiction.
			//Example: If a credential is valid in all states, except Oregon, add the latter as an exception.
			entity.JurisdictionException = new List<Place>()
			{
				new Place()
				{
					AddressRegion = "Oregon",
					Country = "United States"
				}
			};

			return entity;
		}

		public static JurisdictionAssertion SampleJurisdictionAssertion()
		{
			JurisdictionAssertion entity = new JurisdictionAssertion()
			{
				Description = "Description of Jurisdiction Assertion",
				GlobalJurisdiction = false
			};
			entity.AssertedBy = new List<OrganizationReference>()
			{
				new OrganizationReference()
				{
					Type="QACredentialOrganization",
					Name="A QA Organization",
					SubjectWebpage="https://example.com?t=myqasite",
					Description="An optional but useful description of this QA organization."
				}
			};
			//A main jurisdiction is defined using the Place class.
			//The Place GEO properties such as Country, AddressRegion or City
			//Or the Name property could be used for say, a continent
			entity.MainJurisdiction = new Place()
			{
				Country = "United States"
			};
			//Include any exceptions to the MainJurisdiction.
			//Example: If a credential is valid in all states, except Oregon, add the latter as an exception.
			entity.JurisdictionException = new List<Place>()
			{
				new Place()
				{
					AddressRegion = "Oregon",
					Country = "United States"
				}
			};

			return entity;
		}
	}
Data in the Registry
Data in the registry is wrapped in a common container, called an envelope. The data your system publishes is transformed into the decoded_payload property of the envelope, and is tracked with other properties. The Registry generates and maintains this structure; you do not publish an envelope.
Structure of a Registry Envelope
The properties for an enevelope are:
| Property | Definition | ||||||||||
|---|---|---|---|---|---|---|---|---|---|---|---|
| envelope_community | The community related to this envelope. | ||||||||||
| envelope_id | The unique identifier for this envelope, defined as a UUID | ||||||||||
| envelope_ceterms_ctid | The unique CTID for the primary document in this envelope. | ||||||||||
| envelope_ctdl_type | The CTDL type of the primary document in this envelope, for example: ceterms:CredentialOrganization | ||||||||||
| envelope_type | Currently will only have a type of resource_data. | ||||||||||
| envelope_version | The version that our envelope is using. The current version is "1.0.0" | ||||||||||
| resource | A string containing the JWT encoded content. The original resource should follow the corresponding envelope_community's schema. | ||||||||||
| decoded_resource | The Resource in the original decoded form. | ||||||||||
| resource_format | Only json is allowed. | ||||||||||
| resource_encoding | The algorithm used to encode the resource. Currently we only support "jwt" | ||||||||||
| resource_public_key | The public key, in PEM format, whose private part was used to sign the resource. This is strictly needed for signature validation purposes. | ||||||||||
| publisher_id | |||||||||||
| secondary_publisher_id | |||||||||||
| node_headers |
Headers for the envelope
|
Sample envelope structure
Retrieving Data from the Registry
A single record in the registry can be accessed using several methods:
-
Via Envelope Identifier
- This uses
/ce-registry/envelopes/, followed by an enevelope identifier (not a CTID) - Example: https://credentialengineregistry.org/ce-registry/envelopes/f85997f3-bc9d-4512-93f7-0119e88e20ab
- This uses
-
Via Resource URI
- This uses
/resources/, followed by the CTID for the resource - Example: https://sandbox.credentialengineregistry.org/resources/ce-a4041983-b1ae-4ad4-a43d-284a5b4b2d73
- This uses
-
Via Graph URL
- This uses
/graph/, followed by the CTID for the resource - Example: https://sandbox.credentialengineregistry.org/resource/ce-a4041983-b1ae-4ad4-a43d-284a5b4b2d73
- This uses
- Payload Search API. This API is useful when importing all data from the registry. Most partners will be more interested in the Graph Search API.
- Graph Search API. See Credential Handbook Search API
Controlled Vocabularies
Within CTDL, a number of properties leverage controlled vocabularies (also called "concept schemes") to convey concepts in a format that can be understood across multiple systems. A controlled vocabulary works like a miniature schema, defining a set of terms and exactly what those terms mean. In many cases, more than one term from a controlled vocabulary can be used to more accurately define the data being described.
Refer to the Concept Schemes section of the terms page to review the concept schemes in CTDL.